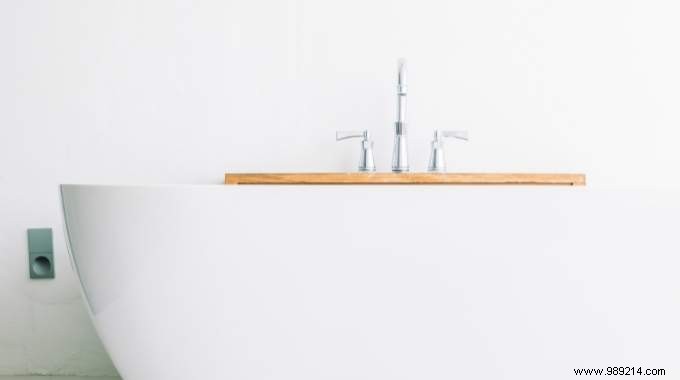
As a seasoned DIY enthusiast, I've crafted numerous bath accessories to enhance relaxation time. A custom bath bridge—perfect for holding books, tea, or candles—transforms your tub into a spa-like retreat. No more soggy pages or spills during your soak.
- 1 meter of wood (for cutting wedges if needed).
- 1 beautiful wooden board (oak, pine, or bamboo) as your bath bridge. Length should match your bathtub's width.
- 2 wedges from the same wood, length equal to or slightly less than the bridge's width. Use excess board and trim to size.
- 4 sturdy screws of appropriate length.
- Screwdriver (borrow from a neighbor, rent via Zilok, or power drill with bits).
- Wood treatment like linseed oil, varnish, or resin—ask at your local hardware store for water-resistant options.
Follow these proven steps for a sturdy, slip-resistant bath bridge.
1. Mark wedge positions. Position them at each end to touch the bathtub's inner walls, preventing slips or rotation.
2. Secure the wedges. Attach with 2 screws each using your screwdriver; pre-drill holes if using hardwood. Sand edges for smooth, rounded finish. Ensure screws don't protrude through the top surface—select the right length.
3. Test fit. Place in tub to confirm stability.
4. Apply finish. Treat with oil, varnish, or resin. Allow full drying or absorption time as per product instructions.
Done! Elevate your bath routine while watching that water bill. Share your results in the comments—I'd love to hear how it turned out.