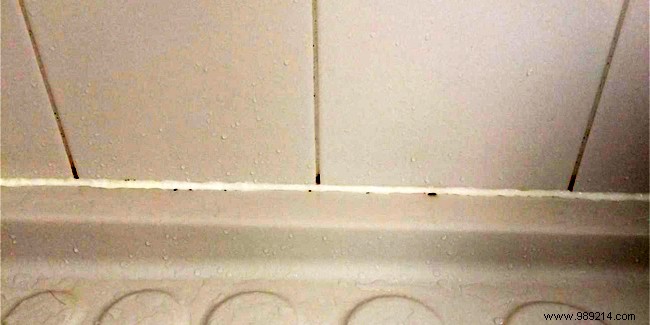
Aged shower or bathtub seals often turn black from embedded mold and grime, making your bathroom look dated and risking tiny leaks. Whether you're a beginner or seasoned DIYer, refreshing these seals is straightforward and effective.
Plan ahead: new silicone needs at least 24 hours to cure fully, so your bathroom will be out of service during this time.
Gather these essentials: a utility cutter, white spirit (or white vinegar as a milder alternative) and a cloth for cleaning; painter's tape (paper-backed for easy removal without residue) to define edges; a joint smoothing tool (optional—your damp finger works too); and high-quality silicone sealant in a caulk gun for precise, effortless application.
Begin by scraping away old sealant with the cutter, ensuring no remnants linger in corners. Wipe down with a white spirit-soaked cloth and let dry completely. For stubborn residue, try store-bought anti-silicone removers (allow 2-3 hours dwell time). This step is crucial—a clean surface ensures strong adhesion and prevents leaks.
With surfaces clean and dry, apply painter's tape along edges for crisp lines. Load the caulk gun and apply a steady bead of silicone, letting it flow naturally. Smooth immediately with the tool for a professional finish, or use a damp finger for that classic handyman's touch—gently press to even it out without sticking.
Trim any excess with the cutter or wipe carefully with white spirit-dampened cloth, avoiding the fresh sealant. Peel off tape gently while it's still wet.
Step back and enjoy your like-new seals. Allow a full 24 hours to cure before use for lasting results.