Floating parquet flooring, introduced in the 1980s, has evolved significantly. Today's laminate and engineered options from top manufacturers are designed for straightforward installation, making it accessible for homeowners to tackle DIY projects successfully—provided you follow proven guidelines like those outlined here.
With clear floor boundaries marked and skirting boards accounted for, measure the space precisely and purchase accordingly. Order a slight excess to avoid shortages, and pick up 8mm MDF boards for creating expansion shims.
For laminate, patterns vary—sort planks beforehand to prevent matching adjacent boards, ensuring a natural look. With engineered parquet, unpack all packs to inspect for knots or veins, selecting premium planks for visible areas. Reserve slightly imperfect ones for cuts, edges, or obstacles.
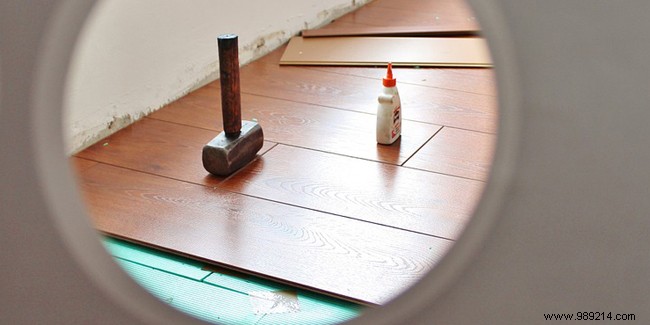
Lay in the direction of natural light for best aesthetics. Start by identifying edge boards, noting cuts for length, radiators, or obstacles, including shim allowances. Measure cuts accurately since wall lengths rarely match plank sizes perfectly. Assemble rows tightly, adding a touch of white glue in select joints for added stability. Verify seams align seamlessly for a uniform finish.
In kitchens or kids' rooms, lay over existing tiles or carpet if clean and dry—no need for removal. Use a polyethylene underlay to block moisture. For underfloor heating, pre-cut boards 24 hours ahead. After installation, leave shims in place for 1-2 hours to let glue set fully.