Want to turn on your lights remotely as you arrive home? A simple timer works, but it's rigid—always the same time, no flexibility, and little learning value.
Enter a smarter solution: the littleBits Smart Home Kit. As someone who's built numerous DIY smart home projects, I've found this kit incredibly versatile. LittleBits Smart Home Kit Review, Kit, and Giveaway. Read More. Beyond aesthetics, it enables full smart home functionality, like a remotely activated light switch.
To build this, grab the littleBits Smart Home Kit, including the CloudBit, power connector, and IR transmitter.
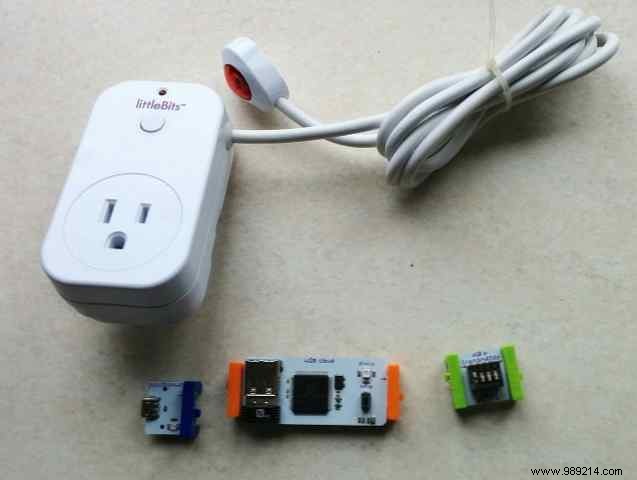
You'll also need the littleBits AC adapter for your lamp, which has a built-in IR receiver for remote activation via the IR transmitter.
Infrared (IR) is a staple in smart home setups, triggering devices based on time, temperature, or humidity. Controlling lamps this way saves energy and costs—key perks of smart homes. Save Energy and Money with These Smart Home Devices. One of the biggest benefits is sustainability and convenience. Read More.
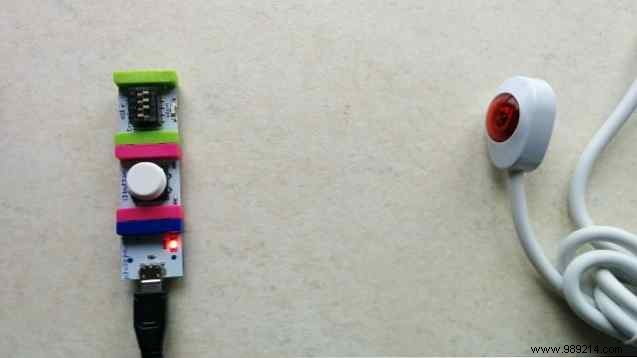
We'll control the AC adapter remotely via the CloudBit web console, accessible from anywhere. First, configure the modules with the IR receiver.
Connect the modules and mount them on a breadboard. Link the CloudBit to your Wi-Fi using instructions at www.littlebits.cc/cloudstart. If issues persist, restart or contact littleBits' excellent support team—I've relied on them for seamless troubleshooting.
Plug the AC adapter into mains power and connect your lamp. Position the IR receiver on the adapter in line-of-sight with the breadboard's IR transmitter. For testing, adjust as needed.
Your setup should resemble this:
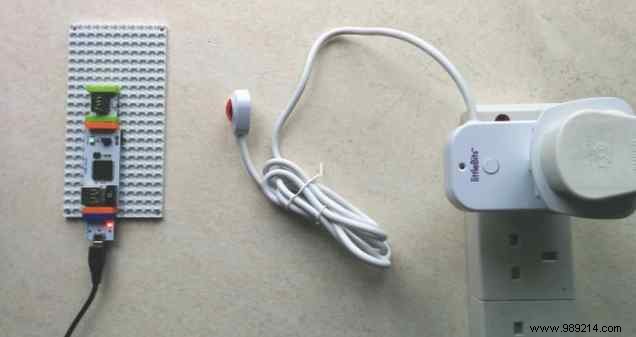
(Note: I'm using UK sockets; the littleBits adapter is US standard.)
For success, sync the IR transmitter with the AC adapter's receiver. Attach the button module and follow the video below if needed.
Once paired, you're set. Troubleshoot by unplugging the IR module and AC adapter, reconnecting to the network, and retrying.
Originally, we explored SMS triggers via apps. Text Better With These Alternative SMS Apps for Android. Read More. But Android's SMS channel on CloudBit only responds to incoming messages, not outgoing commands—a limitation for this project. Plenty of other IFTTT recipes work great. Tasker and IFTTT: The Perfect Automation Duo for Android. Read More.

Instead, use the 'Remote Control for cloudBit' app from Google Play. Enter your CloudBit Device ID and API Token from the Settings page. Tap Send to trigger the IR transmitter. Or visit control.littlebitscloud.cc/ in your browser.
Your light is now on!
This isn't limited to lamps. Connect a coffee maker for fresh brew on arrival, or other devices. For TV nights, How to Successfully Host a TV Party. Read More.
With a littleBits Smart Starter Kit, the possibilities are endless. Questions? Share in the comments—happy to help based on my hands-on experience.