Materials and Tools
- Stitchable cardstock
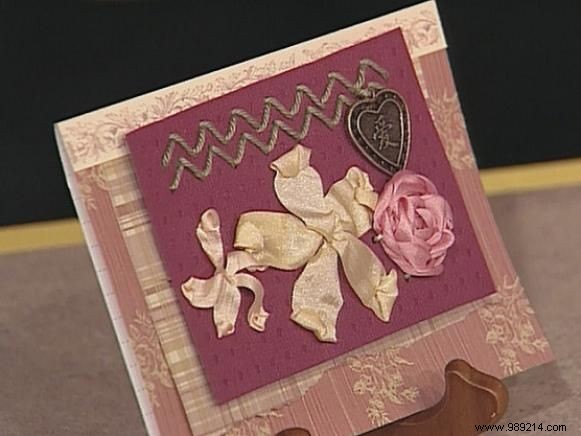
- Matching pink plaid, pink floral, and cream floral patterned paper
- Green embroidery thread (2')
- Cream 1/2" silk ribbon (1' for each daisy)
- Heart-shaped charm
- Craft needle with a large eye
- Archival-quality tape or adhesive
Download the "He Loves Me, He Loves Me Not" template for precise patterns and hole guides.
Step-by-Step Instructions
- Cut pink floral paper (#1) to 8" x 5-3/4". Fold in half to form a 4" x 5-3/4" card base.
- Cut pink checkered paper (#2) to 5" x 4". Tear one 5" edge for a distressed look, then adhere to the card front.
- Cut a 1/2" x 5-3/4" strip from cream floral paper.
- Cut stitchable cardstock to 4-1/4" x 2-3/4".
- Trace the design (from template) on the back of the stitchable cardstock. Pierce holes with a needle—the pre-punched template ensures perfect alignment and ease.
- Use dental floss to outline the five-point star.
- For the rose, cut 1' of silk ribbon and tape one end to the back of the cardstock.
- Thread ribbon up through the star's center hole. Insert needle into the taped center at your desired length, pull loosely to the back, then weave under and over star loops 7+ times. Pro Tip: Twist the ribbon for added dimension and realism.
- For daisies, bring ribbon to the petal center, stitch through and back out. Repeat for each petal—simple and effective.
- For zigzag border, cut 2' of green embroidery floss and tape one end to the back.
- Sew in a zigzag pattern per template atop the cardstock. Repeat for two rows.
- Tape the floss end to the back when finished.
- Sew on your chosen heart charm.
Project by crafting expert Diane Swain.