A rain gauge precisely measures rainfall in your garden or vegetable patch, helping you water only as needed and conserve precious resources.
As an experienced gardener, I've relied on this simple tool for years to optimize irrigation and reduce waste—saving hundreds of gallons annually.
Best of all, you can make one at home in minutes from recycled materials, no purchase required.
Here's how to build your own DIY rain gauge with a plastic bottle in just 2 minutes: Watch the process below.
1. Using scissors, cut the top of the bottle where it begins to taper.
2. Invert the cut top and insert it into the bottle to create a funnel.
3. Secure the pieces firmly with adhesive tape.
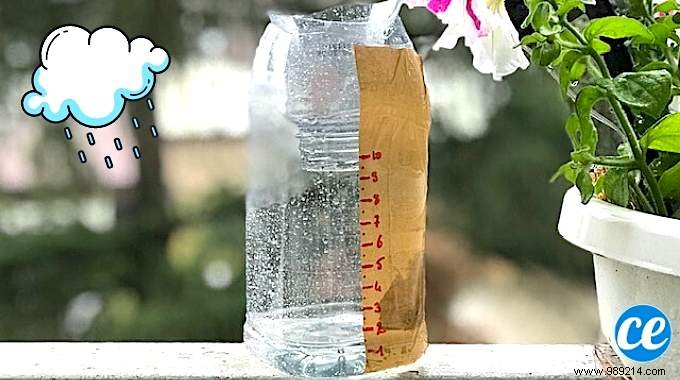
4. Cut a strip of opaque cloth tape the full length of the bottle.
5. Attach the strip vertically along the bottle, starting from the flat bottom.
6. Use the ruler and marker to mark graduations every 0.5 cm up to the top.
7. Position the rain gauge in an open, flat area exposed to rainfall.
8. Check and empty it every 24 hours for accurate readings.

And there you have it! Your DIY rain gauge is ready to track precipitation reliably.
Quick, effective, and eco-friendly—this 100% recycled project outperforms many store-bought options.
Monitor weekly or monthly totals to fine-tune your watering schedule.
If the bottle lacks a flat base, add gravel to stabilize it.
Perfect for family projects, especially with young kids learning about weather and sustainability.