By Lucie Rowe
Plexiglass is an exceptional material for jewelry making—transparent, versatile, and straightforward to shape. Cut, drill, or even heat and bend it to create pieces that pair with any style.
1. Cut a 1/8-inch plexiglass sheet to slightly over 6 inches long, adjusting for your wrist size. Choose your preferred width.
2. Secure the plexiglass with a wood block while cutting on a table saw. Opt for a fine-tooth plywood blade for clean edges.
3. Smooth the edges with a circular saw using a spiral blade, then sand all sides by hand or with a bench sander.
4. Peel off the protective paper from both sides.
5. Add vibrant designs using plastic paints, rubber stamps, or ink on the back side. Layer paints—the first layer appears in front when viewed from the front. Ensure everything is dry and clean before baking.
6. Place the piece on a parchment-lined baking sheet in a preheated oven at 255-300°F.
7. Bake until soft and pliable, about 7-10 minutes. Wearing heat-resistant gloves, remove and shape over a PVC pipe form.
8. While still hot, adjust the ends for a perfect fit, then remove from the form.
9. Heat may cause paints to bubble, mimicking blown glass. For more texture, extend baking time slightly.
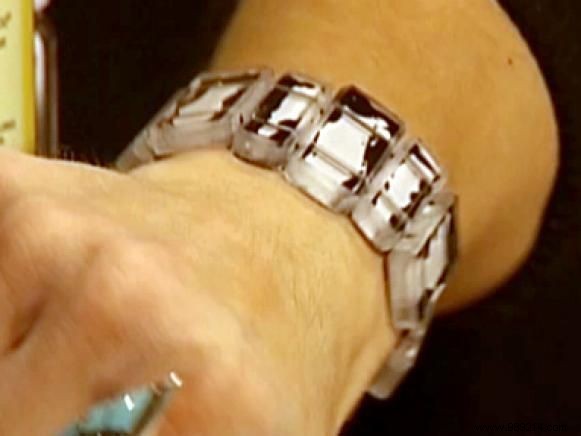
1. Cut 1/4-inch plexiglass into small squares: first into strips on a table saw, then into squares using a miter box or hacksaw.
2. Drill two lengthwise holes (not front-to-back) in each square, sized for elastic. Use a drill press for consistency. Tip: Spray the bit with non-stick cooking spray to prevent sticking.
3. Remove protective backing from both sides.
4. Decorate the back with stamps or paints before assembly. Initial layers will show in front.
5. Finish edges with sheet metal filler and let dry.
6. Thread coordinating elastic through the beads, mixing with other beads if desired.
7. Size to fit your wrist, stretch the elastic slightly, knot the ends, and trim excess.
Plexiglass beads shine in bracelets, earrings, pendants, and more projects.