With years of hands-on woodworking experience, I've built countless miller's ladders for DIY enthusiasts and home renovations. Perfect for tight spaces or new mezzanines, this compact, practical design is straightforward to construct—if you prioritize precise measurements for safety and comfort.
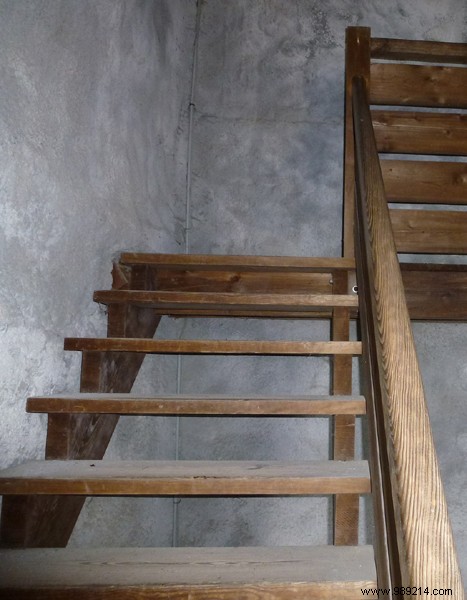
A miller's ladder is elegantly simple and durable, typically fashioned from straight-grained hardwoods like fir, oak, beech, ash, or maple. These woods feature few knots and tight grains, making them ideal for easy finishing with paint, varnish, or glaze.
It consists of two parallel stringers, which can be fitted with a rack on their inner faces to support the treads. For added security, install a handrail or banister to minimize fall risks—essential for household use.
Despite its simplicity, a miller's ladder's safety hinges on proper sizing for comfortable ascent and descent. Aim for a reasonable slope based on tread depth and riser height. Start by determining the number of steps: measure the total height and divide by 14 to 18 cm to get an exact riser height—this range ensures ergonomic comfort.
Treads should measure at least 20 cm deep for secure foot placement. Account for room size, escape routes, and hopper dimensions too. Proven configurations include a 60° slope with 15 cm risers and 22 cm treads, or a 50° slope with 20 cm treads and 16 cm riser spacing—both reliable for real-world installs.
Begin by marking the stringer and rack positions precisely parallel on the wall. Secure the rack with screws into wall dowels, ensuring treads remain level—use a spirit level religiously for accuracy.
Anchor each stringer at the base to a floor cleat and at the top to a securely fastened beam cleat. Install treads sequentially, securing with wood glue followed by screws. Pre-drill stringers, countersink holes, and cap with plastic plugs for a clean finish. For a handrail, attach via mortise, tenon, or directly to the stringer edge.