Smart home tech has evolved rapidly, delivering affordable, feature-packed devices like the iHome iSS50 5-in-1 SmartMonitor. This compact sensor tracks temperature, humidity, motion, light, and sound—all in one unit that integrates seamlessly with your smart home ecosystem.
iHome iSS50 5-in-1 SmartMonitor: 24/7 Surveillance from Anywhere Buy Now on Amazon $53.99
Years ago, monitoring these metrics required expensive, siloed sensors. Today, the iHome SmartMonitor changes that, offering cohesive control via apps and hubs. If you've just unboxed yours, this hands-on guide—drawn from real-world testing—covers setup, usage, automations, and fixes for common issues.
1. Unboxing and iHome SmartMonitor Setup
Connecting to the iHome SmartMonitor | Using an iHome account | Share access with different devices
2. Using the iHome SmartMonitor
Take advantage of the iHome Control app | Creating rules with the iHome SmartMonitor | Working with the Apple Home app and Siri | Practical automation using the iHome SmartMonitor
3. Fix common iHome SmartMonitor problems
iHome SmartMonitor can't connect to the Internet | iHome SmartMonitor does not accurately detect temperature or movement | Issues using Siri to access iHome SmartMonitor data and other HomeKit issues
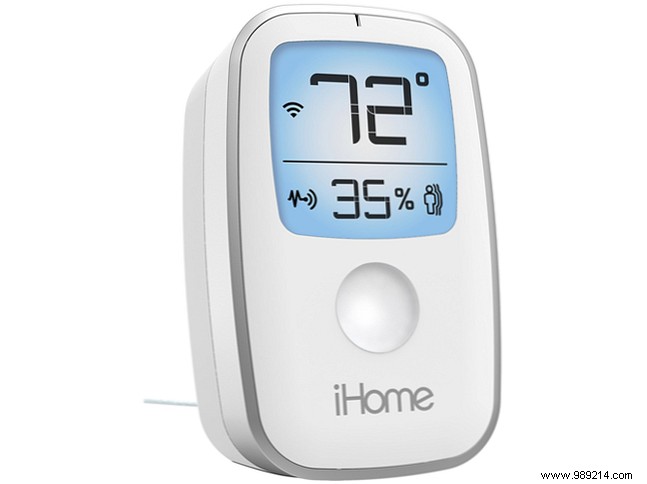
Open the box to find the SmartMonitor, power cord, adapter, and Quick Start Guide. It requires constant power—plug it in near an outlet and wait for the Wi-Fi icon (top-left on the LCD screen) to flash, signaling setup mode.
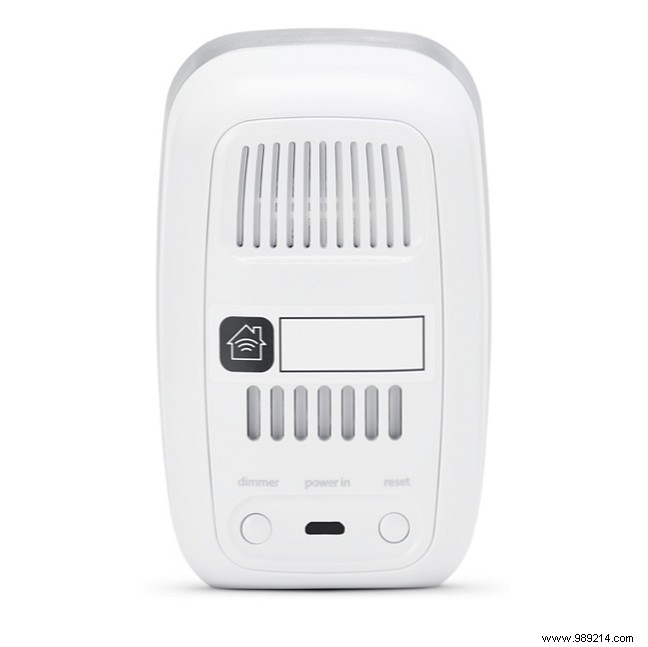
The front LCD displays Wi-Fi status, temperature, humidity, motion, and sound indicators, with one sensor below. On the back: power port, LCD dimmer button (cycles: auto, high, medium, low, off), and reset button.
Download the iHome Control app on iOS or Android—essential for full functionality.
In the app, tap Devices (Android) or HomeKit (iOS), then Add Device. Follow prompts to connect to Wi-Fi and configure.
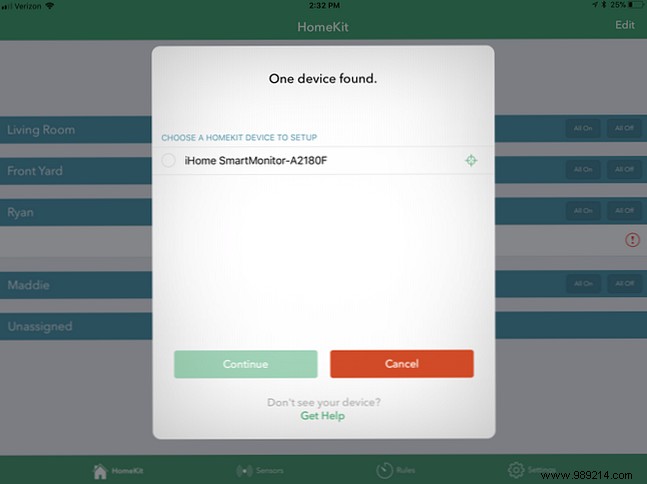
Apple users: Scan the HomeKit code from the guide or device. HomeKit (iOS/Apple Watch only) organizes via Rooms (device locations), Zones (adjoining rooms), and Scenes (custom actions, like 'Good Morning' to activate lights/doors via app or Siri).
How to use Siri with your Smart Home devices Controlling your smart devices with Siri makes them incredibly easy to use. Read More
Setup pays off for scalable Apple smart homes.
Optional but recommended: Create an account in Settings. Enables remote iOS control sans Home Hub, iPhone-free rules on SmartPlugs, and Android sharing.
Share via iOS (same iCloud: automatic; different: Settings > Sharing & invite) or Android (same account login). iOS-to-Android works; Android-to-iOS doesn't.
Protect your iCloud account with these 4 easy steps
iOS app tabs: HomeKit, Sensors, Rules, Settings. Android: Devices (no Sensors; HomeKit renamed Devices).
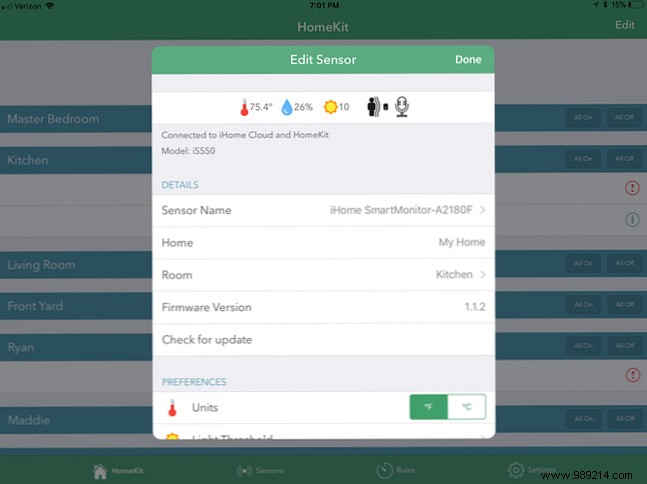
Core hub for data and control. iOS HomeKit shows rooms/devices (edit, update firmware, identify/remove). Zones/Scenes for grouping/automations. Android Devices displays live data.
Sensors tab for other iHome wireless sensors (not SmartMonitor). Rules: Build automations. Settings: Account, products, support. Note: No data logging/history.
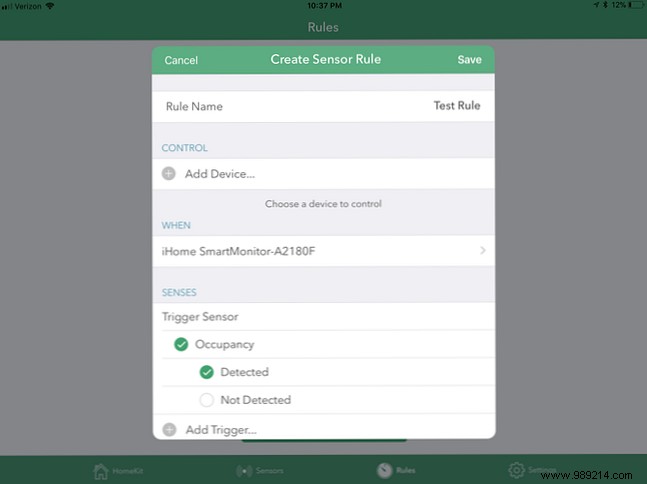
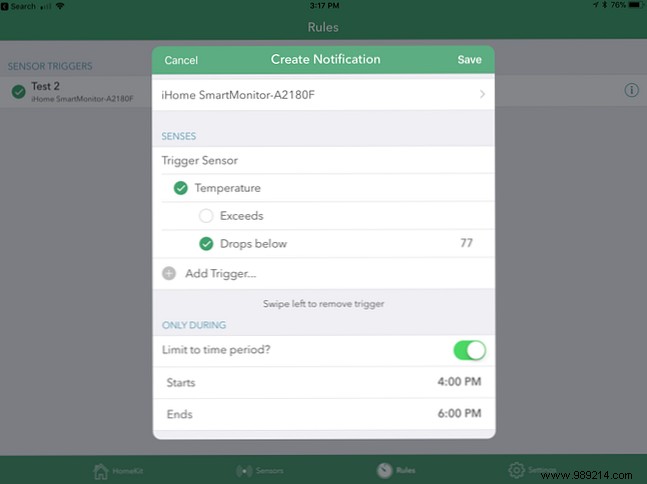
Tap Add Rule: Name it, choose Control a Socket (iHome plugs like iSP8) or Receive Notifications.
iHome iSP8 Wi-Fi SmartPlug: Voice control, remote, Alexa/Google/HomeKit. Buy now on Amazon $49.99
Select plug, SmartMonitor sensor(s): temp/humidity thresholds, sound/motion/occupancy detection. Add time/day limits, notifications. Review & create.
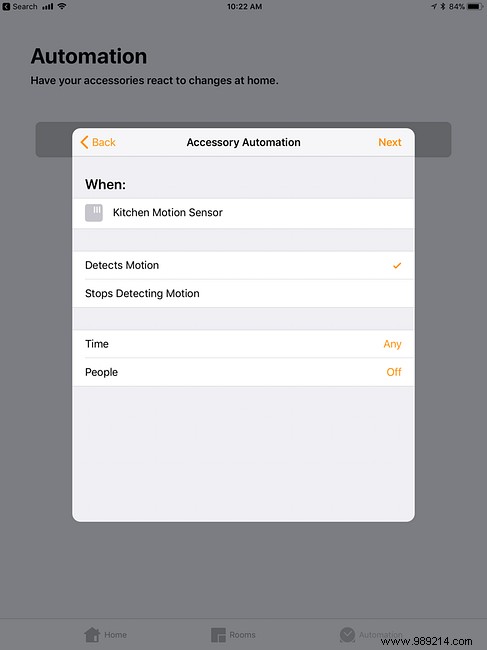
Home app: One automation per device (motion only). Automation > New > Sensor Detects > Motion options/time/people home > Scene/device action.
Siri queries: "Hey Siri, what is the temperature of [name]?" (Also humidity, motion, light). Works on iPhone/iPad/Apple Watch.
Put Apple HomeKit devices to good use with automation Read More
Add to Wink app for automations (e.g., motion-triggered lights). Lesser-known hub alternative.
7 Smart Home Hubs You've Never Heard Of Read More
Pair with iHome plugs (iSP5/6/6X/8) for:
Combine sensors. Plugs work with Alexa too. Endless ideas!
10 Creative Uses For Smart Plugs Read More
Local data works offline; Wi-Fi enables app/HomeKit. Flashing icon = no connection; solid = good. Ensure 2.4GHz router band. Reposition closer. Mesh Wi-Fi (Eero/Orbi/Google Wifi) for coverage.
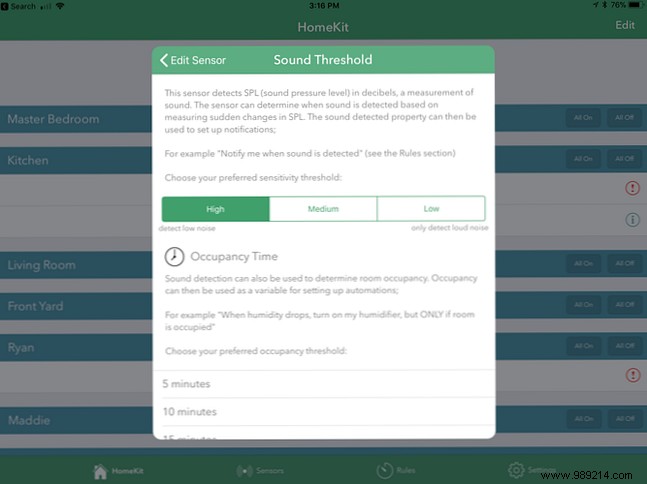
Calibrate 2+ hours post-setup. Avoid sun/ducts. Motion: Face coverage area (20ft range). App-adjust thresholds: HomeKit/Devices > Preferences > Light/Sound/Motion.
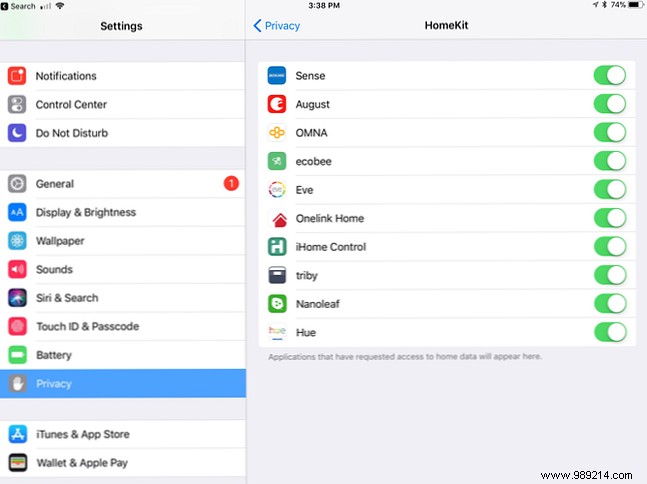
Verify iCloud (Settings > [Name] > Home/Keychain on). Privacy > HomeKit enable iHome app. Reset (back button 15s; reconfigure). Remote access needs Home Hub (Apple TV/iPad).
How to get the most out of Apple HomeKit Read More
Affordable powerhouse for iOS users: Remote access, automations simplify life. Questions on setup or multi-sensor use? Drop them below.