As a seasoned woodworker with years of experience in pocket-hole joinery and holiday crafting, I've perfected this stunning project to create illuminated wooden snowflakes that wow at any festive display. If you're new to pocket-hole woodworking, review the basics first for best results.
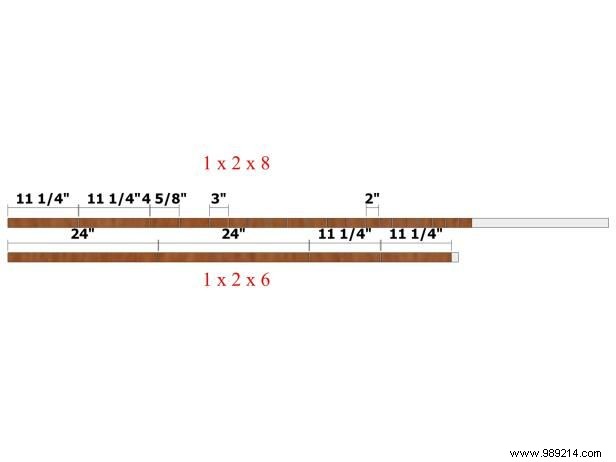
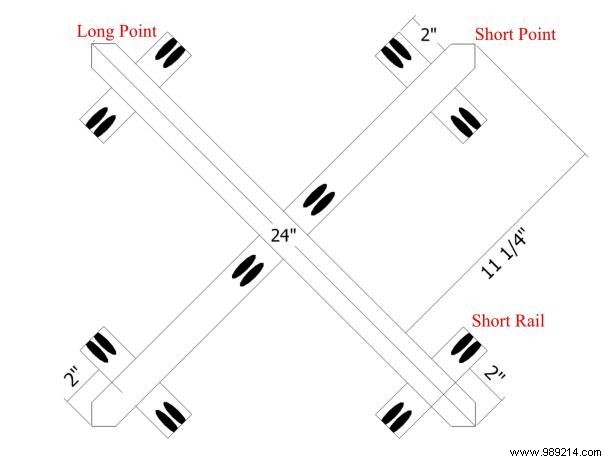
For long points: two at 3/4" x 1-1/2" x 24"
For short points: four at 3/4" x 1-1/2" x 11-1/4"
For long rails: eight at 3/4" x 1-1/2" x 3"
For center points: eight at 3/4" x 1-1/2" x 4-5/8"
For short rails: eight at 3/4" x 1-1/2" x 2"
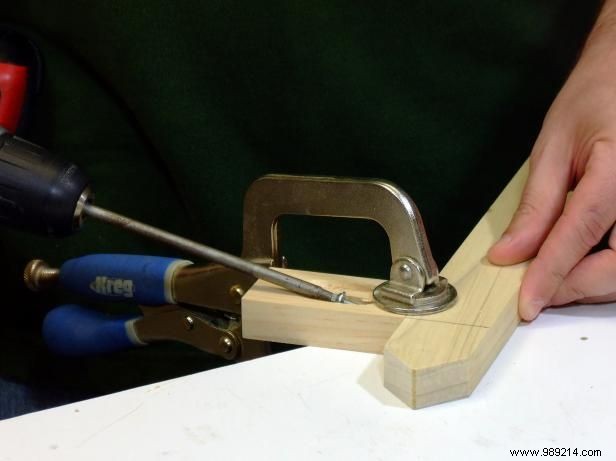
Follow the guide in image 1 to cut the long points, short points, long rails, and center points to the lengths specified in the cut list. With a miter saw, cut 45-degree angles on both ends of the long points, one end of the short points, and one end of the center points.
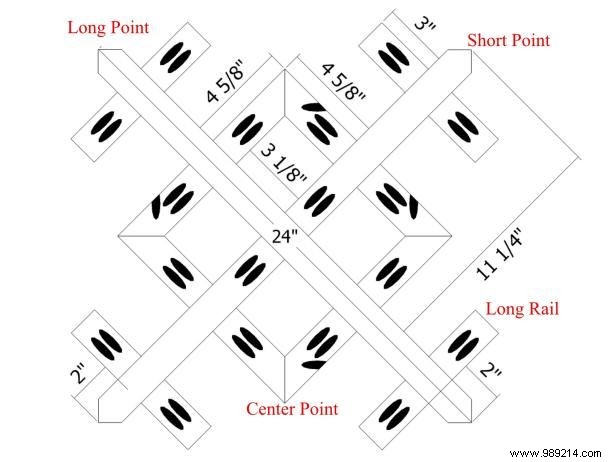
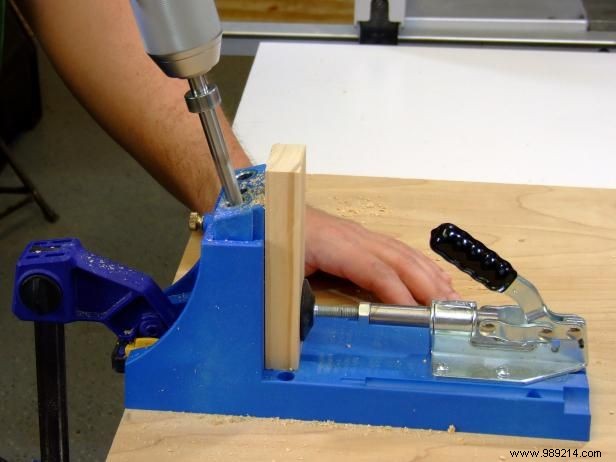
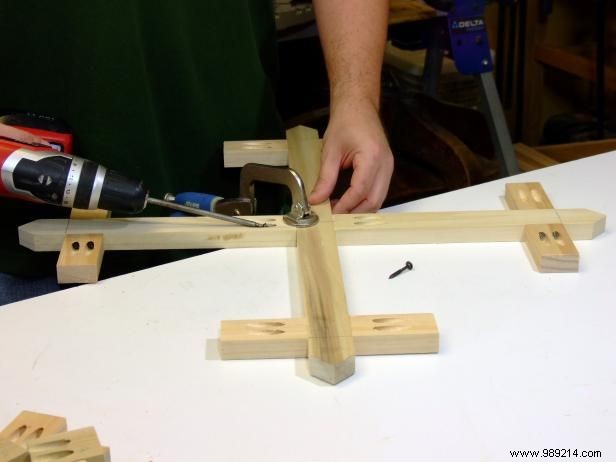
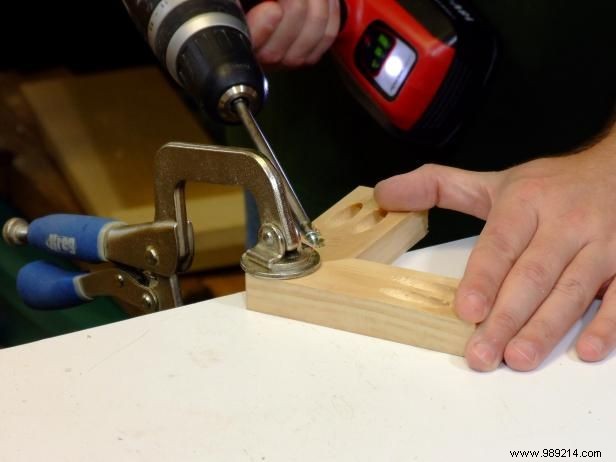
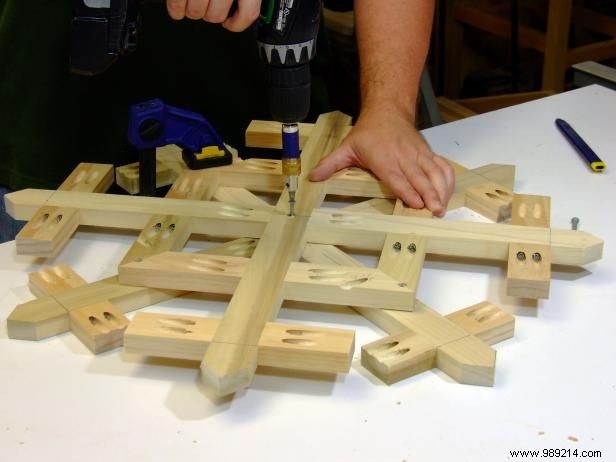
Drill pocket holes in the short points, long rails, and center points (images 1 and 2). Position the long rails 2 inches from the ends of the long and short points (image 1), then attach using pocket-hole screws (image 3).
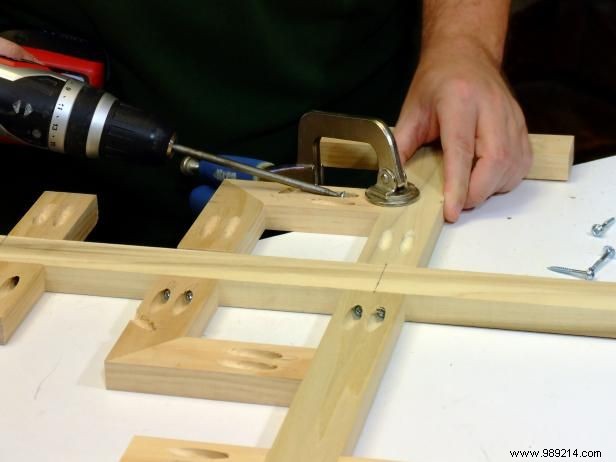
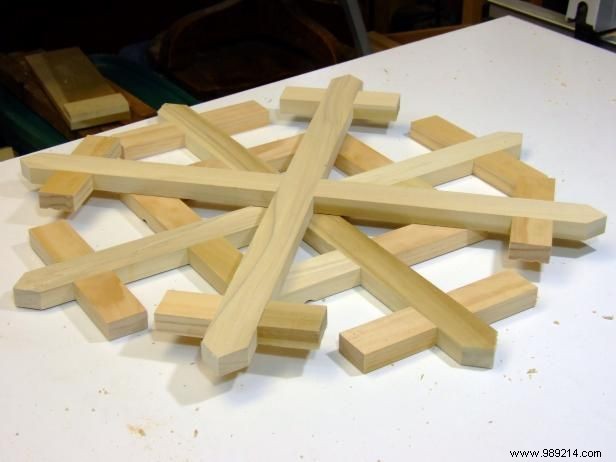
Center the short point sets on the long point sets (image 1) and secure with glue and 1-1/4-inch pocket-hole screws (image 4).
Position the center points so mitered corners meet, then attach with glue and 1-1/4-inch screws (image 1). Assemble the center point units and secure with glue and 1-1/4-inch pocket-hole screws (image 2).
Use the guide to cut the long points, short points, and short rails to the lengths in the cut list. With a miter saw, cut 45-degree angles on both ends of the long points and one end of the short points. Drill pocket holes in the short points and short rails.
Center the short point sets on the long point sets and attach with glue and 1-1/4-inch pocket-hole screws.
Lay the front frame pocket-hole side up on your work surface. Place the back frame on top, also pocket holes up, rotated so the long and short points are diagonal to those on the front frame. Secure with glue and 1-1/4-inch deck screws (image 1).
Rotate the assembly as shown (image 2) and make any final adjustments. Apply white spray paint for a pristine finish and allow it to dry fully.
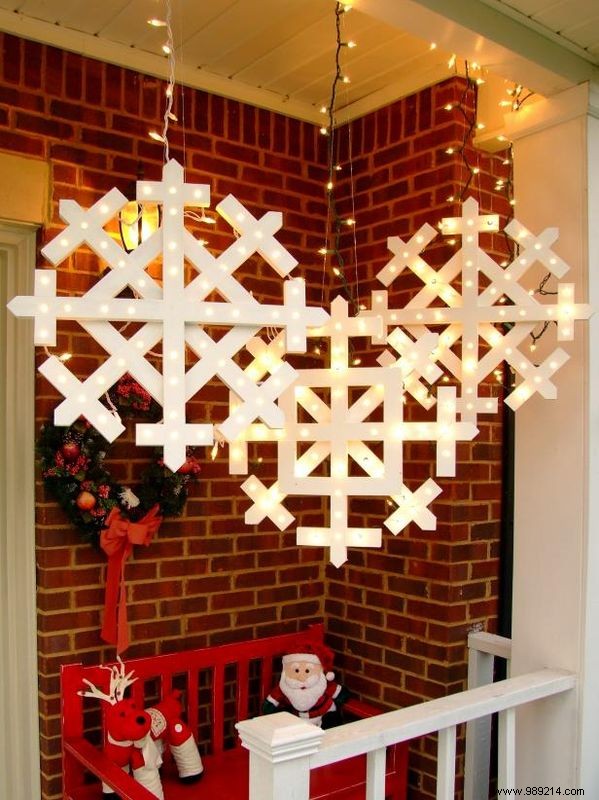
For illumination, choose a 100-bulb string light set. Drill holes sized to fit the bulbs snugly (we used 11/32-inch bits) spaced about 2 inches apart along the frame. Start near the center: thread lights through to the points, out to the next points, back to center, and outward again, repeating to weave evenly across the snowflake.
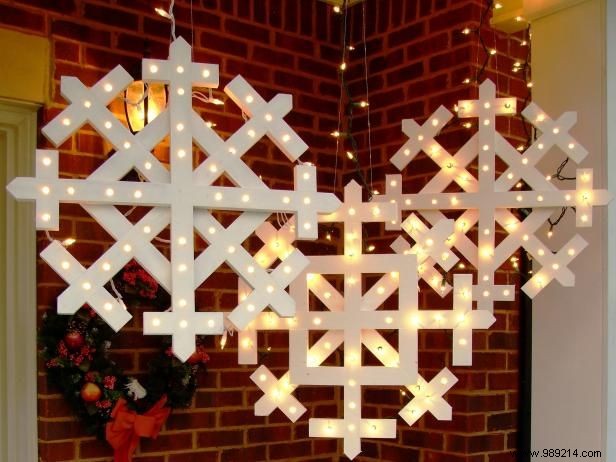
Display options include wall-hanging near entryways, suspending from porches or trees, or staking in the yard. For walls or porches, add picture hooks or screw eyes to the back. Use clear fishing line for nearly invisible tree or porch suspension.