As experienced DIY creators Joanne Palmisano and Susan Teare show, repurpose a computer/printer cart—or a nightstand, side table, or even a cut-down bookshelf—into a sturdy kids' workbench. The key is selecting a piece at the perfect height for your child to work comfortably.
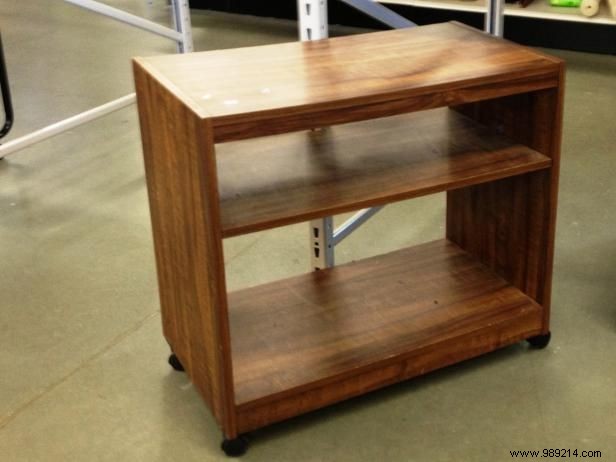
We scored this piece at a local thrift store for just a few dollars.
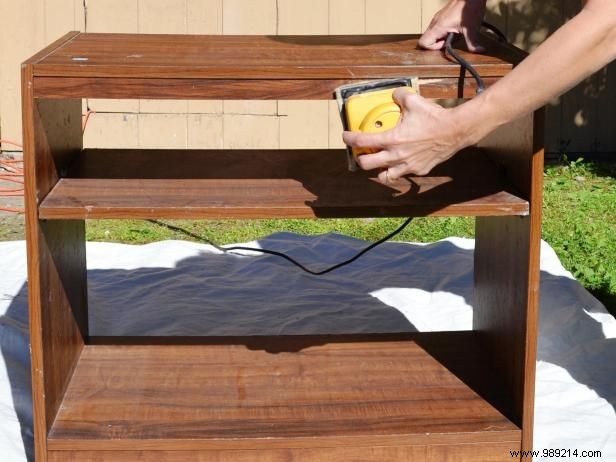
Paint bonds best to a rough surface. Lightly sand the existing finish, skipping the top since we'll add a new work surface.
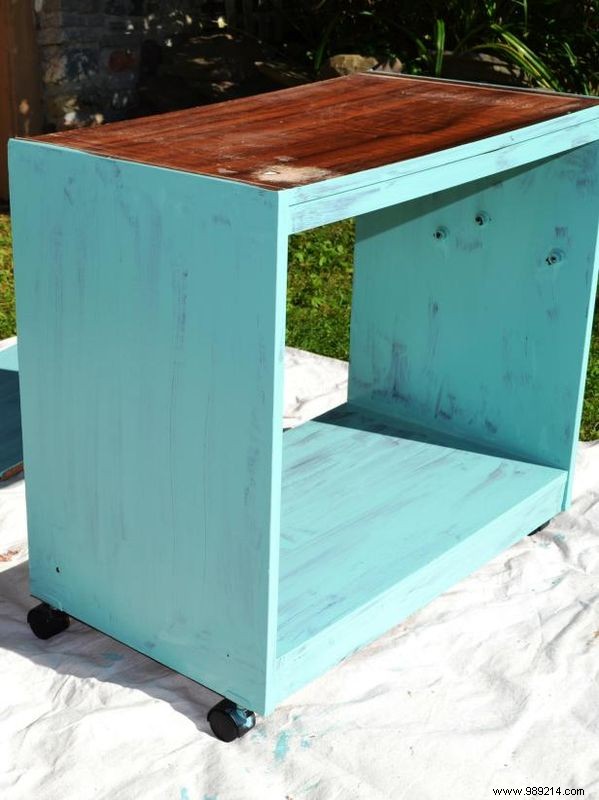
Brush on a coat of vibrant, kid-approved paint. Let it dry fully before deciding on a second coat.
For cabinets with an open back, measure the space and cut plywood to fit. We cut ours about three inches taller than the table height—the extra serves as support for the pegboard. Paint the backing and allow it to dry.
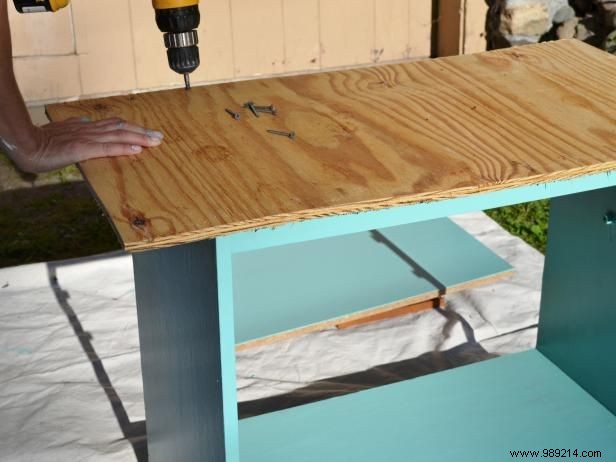
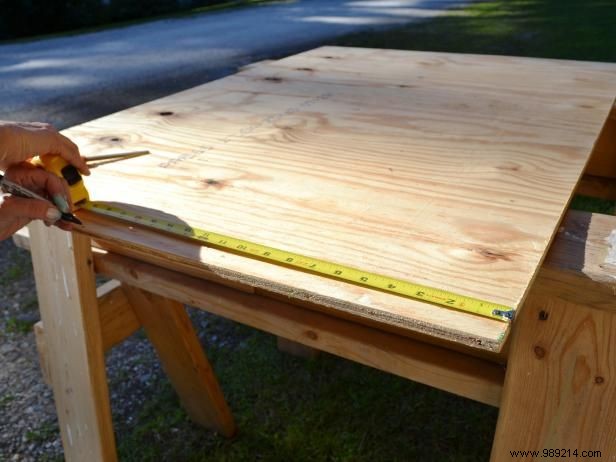
Measure and cut plywood for the new top with a slight overhang on the front and one side (we extended one side further for tool-holding holes). Secure it with wood screws.
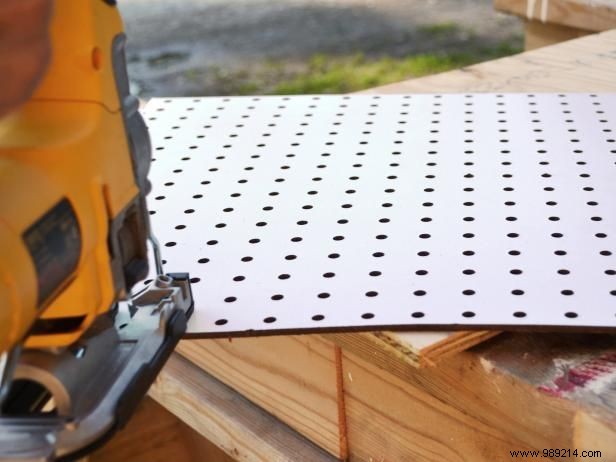
Cut pegboard to fit the vertical back area for hanging tools and toys. Sand the edges smooth.

Fasten the backing to the unit with wood screws, ensuring it extends a few inches above the work surface. Position the pegboard against this extension and secure it to both the backing and surface using L-brackets.
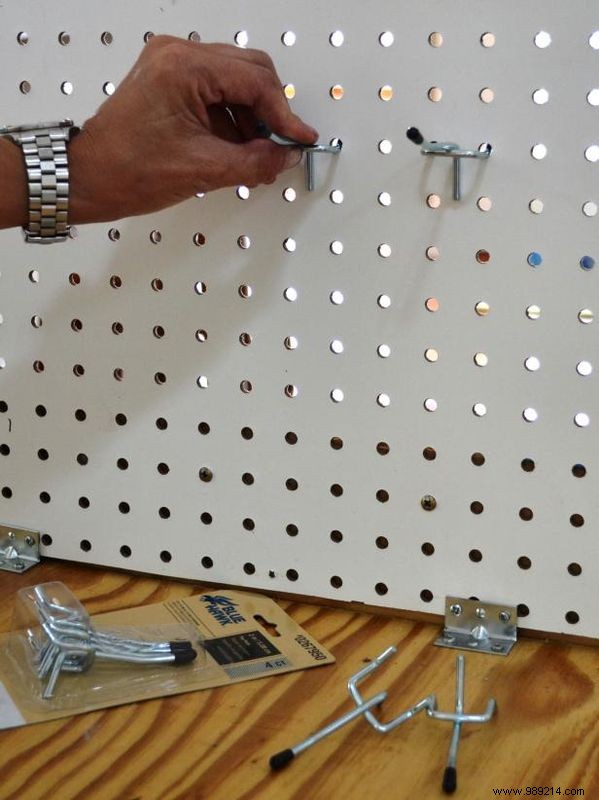
Pop in store-bought peg hooks wherever needed on the board.
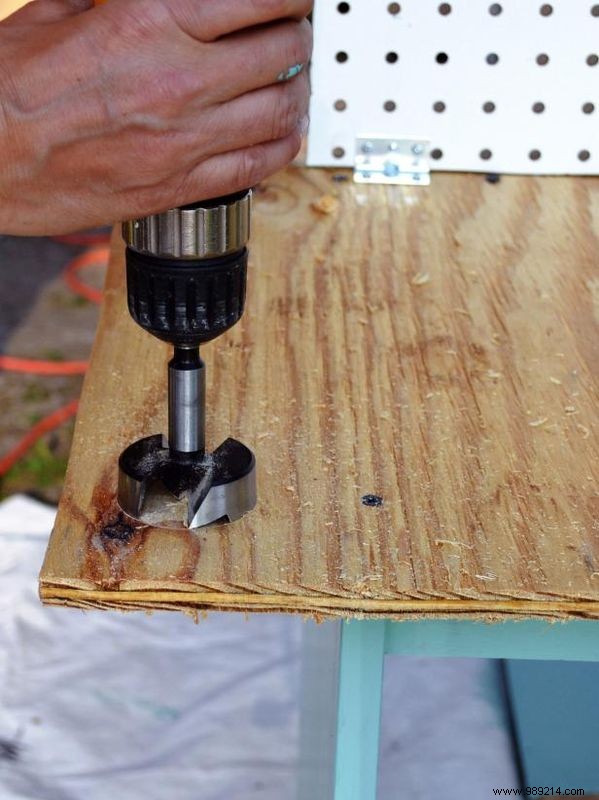
Drill holes along one side of the work surface to hold hammers, clamps, and drills securely.
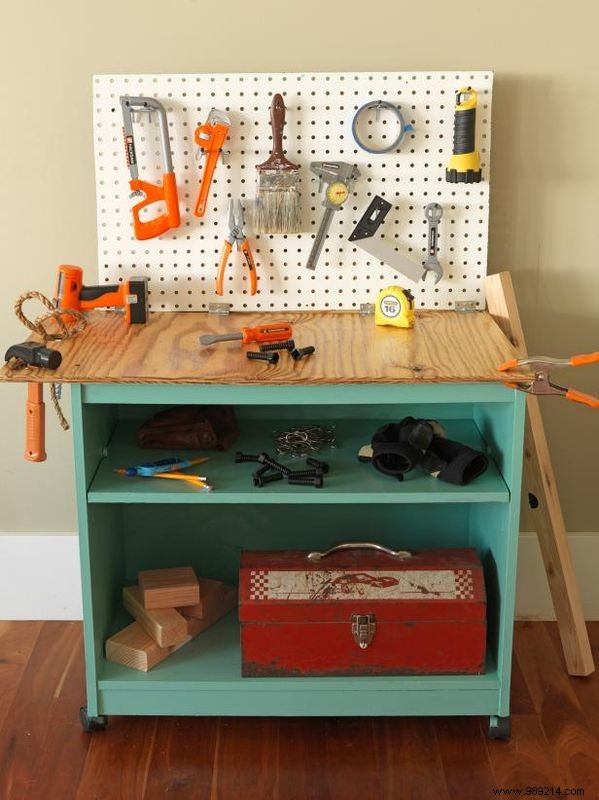
Sand the work surface smooth, rounding the corners for safety. Apply three coats of polyurethane, drying fully between each. Stock with toys and let the fun begin!
By Joanne Palmisano and Susan Teare