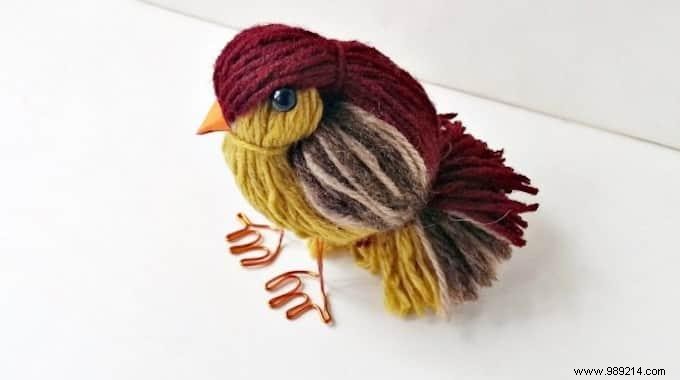
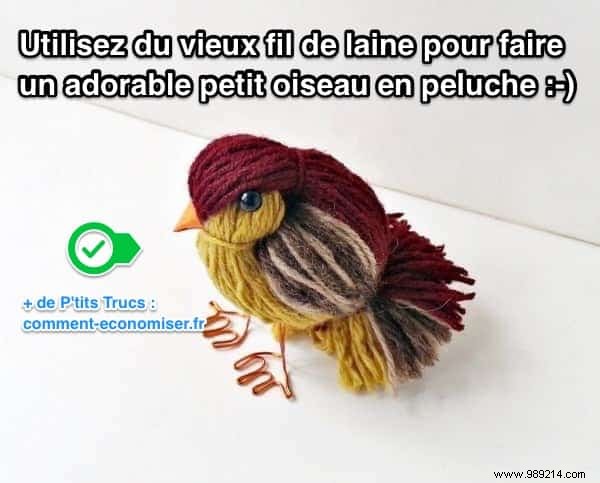
Got yarn scraps piling up at home? Don't toss them! As a crafter with years of experience turning leftovers into treasures, I've perfected this simple method to create a charming stuffed bird your kids will adore. Follow this straightforward tutorial for fun, eco-friendly crafting.
- Yarn (3-4 different colors)
- Scissors
- Cardstock or Bristol board
- Ruler
- Multi-purpose glue
- Wire (for legs)
- Small pliers (to cut wire)
- Plastic beads (2 black, medium size)
- Sewing needle and black thread
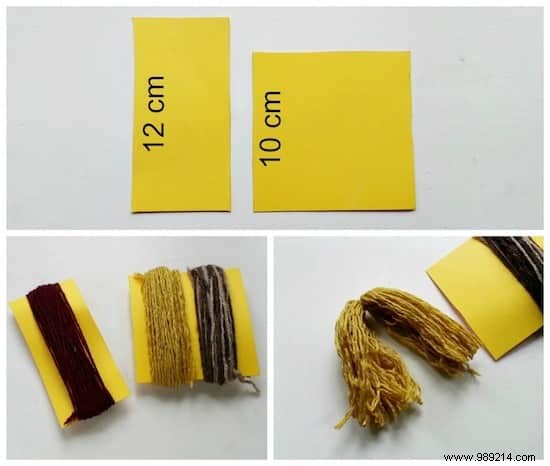
Start with two pieces of cardstock, cut to 4-5 cm wide. Trim one to 10 cm long for the bird's underside and the other to 12 cm for the top. Adjust sizes for your preferred bird dimensions.
Use light-colored yarn for the underside (10 cm), darker yarn for the top (12 cm), and matching colors for wings and sides (10 cm).
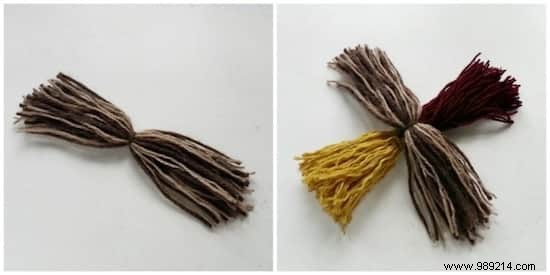
Wrap yarn lengthwise around the cardstock until each forms a 1 cm thick bundle. Secure, then cut one end to release even strands. Begin with the 10 cm bundle. Tie a tight knot in the middle of each bundle.
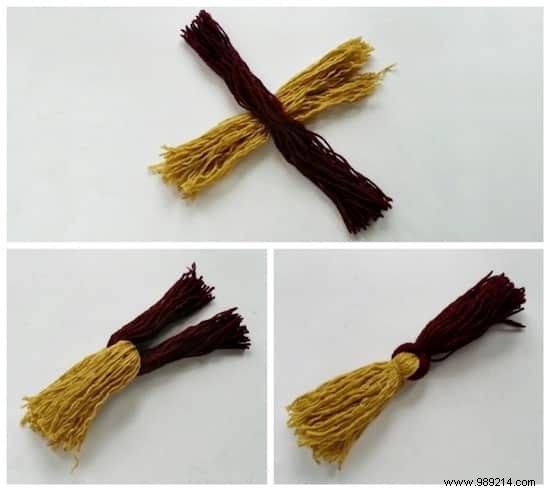
Lay the 10 cm light yarn flat. Place the 12 cm dark yarn perpendicular across it to form a cross.
Fold each bundle outward in half, then tie a knot just off-center to secure. Match thread color to yarn for seamless results.
Prepare the wing yarn: cut to length, fold in half, and knot in the middle.
Tie matching yarn to the other bundles just off-center, mirroring the previous step.
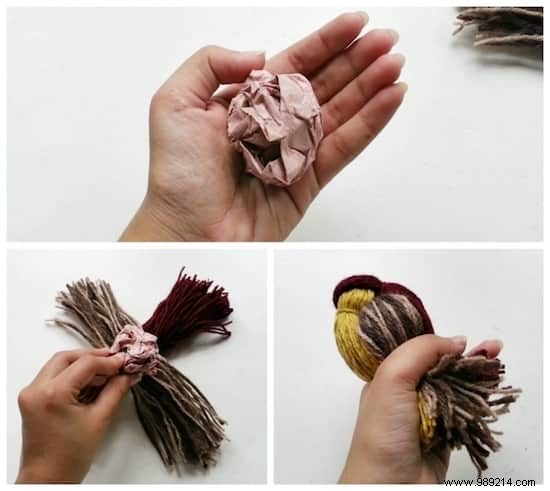
Crumple half an A4 sheet into a tight ball—the core of your bird; size it to your liking.
Place it in the center of the yarn bundles, then pull ends upward to secure the ball tightly.
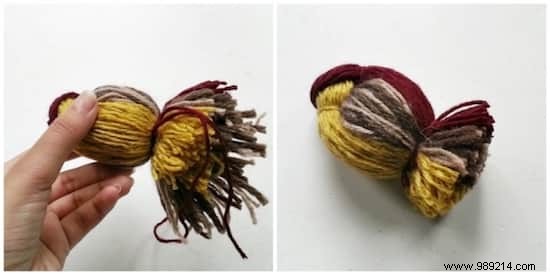
Select a yarn color and knot it around to unite all three bundles.
Trim ends evenly with scissors for a neat finish.

Use pliers to shape wire into tiny bird feet.
Fold orange cardstock into a small cone beak.
Sew or glue on two matching black beads for eyes.
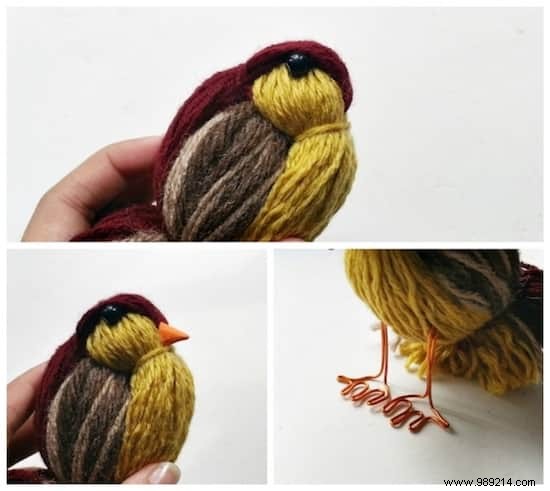
Sew eyes with needle and black thread, or attach with glue.
For legs, bend wire ends into small hooks and insert below the body.
Glue the beak on for the finishing touch!
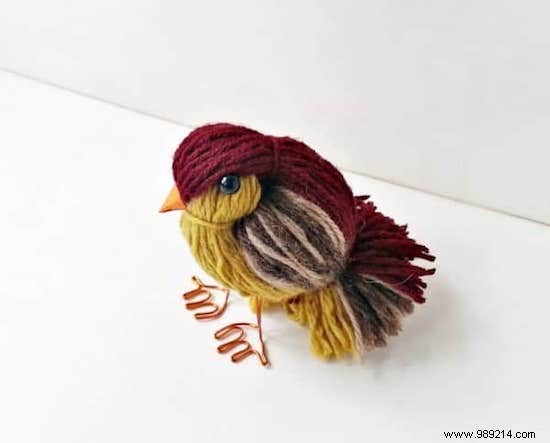
Your yarn scrap bird is complete! This super simple project recycles leftovers into a delightful toy. Customize colors for endless variations—kids love getting creative.