DIY Patchwork Tack Board and Custom Pins: Expert Step-by-Step Guide
Materials and Tools
- Acoustic ceiling tile (15"x15"), available at hardware stores (cut to size with a utility knife)
- 9" square padded
- Medium to heavy weight fusible interfacing
- Scrap fabric (velvet, funky colors and prints)
- Tube of Fabri-Tac
- Backing fabric or felt, cut slightly smaller than tile
- 18" of decorative ribbon
- Sewing machine
- Scissors
- Pinking shears
- Assorted snaps and buttons
- Heavy duty flat thumbtacks
- Jewelry wire cutters
- E6000 glue
Step-by-Step Instructions
- Use the padded square to trace and cut out four 9" squares of fusible interfacing.
- Cut the scrap fabric into random sizes and shapes and place it on the adhesive side of the interfacing. Arrange the cloth pieces so they overlap without showing the interfacing.
- Iron the fabric pieces to the interfacing using a hot, dry iron. Press down and hold to fuse the interfacing with the fabric scraps.
- Using a zigzag stitch, sew over the edges of each piece of fabric in a crazy quilting pattern. Repeat for each of the four squares, trimming the edges to fit the fabric to the interfacing.
- Lay out the four squares to form a large 18"x18" square.
- Overlap the edges of two squares and pin them together. Use a zigzag stitch to sew the squares together. Repeat with the remaining two squares.
- Overlap the two sets of squares and zigzag stitch to complete the large square.
- Lay the fabric down and place the ceiling tile on top; there should be a 3" seam allowance on all sides of the tile.
- Place a dot of Fabri-Tac glue on one corner of the tile. Pull the fabric taut, fold it toward the center, and press. Continue until all four corners are folded and glued.
- Place additional glue around the perimeter of the tile and fold the remaining fabric to the center.
- Stick the ends of the 18" ribbon to the back of the tile, 2" from the top and 3" from the side edges—the ribbon acts as a hanger.
- Cut a 15"x15" piece of backing fabric or felt (slightly smaller than the tile) and glue it to the back, covering the folded fabric for a clean finish.
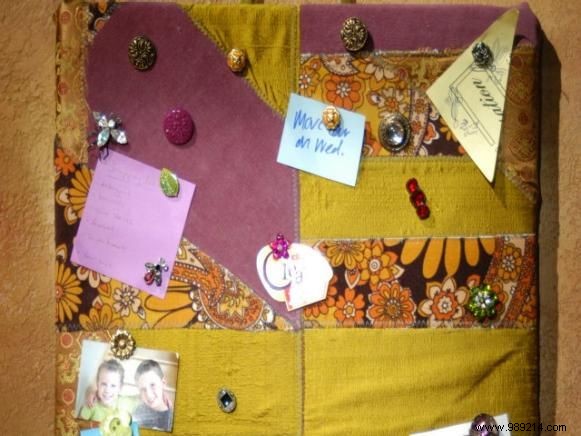
- Select an assortment of snaps and buttons and remove all supporting hardware (shanks and posts) with jewelry wire cutters.
- Using E6000 glue, attach the flat heavy-duty thumbtacks to the back of the snaps. Work on a flat surface and allow several hours to dry fully.