By Marietta Fargueson
Materials and Tools
- Staple gun
- Scissors
- 24" x 32" piece of 1/4-inch-thick plywood
- 24" x 32" piece of batting
- 32" x 40" piece of fabric
- 10 yards coordinating 1/2-inch ribbon
- 3-1/2 yards fat trim
- 13 decorative upholstery tacks (optional)
- Two D-rings
- 4 feet of picture hanging wire
Step-by-Step Instructions
- Select your fabric and cut it four inches longer on each side than the plywood and batting. Buyer's Tip: Check fabric scraps for affordable options.
- Lay the fabric wrong side up on a sturdy worktable.
- Cut the batting to match the plywood exactly. Pro Tip: Ask your hardware or home store to custom-cut plywood if needed.
- Center the batting on the fabric, then place the plywood on top of the batting.
- Pull the fabric to the back of the board and secure with pins, working one side at a time, then the opposite. Stretch tightly before stapling each side, saving corners for last. Use an electric staple gun or manual stapler. Safety First: Always wear safety glasses with a staple gun.
- For corners, pull the batting up first and staple, then fold and staple the remaining fabric.
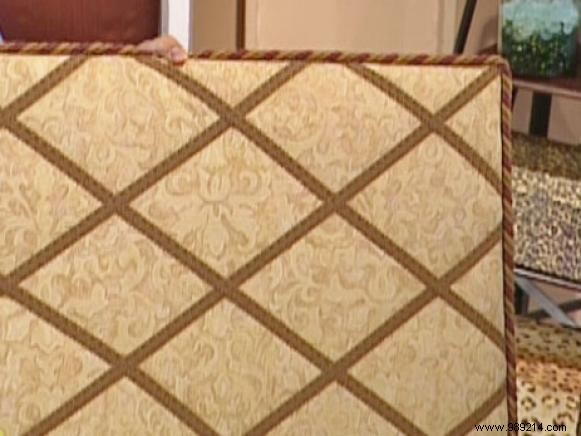
- Flip the board and mark ribbon paths with chalk and a disappearing-ink marker, drawing parallel diagonal lines about five inches apart. Use a clear ruler or marked paper template for precision.
- Draw lines on one diagonal first, then the crossing set for a crisscross pattern.
- Cut ribbons a few inches longer than each line.
- Place ribbon over one set of parallel lines, pull taut to the back, and staple securely.
- Weave the second set of ribbons over and under the first set in a crisscross pattern, then staple the ends to the back.
- Secure the fat trim (rope braid) around the board's edge with hot glue.
- Attach two D-rings and picture hanging wire to the back, just like framing a photo.
FAQs
Q: Can kids make this project?
A: Yes, swap plywood for foam core and use a hot glue gun instead of a staple gun.
Q: Fix weaving mistakes without restarting?
A: Absolutely—use upholstery tacks at intersections to secure and conceal errors. Pro Tip: Buy extras, as hammering can break them.
Q: Can I use clear ribbon instead?
A: Try clear vinyl strips from the hardware store, cut to size.