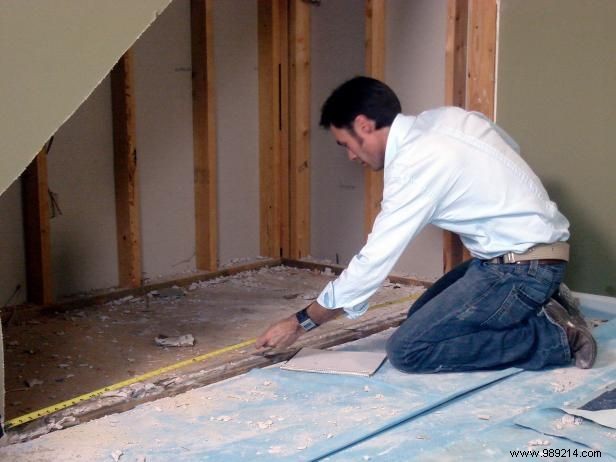

As a seasoned carpenter with years of custom woodworking projects, I recommend starting by removing the drywall between the studs and clearing the space. Precisely measure the under-stair area (Image 1) and sketch a detailed layout for your home office (Image 2). A proven approach is designing it as a modular 'box' structure, which simplifies construction and installation.
Using 3/4" birch plywood, cut the panels for the office 'box.' For angled sides matching the stairs, measure precisely at the joints for a seamless fit. Also fabricate the desk, shelves, and ledger strips per your drawing. Always prioritize safety: wear protective glasses and use proper techniques with power tools like circular saws.
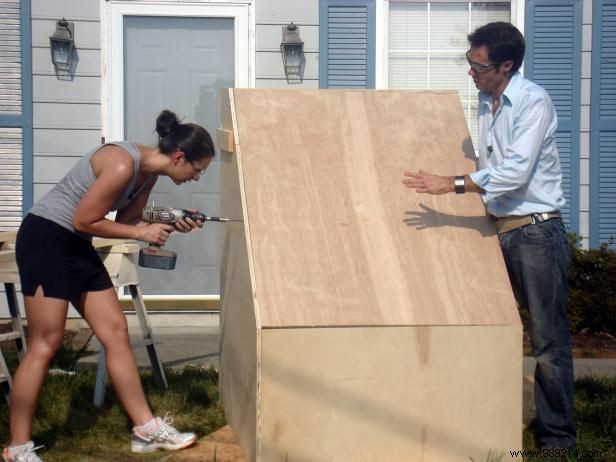
Assemble the box using 2" wood screws, drilling pilot holes with a countersink bit for clean, strong joints. Skip wood glue at this stage for easy disassembly later. This pre-assembly ensures everything aligns perfectly before finishing.
Once verified, disassemble by removing screws. Sand all pieces smooth, apply stain for a professional look, and seal with multiple coats of polyurethane for durability. Finish the desk and shelf components too. Pre-assembly catches issues early, saving time during final install.
Cut 3/4" pressure-treated plywood to fit the floor, securing it with subfloor adhesive. This elevates the surface level with the room and blocks concrete moisture, which can rot untreated wood. Pressure-treated lumber is essential for longevity in damp-prone areas.
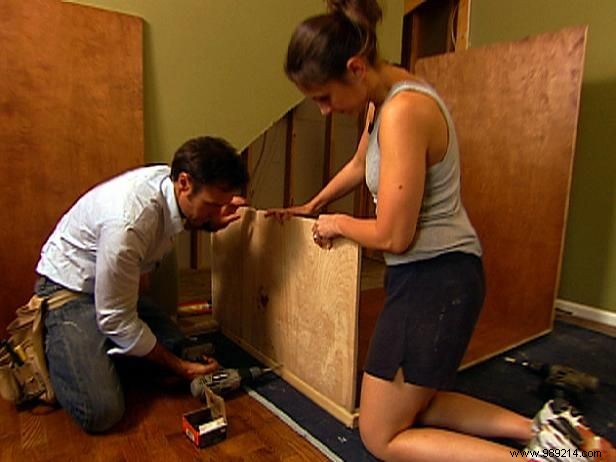
Transport pieces to the space and reassemble with screws and wood glue—the pilot holes make it quick. Anchor the base to 2" x 4" blocks for stability during handling.

Slide the box into the under-stair cavity, aligning with the angled drywall cut. Secure to the rear studs with screws for rock-solid support.
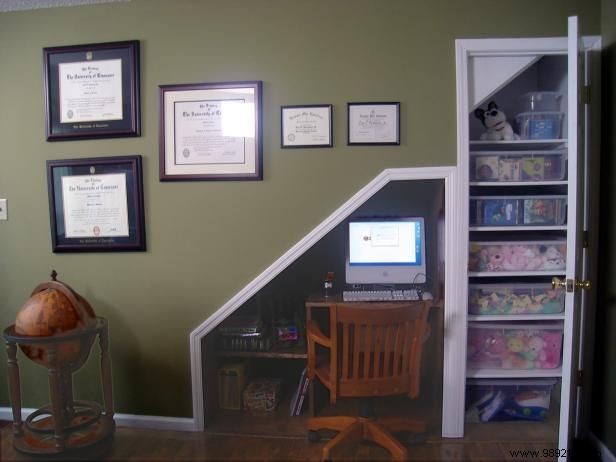
Mount finished ledger strips inside: back and right walls for the desk, left wall for the shelf. These provide reliable structural backing.
Ledger strips and vertical supports hold the desk and shelf. Attach components to brackets, then fasten the assembly to the box and ledgers—use a nail gun initially, followed by screws for maximum strength.
Nail 3/4" decorative trim along desk edges. Install wider trim around the opening to conceal gaps and achieve a built-in, professional appearance.