By Emily Fazio
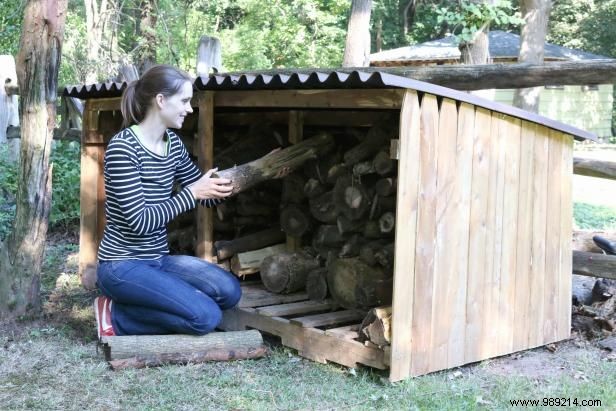
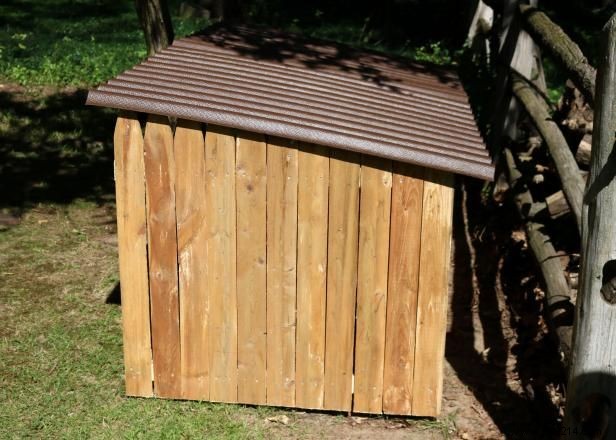
As an experienced DIY enthusiast, Emily Fazio shares her proven method for building a practical outdoor firewood storage shed. Using two shipping pallets as the base elevates the wood off the ground, promoting airflow to keep it dry and prevent rot.

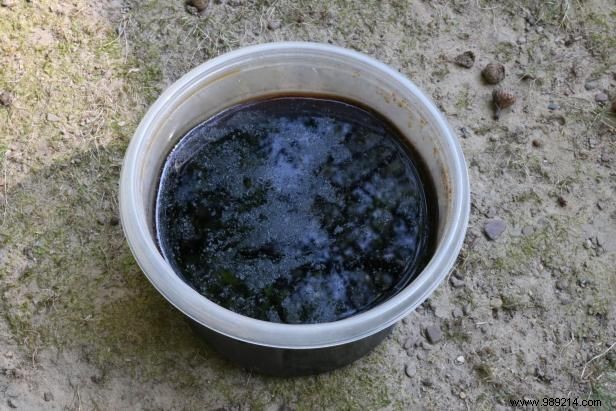
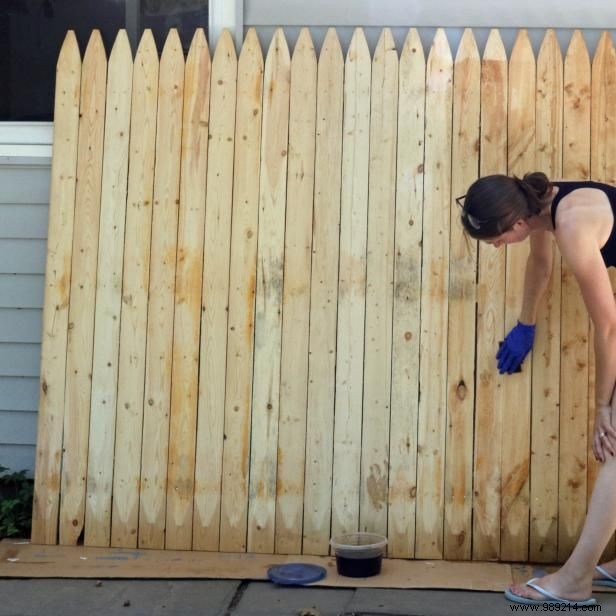
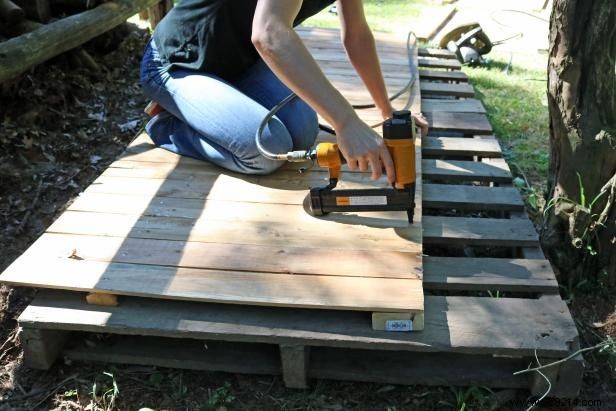
Before assembly, stain the pressure-treated fence panels for protection and aesthetics. Skip oil-based stains and create a natural alternative by soaking steel wool in apple cider vinegar. The reaction produces a rich brown solution that ages the wood beautifully. Allow several weeks for the mixture to mature, then apply with a sponge.
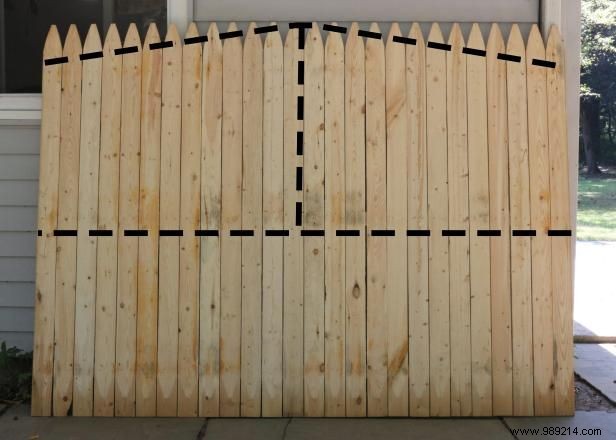
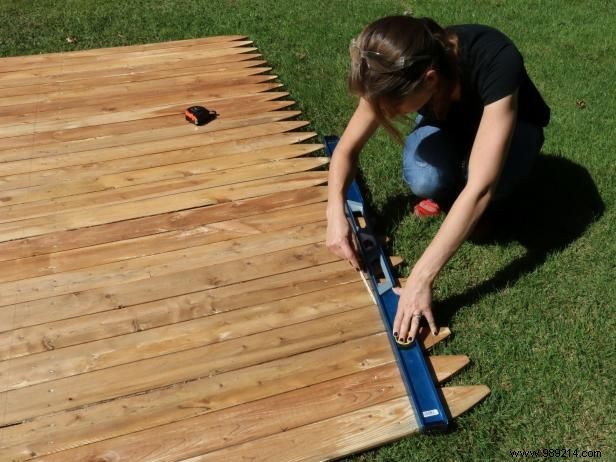
Start with a single fence panel to form the back and side walls. Measure 31-1/2" from the bottom and mark across the width for the back piece. For the side walls, mark 8" down from the top corners—ideally aligning with existing horizontal boards for stability. Mark the center at 4 feet, then use a straight edge to connect points for angled rooflines that promote runoff. Repeat for both sides.
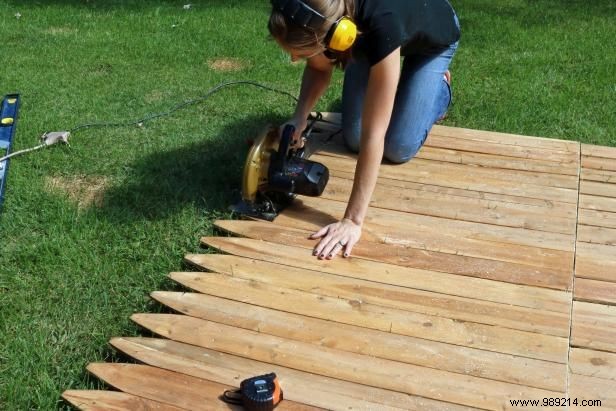
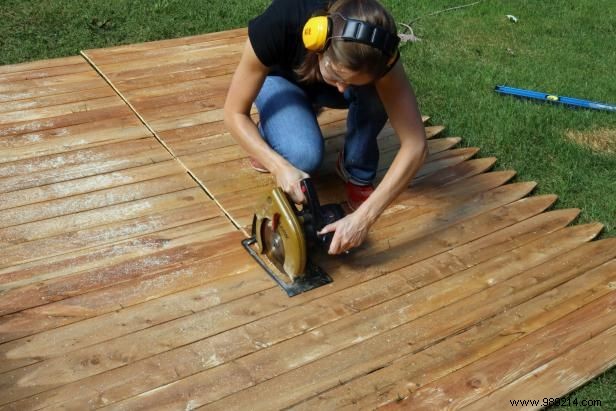
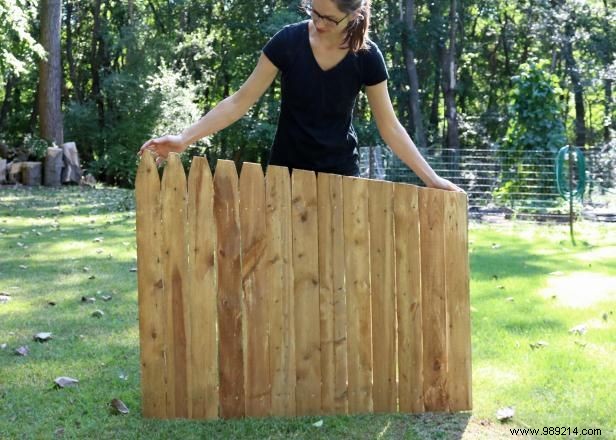
Set your circular saw to the proper depth and cut along the marked lines. This yields a 96” x 31-1/2” back panel and two angled side walls.
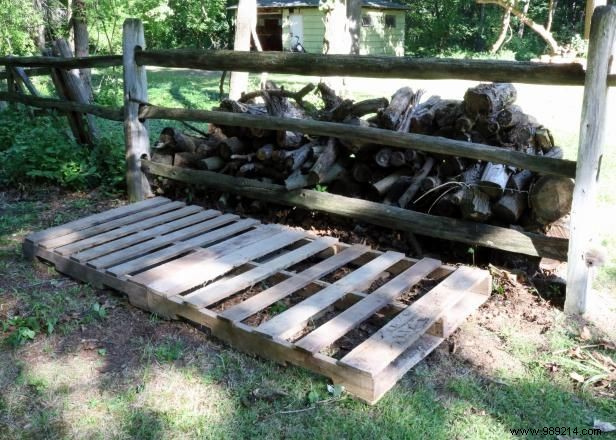

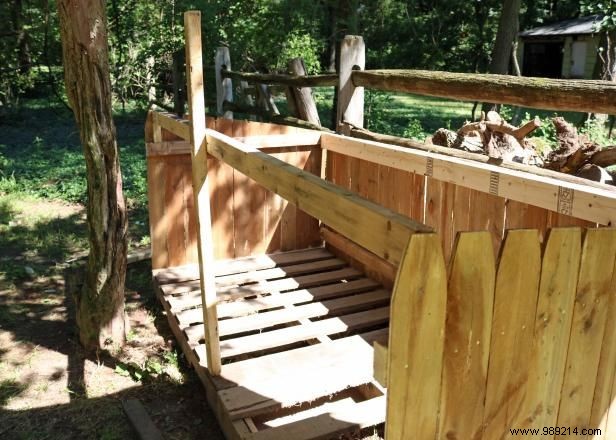
A breathable design is key for wood storage. Pallets keep logs elevated for air circulation. Position two pallets side-by-side (90" wide x 42" deep) near the final site, as the assembled shed will be heavy. Secure them together for stability. Trim side and back panels to match the pallet dimensions, including three vertical slats on the back.
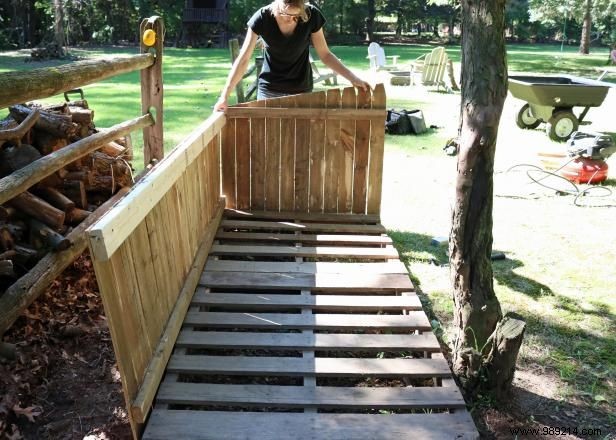
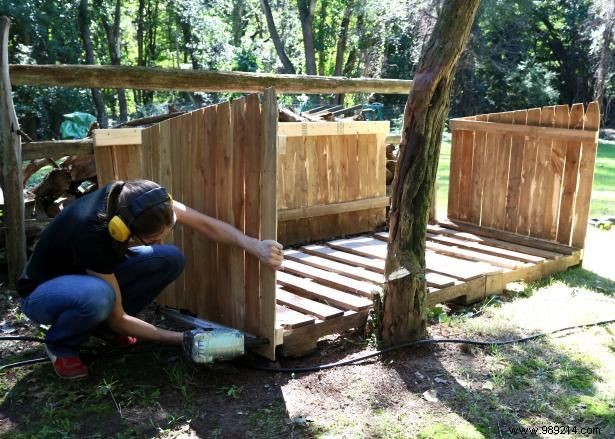
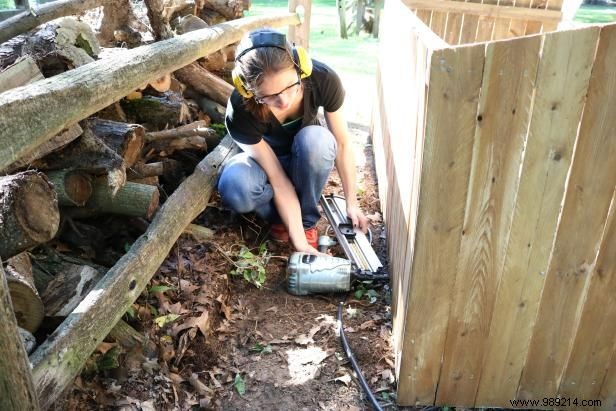
Nail loose fence ends to a 2x4 for back wall support. Use a nail gun to attach all three panels to the pallets, starting with sides. Lap corners for a tight seal.
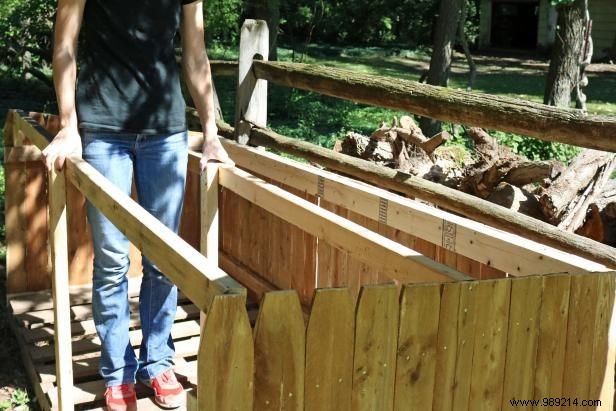
Two 2x3s span the length as roof joists. Measure from pallet top to joist height and cut two more 2x3s for vertical supports. Nail them in place to prevent sagging from snow or weight. The back wall's top 2x4 acts as the third joist.
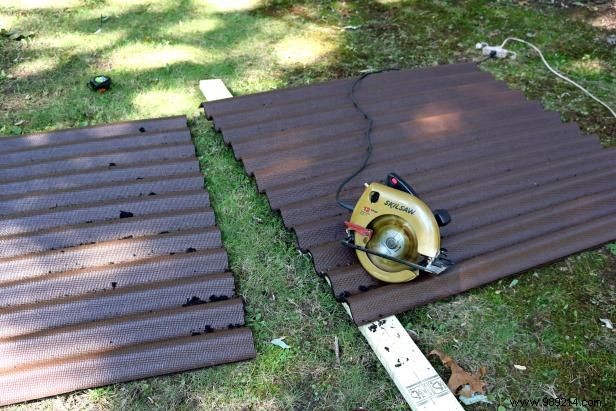
Use 48" x 79" corrugated asphalt/fiber panels (two sheets cover the unit). Orient ridges for drainage. Overlap 1-2 ridges at the center. Mark overhangs—2" taper at eaves, 4" front/back—then cut with a circular saw.
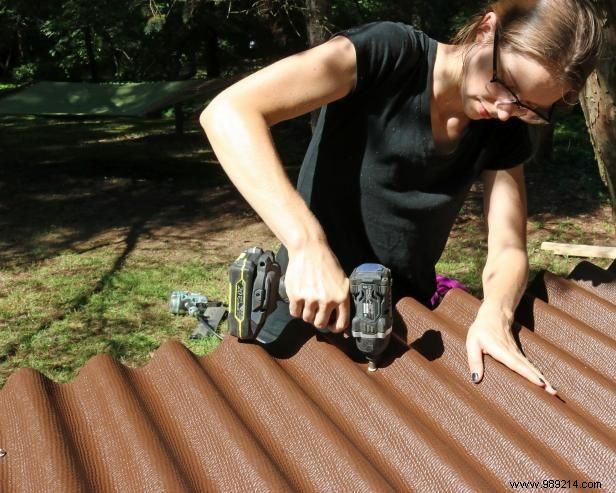
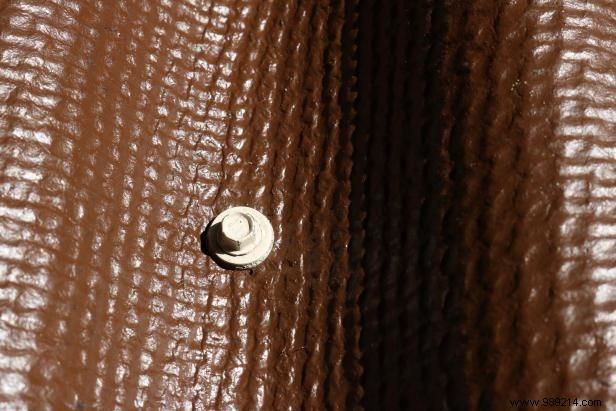
Use self-tapping screws with polycarbonate washers every 2-3 ridges along each joist for a watertight seal.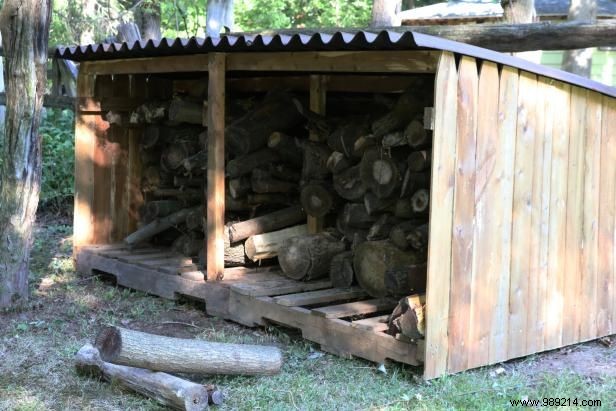
By Emily Fazio