Brian Patrick Flynn
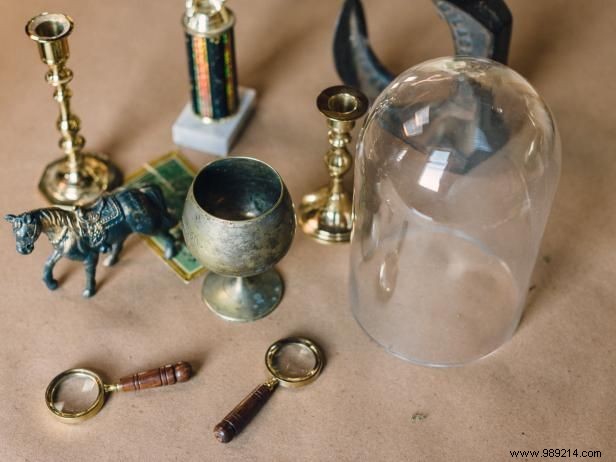
Freestanding objects often shine on their own, but under a cloche, they can appear cluttered or oversized. As an experienced interior designer, I've found success by gathering a variety of items first—then testing them beneath the glass dome to evaluate how shapes, layers, and textures interplay. Pro tip: Leave about two inches of clearance around most objects to prevent a cramped look.
Brian Patrick Flynn
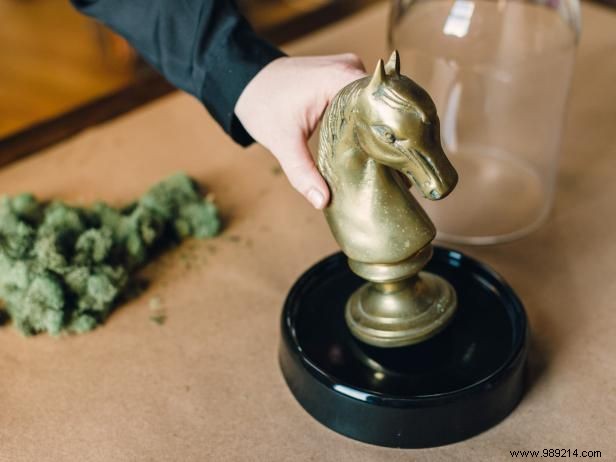
Cloche domes and bases are specialty pieces, best sourced from antique shops, trade showrooms, or craft stores—not everyday retailers. Always grab a spare dome in case of breakage. Position your selected objects inside to check fit, then center the ideal one on the base for balanced appeal.

Brian Patrick Flynn
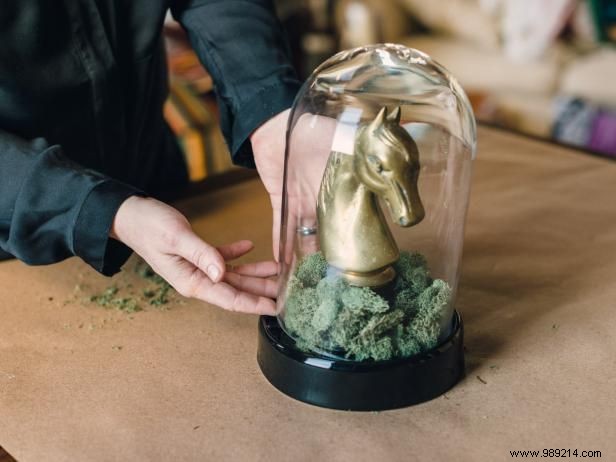
Unpack the floral moss and layer it along the cloche base, surrounding your centerpiece object. This creates a lush ground cover that adds depth, texture, and subtle color for a polished finish.
Brian Patrick Flynn
Size the moss to extend 1/8 inch beyond the glass dome's diameter. This keeps everything level and visually seamless.

Brian Patrick Flynn
Position your completed cloche at the table's center, then layer surrounding decorations to form a cohesive vignette that elevates the entire tablescape.