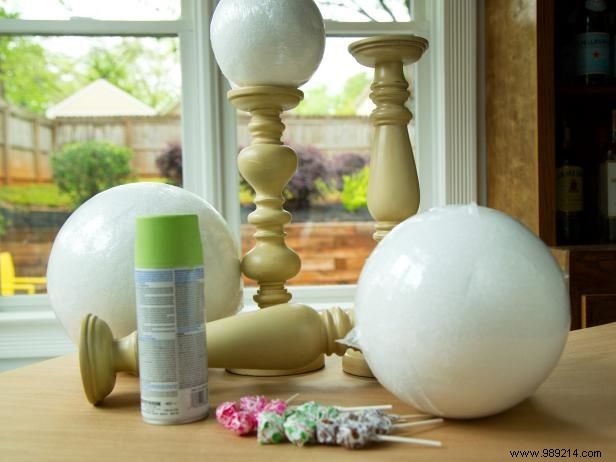
As a seasoned event stylist with years of crafting custom centerpieces, I've found the key to balanced tabletop topiaries lies in mixing heights effectively. Opt for odd-number groupings like three or five, spaced evenly, using tall, medium, and short candlesticks. Pair them with floral foam spheres in slightly varying diameters—an ideal combo is 4", 6", and 8".

To unify your palette, refresh the candlesticks with spray paint matching colors from the lollipop wrappers. In a well-ventilated space, apply even coats from about 8" away, sweeping back and forth smoothly.
Exact color matching delivers bold impact, while blending shades from the same family adds sophisticated depth—a technique I rely on for professional results.
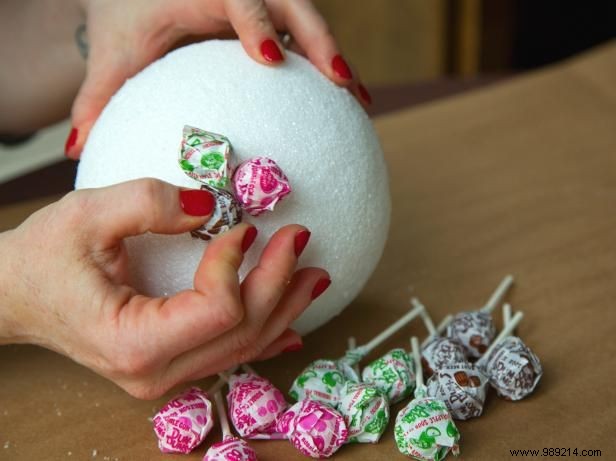
For even coverage on each floral foam sphere, group lollipops by color first.
Random placement ensures balance, but avoid adjacent same colors. Begin with a central 'color pack' of all featured shades as your template—this prevents direct color clashes outward.
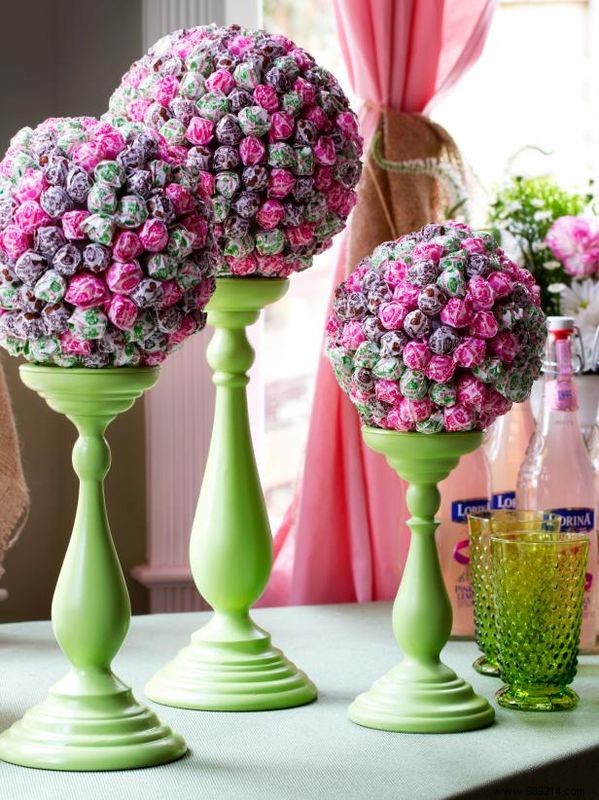
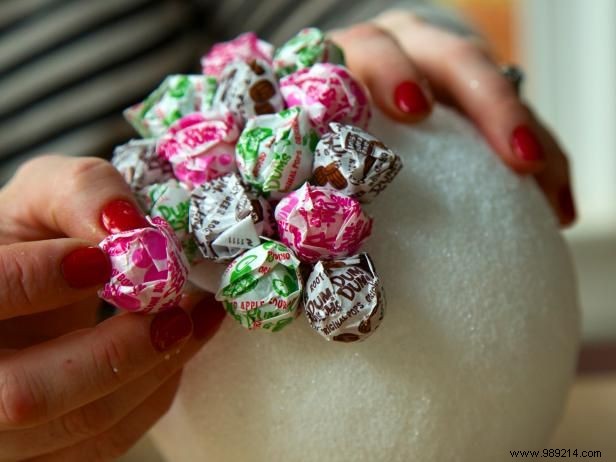
Build from the center color pack, inserting lollipops quadrant by quadrant for perfect distribution. Fully cover the sphere, then secure it atop the candlestick for a stunning finish.