Tools and Materials:
White crepe paper
Yellow stamen
White floral ribbon
Green wire stems
Scissors
Ballpoint pen
Magnolia branches
Floral wire
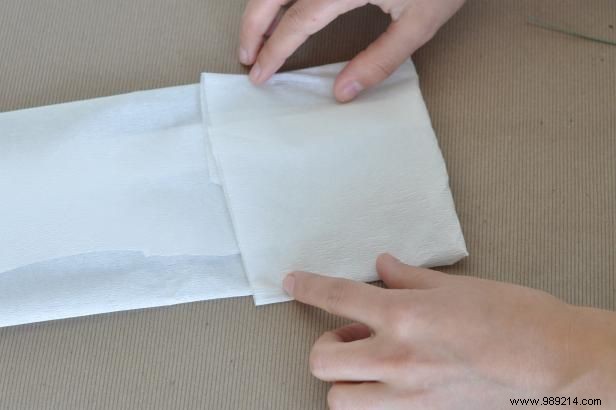
Photo by She-n-He Photography
Fold the crepe paper into a 4" x 5" rectangle.
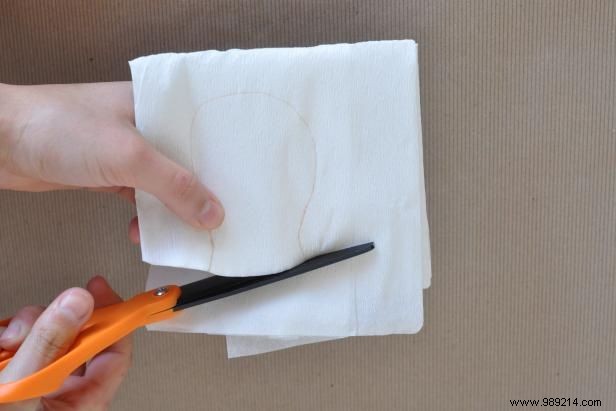
Photo by She-n-He Photography
Draw a large petal shape in the center and cut through all layers to create multiple petals at once.
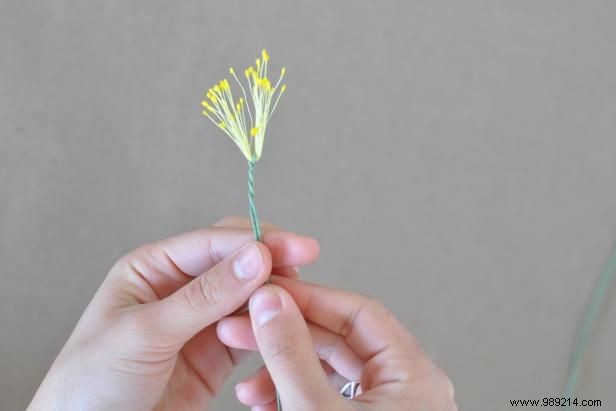
Photo by She-n-He Photography
Fold a flower stem in half, thread the stamen through the folded end, and fold up. Squeeze several times to secure.
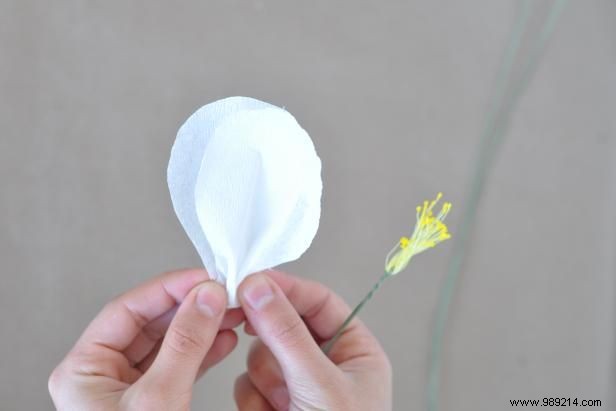
Photo by She-n-He Photography
Stack two petals and scrunch the bases together.
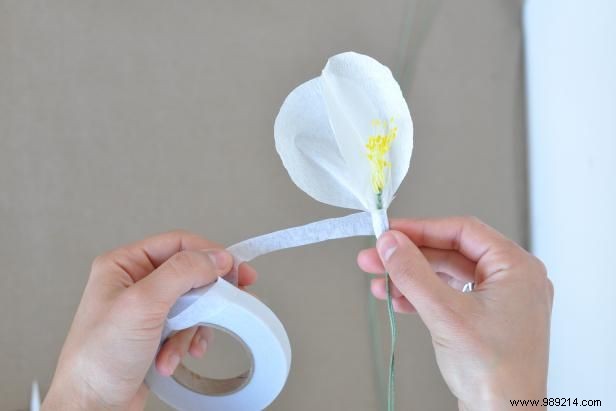
Photo by She-n-He Photography
Attach the scrunched petals to the stem using floral tape. Repeat this process three more times for a total of eight petals.
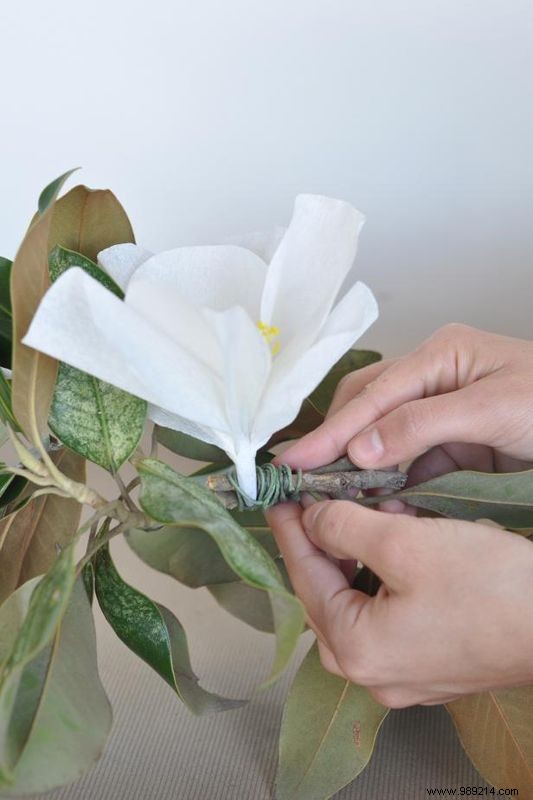
Photo by She-n-He Photography
Gently shake the petals to open them naturally, then twist the wire stem around a magnolia branch. Repeat on additional branches, securing them together with floral wire to create a garland of your desired length.
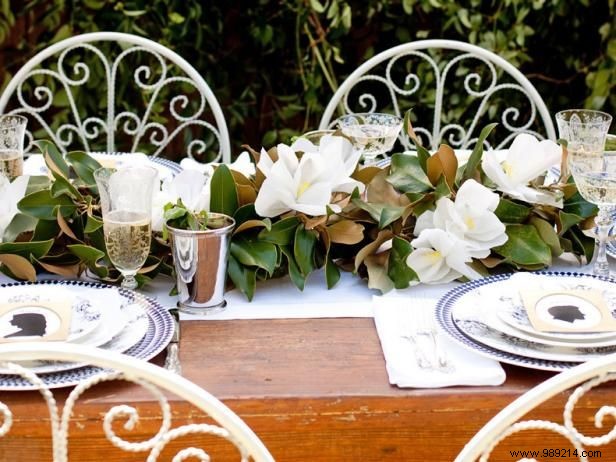
Photo by She-n-He Photography