We sourced this weathered board from a recycling center, cleaned it thoroughly, and hand-painted a warm welcome message for guests. Short on reclaimed wood? Start with new lumber, base-coat it, then distress with sandpaper and hand tools for authentic vintage charm.
Utility knife and scissors
Punch tool
Measuring tape
Hand saw
Paintbrush and red paint (sample size; we used Lowe's Valspar Claret)
Shop vac
Dust mask
Reclaimed wood board (about 70"-75" x 20"-24")
Shellac (all-natural sealer)
2 D-rings with screws and picture hanging wire
3 large paper bags
Painter's tape
Sandpaper
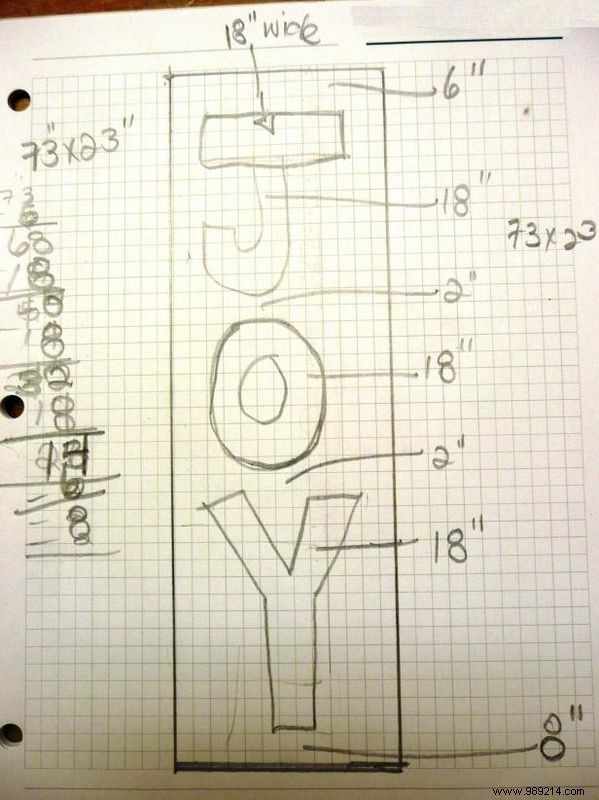
Wear a dust mask. Vacuum away paint flakes and debris. Wipe down with a damp cloth. Measure the board and sketch your layout on paper.
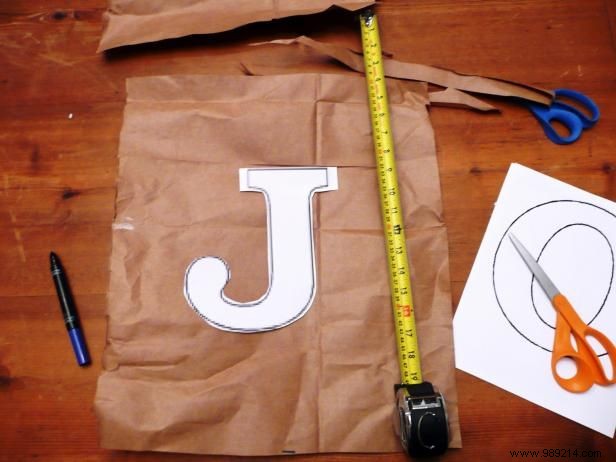
Make letter templates from three paper bags. For a 70" x 24" board, letters should be at least 16" tall.
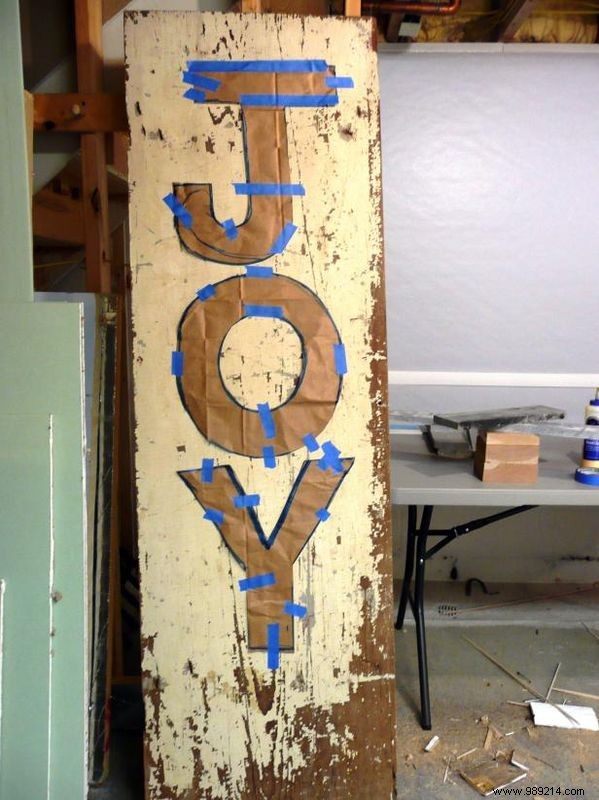
Tape templates to the board and trace outlines with a marker.
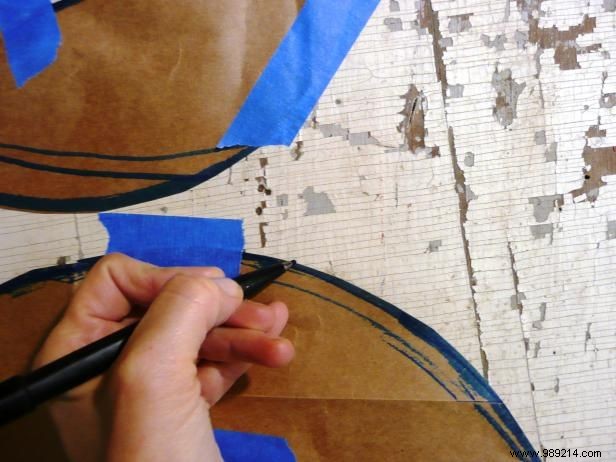
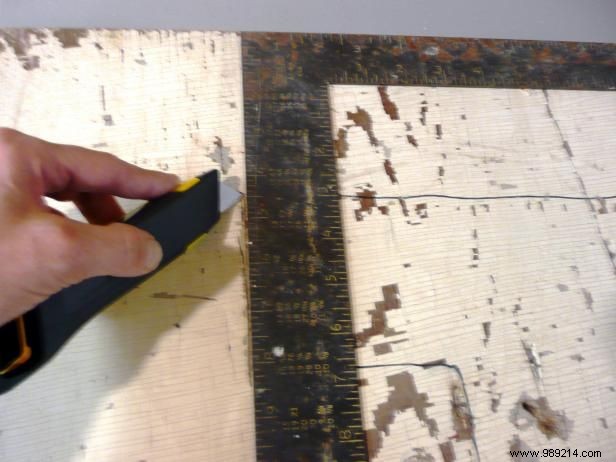
Remove templates and score along marker lines with a utility knife. Repeat a few times to deepen grooves.
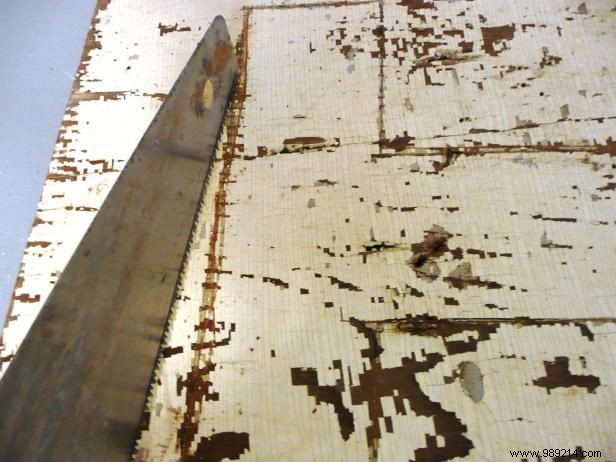
Run a hand saw along the grooves for a rugged, hand-hewn effect. Vacuum up dust and chips.
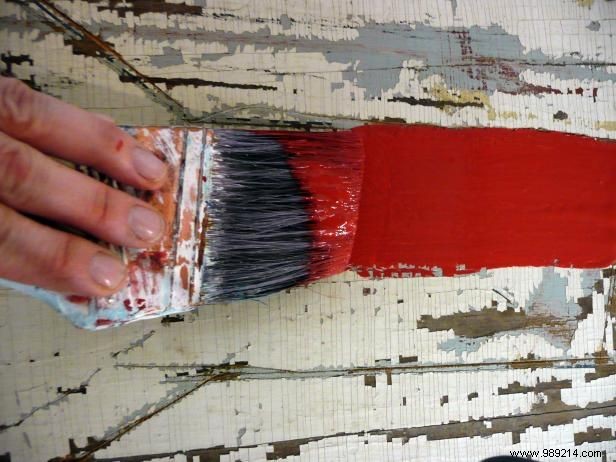
Fill grooves with paint, leaving some underlying texture visible. Allow to dry; apply a second coat if needed. Distress edges with sandpaper for an aged patina.
Brush on shellac front and back, two coats.

Attach D-rings to the back and string with hanging wire.
Joanne Palmisano is the author of Salvage Secrets (W.W. Norton, September 2011). Visit her blog, also called Salvage Secrets.