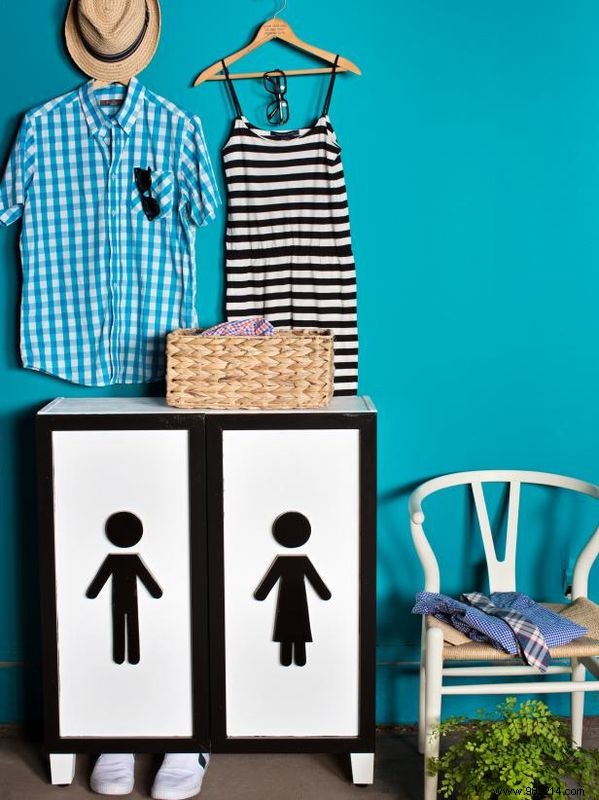
Sharing a bathroom vanity can spark clutter battles between partners. As a woodworking enthusiast with over a decade of DIY projects, I've found that custom plywood silhouettes clearly divide 'his' and 'hers' spaces—tailor them to your personal style for harmony and organization.
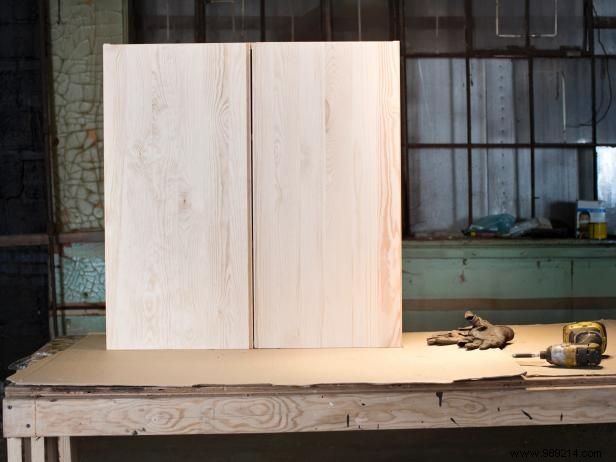
Flat-panel cabinet, cupboard, or chest of drawers.
1x3 trim to skirt cabinet doors.
3/4" paint-grade plywood.
Spray paint with a spray can handle.
Semi-gloss latex paint and paint tray.
Paint roller and roller sleeve.
Paint-grade plywood.
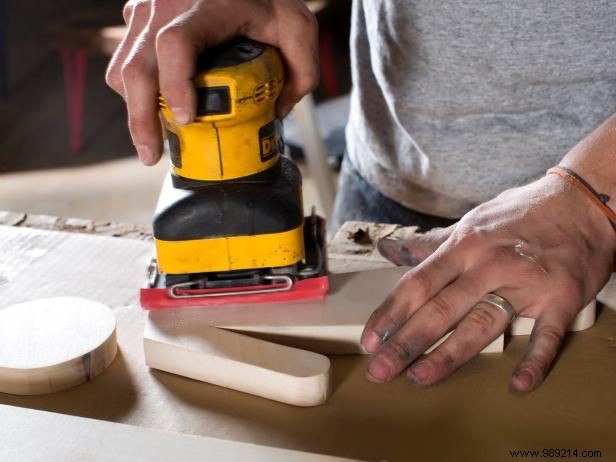
Electric sander with additional sanding pads.
Sanding block.
Drill with wood screws.
Caulking gun with liquid bonding adhesive.
Jigsaw.
Damp cloth.
Safety glasses and dust mask.
Miter saw.
Opt for cabinets, chests of drawers, or dressers with flat-panel doors to ensure a smooth base for your customizations.
If needed, use a power sander to strip the old finish. Once smooth, wipe away dust and debris with a damp cloth for a clean surface.
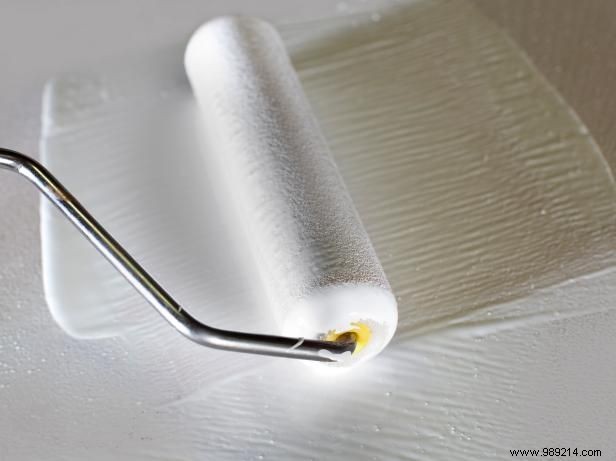
Using the paint roller and sleeve, apply a coat of primer inside and out. Choose a tinted stain-blocking primer (gray or brown shades) to prevent wood knots or blemishes from bleeding through your final paint.
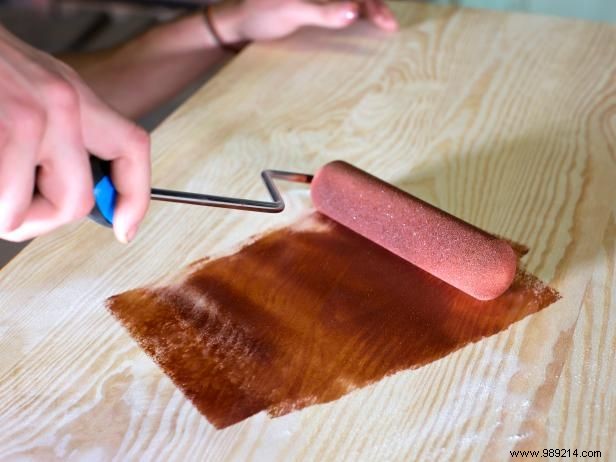
Roll on the base color to both interior and exterior surfaces. Two coats typically deliver a durable, professional finish.
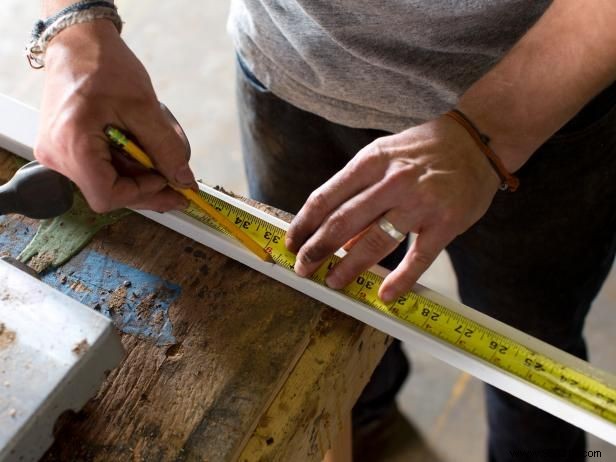
Tape measure the door fronts to determine exact dimensions for the edge trim cutouts.
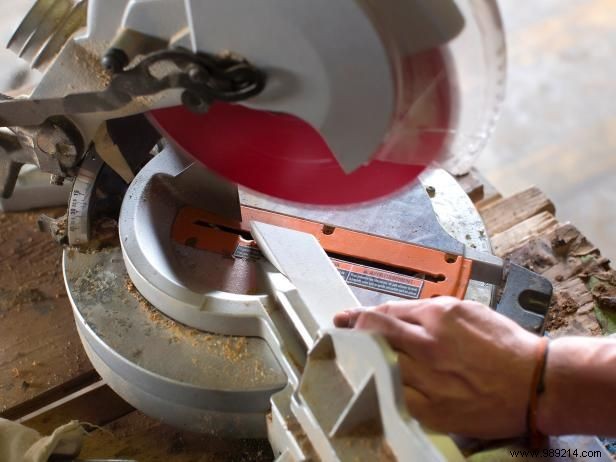
With a miter saw, cut 45-degree angles on the top and bottom edges of the trim. Sand rough spots and wipe clean.
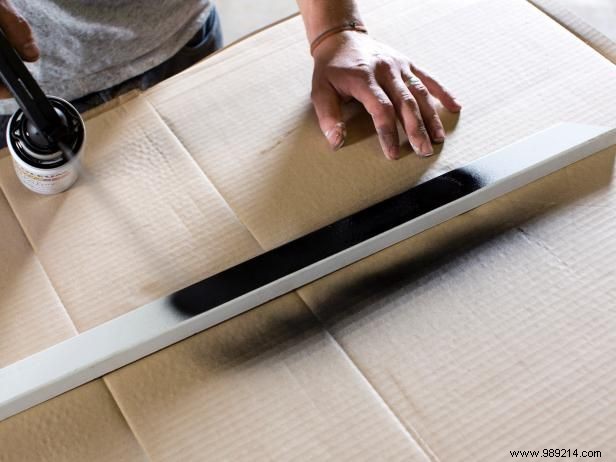
Attach the spray paint can to the handle and apply even coats with slow, back-and-forth motions.
Pro Tip: Painting trim separately ensures crisp edges where it meets the doors—no touch-ups needed.
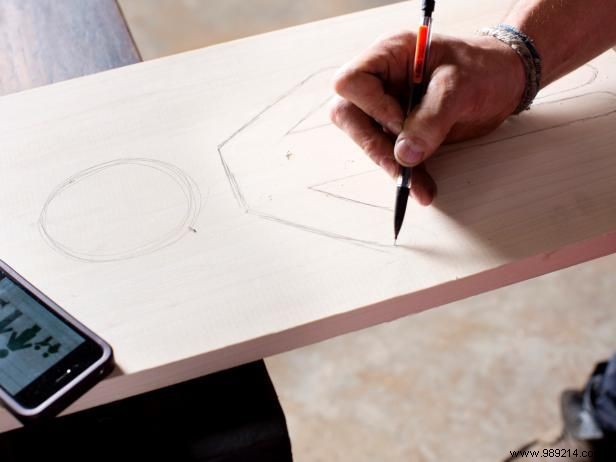
Select or print an inspiring image, then trace it onto the plywood with a pencil for your custom cutouts.
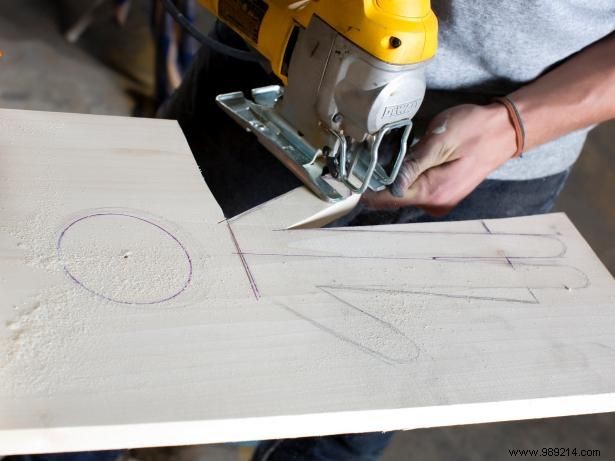
Use a jigsaw to follow the pencil lines precisely—always wear safety glasses. Smooth edges with a power sander or sanding block.
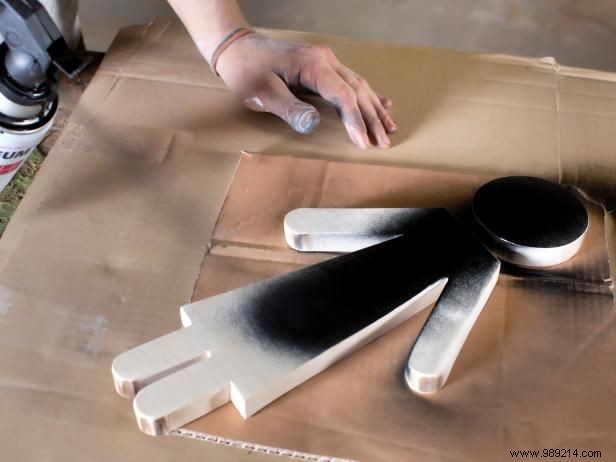
Spray-paint the shapes to match the trim, applying two even coats just as before.
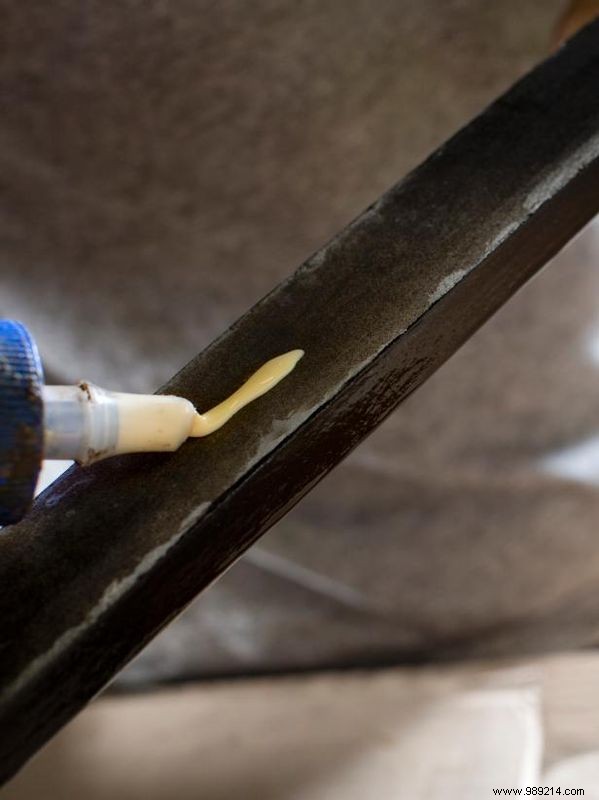
Apply liquid adhesive to the trim backs with a caulking gun, then press onto door fronts, aligning mitered corners perfectly.
Add adhesive to the back of each silhouette and position them firmly. Let set for at least six hours before standing the cabinet upright.