Begin by measuring the wall to assess available space. For this project, we crafted an 8-foot bench with about 8 inches of clearance on each end. Mark the bench height at 35 inches, then add 7 inches below for the slatwall panel base. Use a level to outline an precise 8-foot rectangle on the wall.
Employ a stud finder to identify wall studs. Draw vertical lines from top to bottom using the level, aligning with stud centers. Extend the top marks slightly beyond the outline for visibility after installing the top panel.
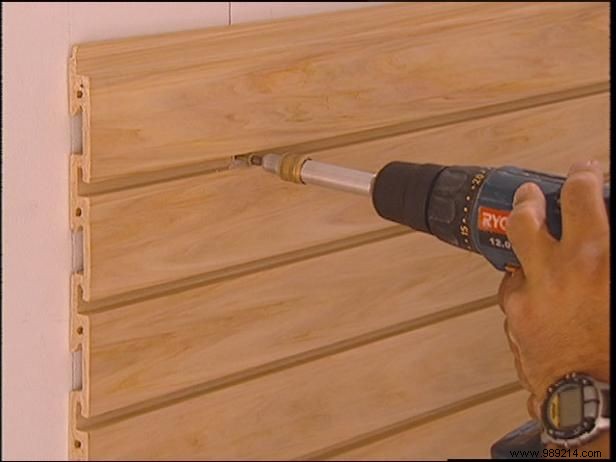
Start the backboard installation by driving temporary nails into the wall to support the first panel. Drill countersunk holes for screws between the slatwall slots. Secure the panel to the studs with 2-inch wood screws, ensuring they're flush.
Position the next panel, aligning the tongue-and-groove edges. Fasten with screws and repeat until the entire wall is complete.

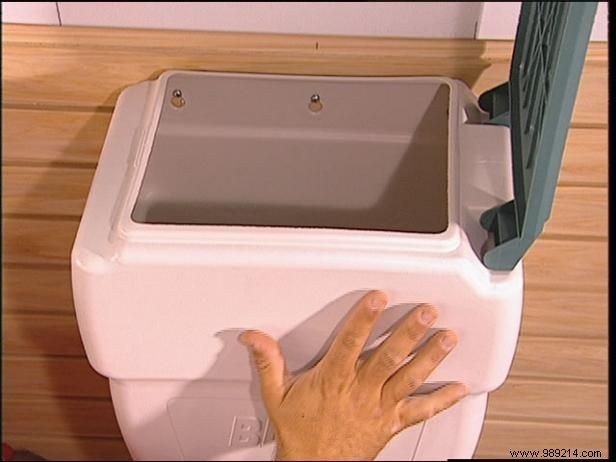
Find the board's center and mark it. Align the dispenser's provided template (Image 1). Drill holes and insert screws, allowing enough protrusion to suspend the unit securely.
Slide the dispenser into place (Image 2) and tighten internal screws. Test functionality by filling with potting soil.
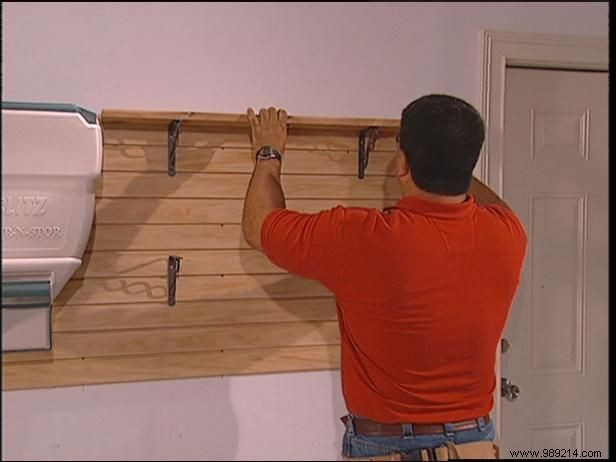
Measure the space to the right of the dispenser; our shelves are 38 inches long.
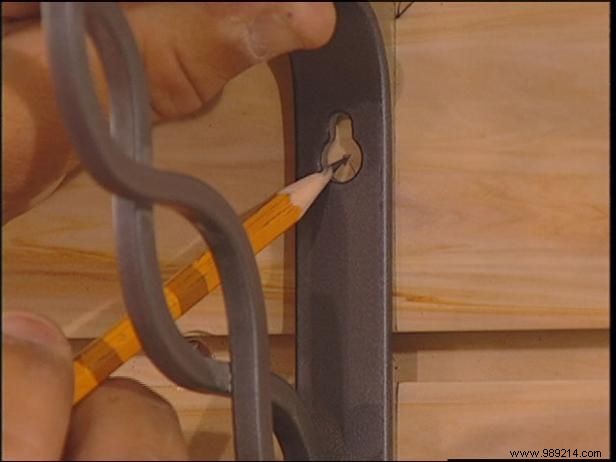
Mark bracket positions 8 inches from each end using a speed square. Position brackets and mark the first screw hole (Image 1).
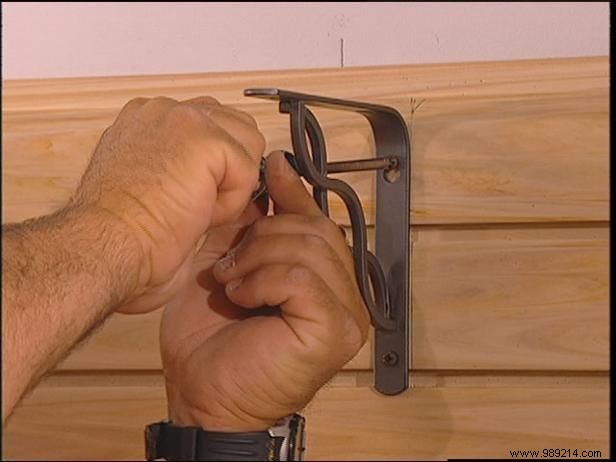
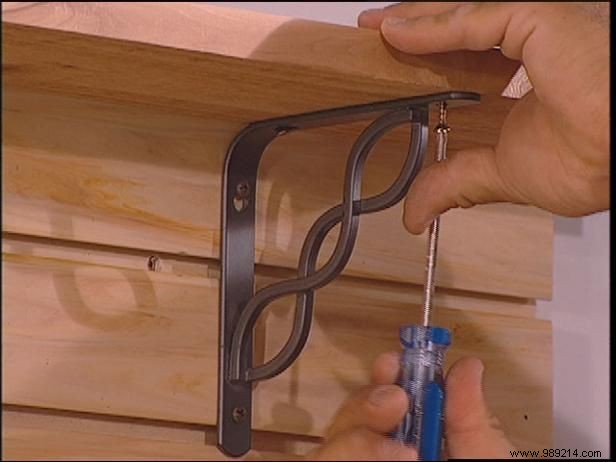
Pre-drill, install the top screw, then the bottom one. Hand-tighten the first screw (Image 2). Repeat for the matching bracket. Mark and level the second shelf's supports, then install identically.
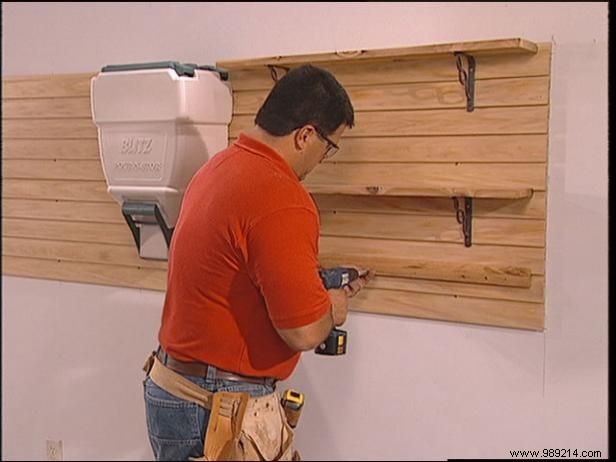
Square the ends of 1x6 boards on a table saw, mark to 38 inches, and cut both simultaneously. Rest on supports (Image 1), aligning 1-1/4 inches from the ends. Ensure the shelf front is flush with bracket ends, then secure with wood screws (Image 2).
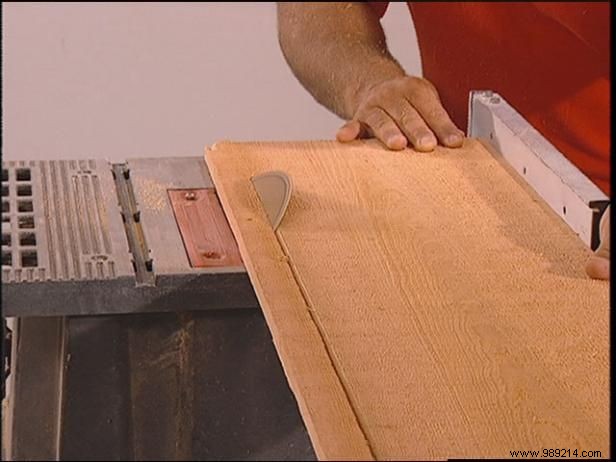
For the lower shelf to hold plants, clamp a 1x12 cedar board and mark at 38 inches (Image 3). Cut with a circular saw. Rip a 45-degree bevel about 1 inch wide on the table saw (Image 4).
Rip a 1x6 to 38 inches by 2 inches wide to serve as a brace where the angled shelf meets the backboard. Level and mark the bottom shelf position.
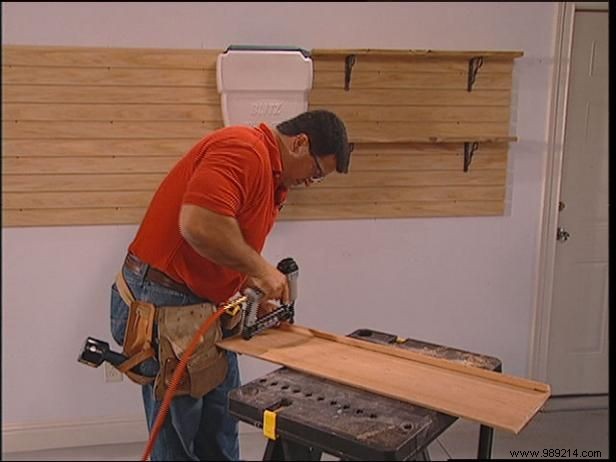
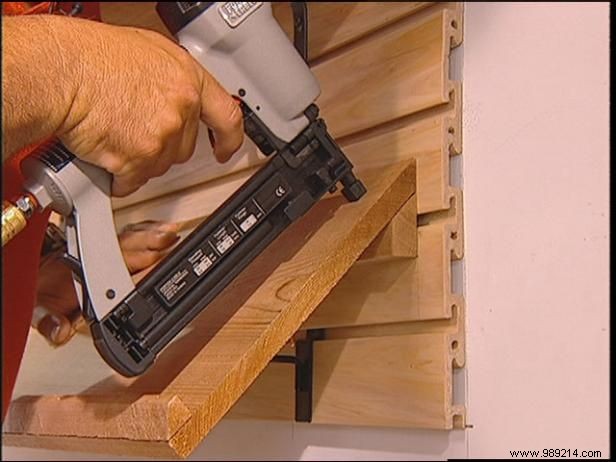
Mark the brace location at 4-3/4 inches and secure with a nail gun (Image 1). Attach to the backboard using 2-inch wood screws (Image 2).
Add slatwall-compatible metal dowels for extra support. Position the shelf on brackets, align, and nail in place (Image 3). Pre-drill above the brace and fasten with wood screws.