With years of hands-on woodworking experience, I've perfected this step-by-step guide to crafting a beautiful 3-foot wooden Christmas tree—ideal for tabletops or cozy spaces where a full-sized tree won't fit.
Wade Works Creative
Wade Works Creative
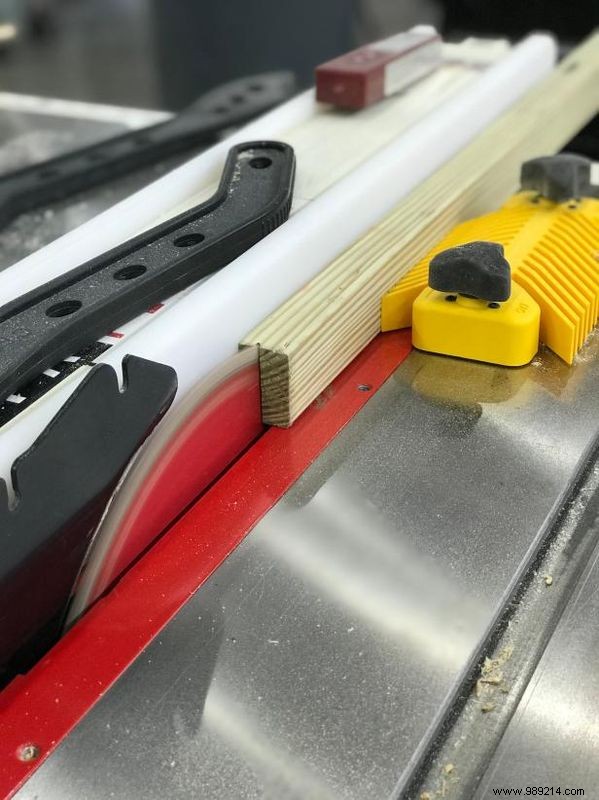
Use a table saw to rip 14 strips, each ¼" thick, from your 2x4s. Safety first: Wear protective gear and ensure the blade is sharp for clean cuts.
Wade Works Creative
Wade Works Creative
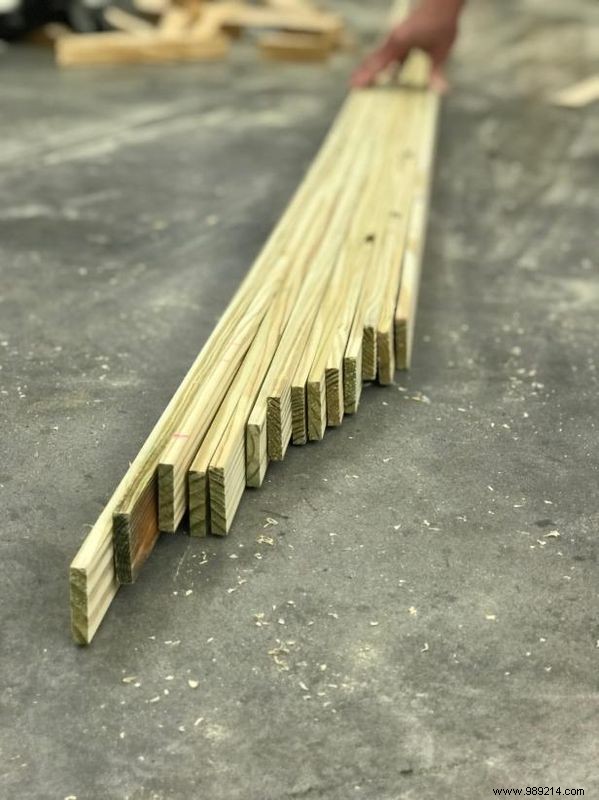
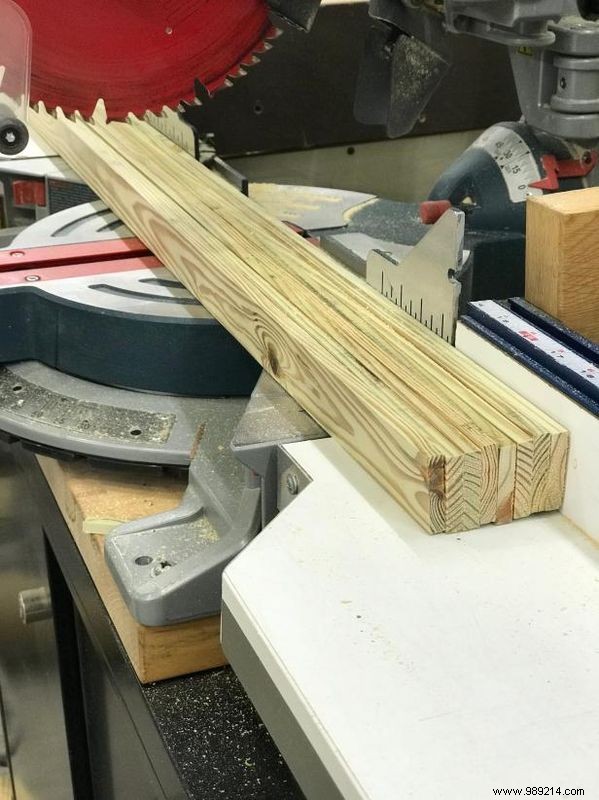
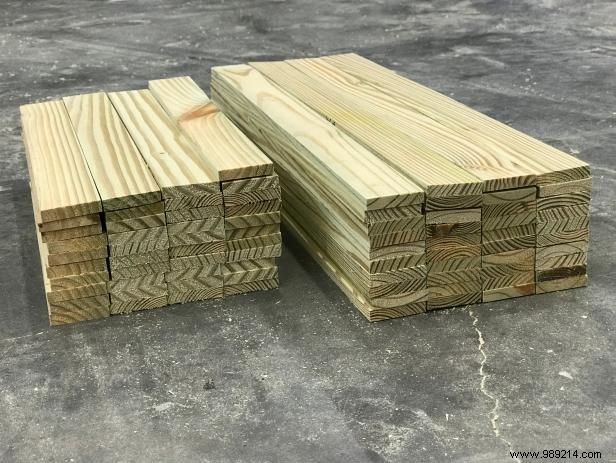
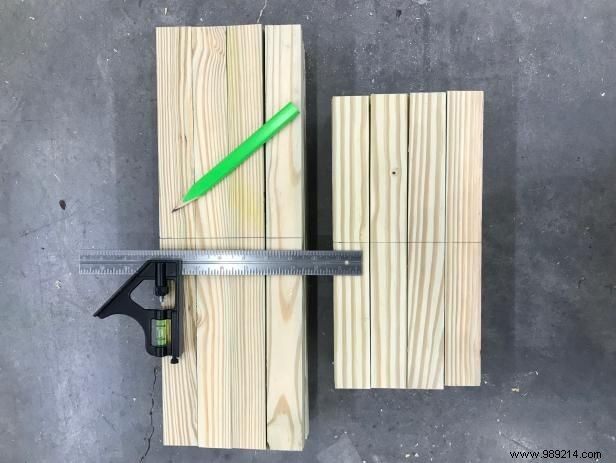
Cut 40 pieces to 16" and another 40 to 12". Precise measurements ensure a balanced, professional-looking tree.
Wade Works Creative
Using a straight edge and pencil, mark the center line on every piece for accurate drilling.
Wade Works Creative

Wade Works Creative
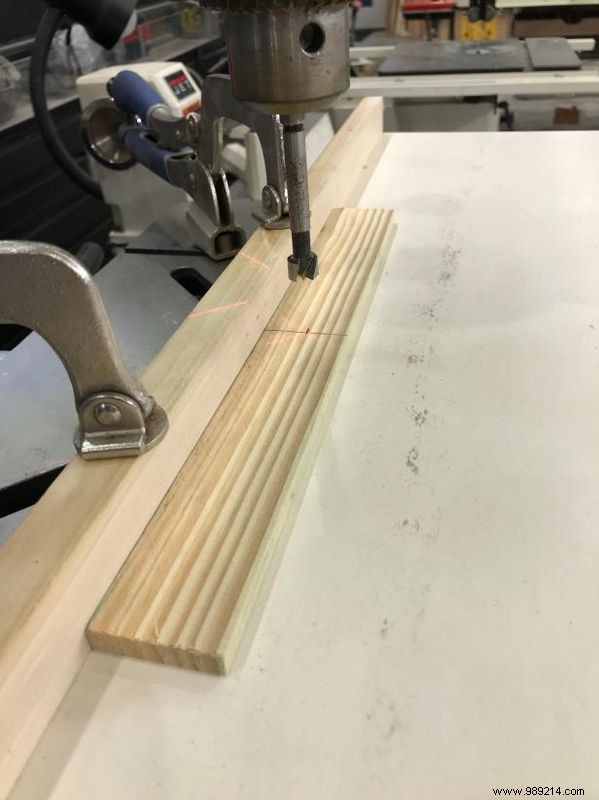
Drill the center of each wood slat with a drill and 1/2" Forstner bit.
Use a drill guide for the most consistent, professional results every time.
Wade Works Creative
Wade Works Creative
Wade Works Creative
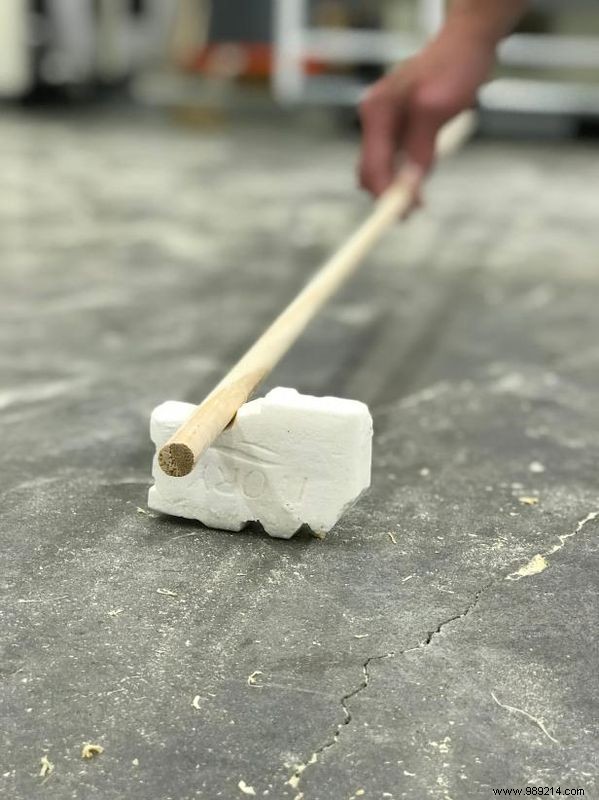
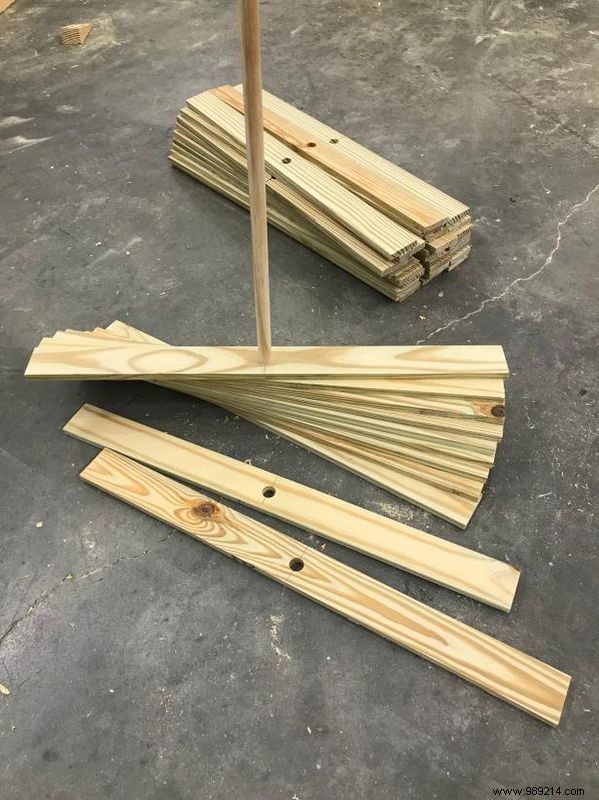
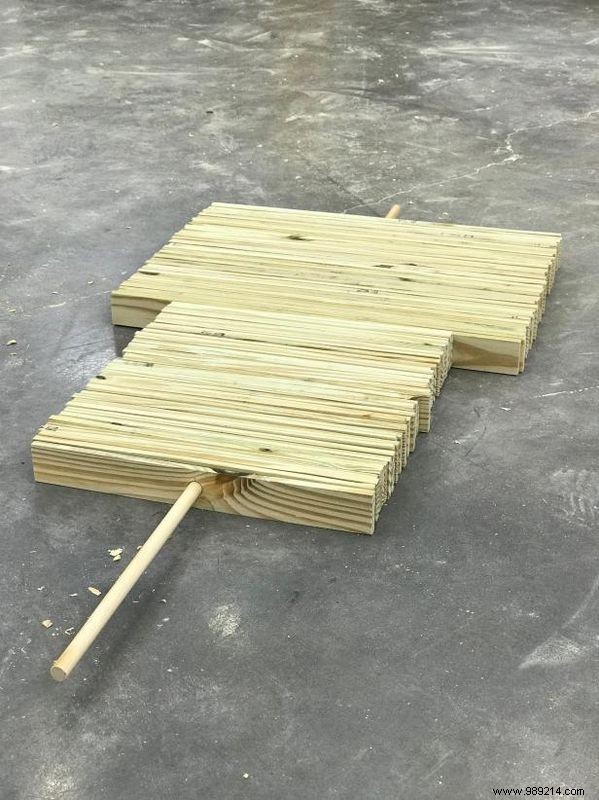
Coat the dowel rod with soap (Image 1), then slide on all the wooden slats, grouping similar lengths together (Images 2 and 3).
Wade Works Creative
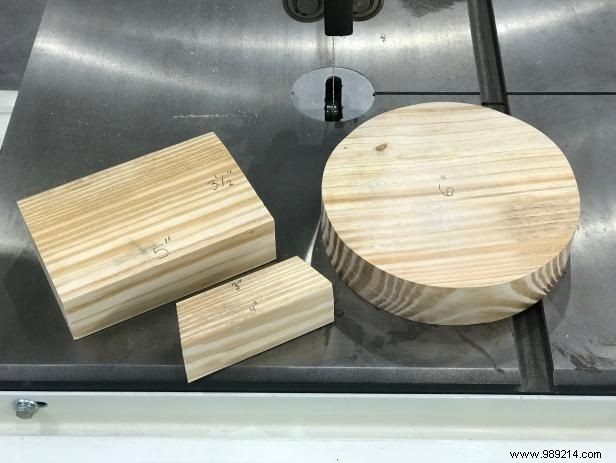
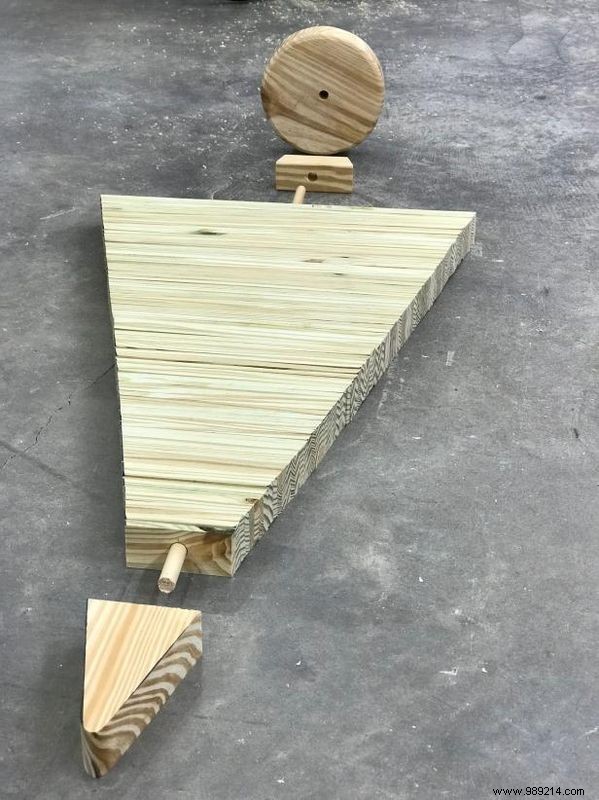
From extra 2x4 lumber and a 2" thick piece, cut to the dimensions shown—6" circle for the base.
Wade Works Creative
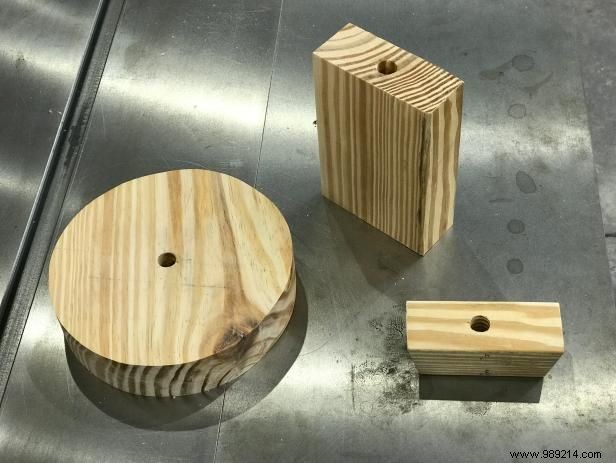
Drill a ½" hole, 1" deep, in the large rectangle and circle. Drill all the way through the smaller rectangular piece.
Wade Works Creative
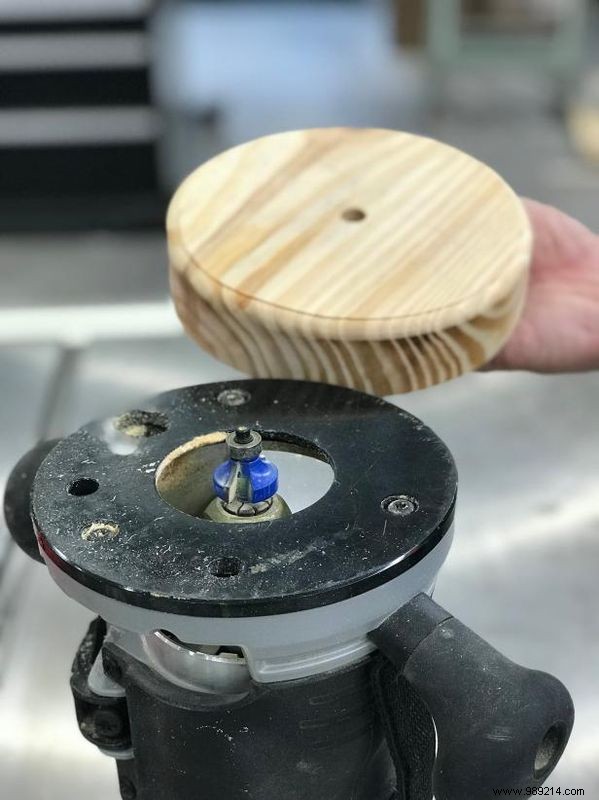
Smooth the top edge of the circle (drilled side) using a router and roundover bit for a polished finish.

Wade Works Creative
Position the small rectangle on the tree's large slat side, leaving 4" of dowel below. Cut the top 3/4" above the small slats with a handsaw.
Wade Works Creative
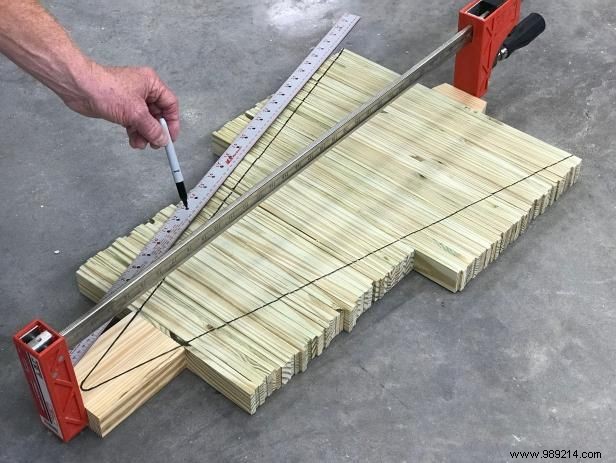
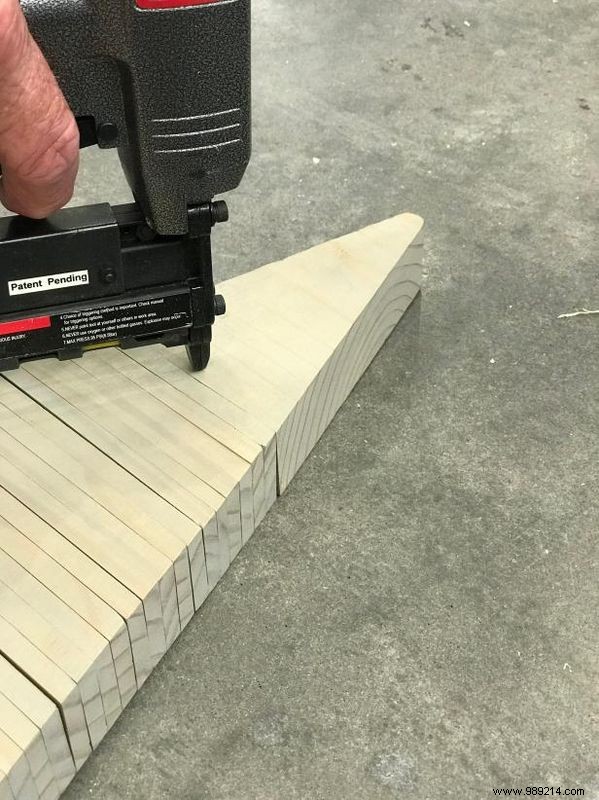
Place the remaining rectangular piece atop the dowel, clamp all slats tightly, and draw your tree shape with a marker and straight edge.
Wade Works Creative
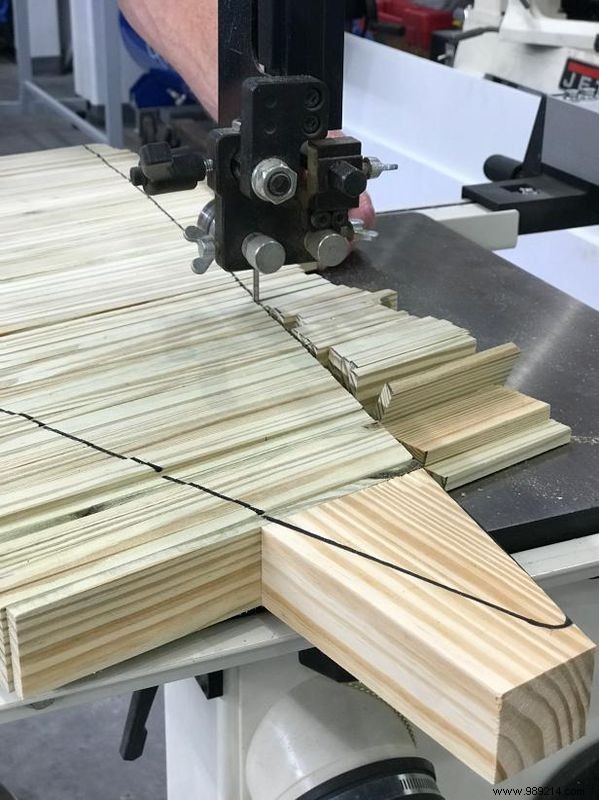
Use a bandsaw or circular saw to cut the profile precisely.
Wade Works Creative
Sand everything smooth for a professional, splinter-free finish.
Wade Works Creative
Wade Works Creative
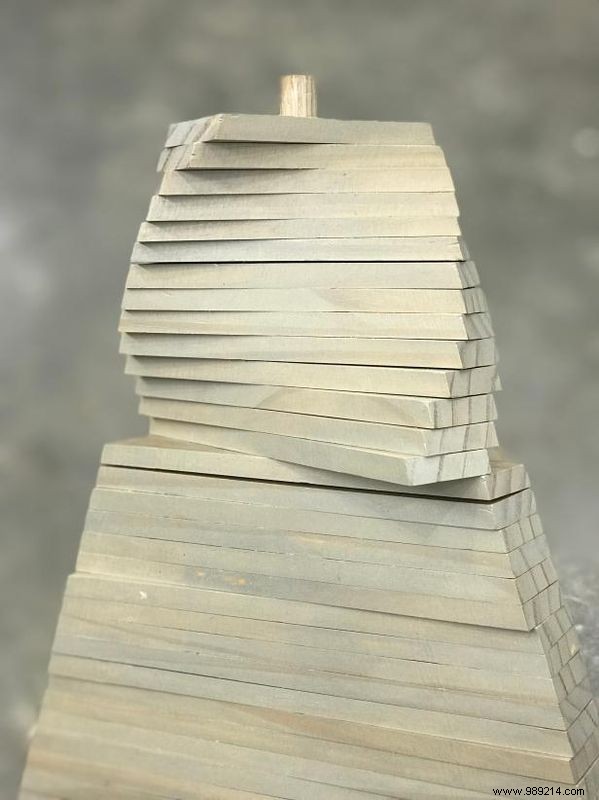
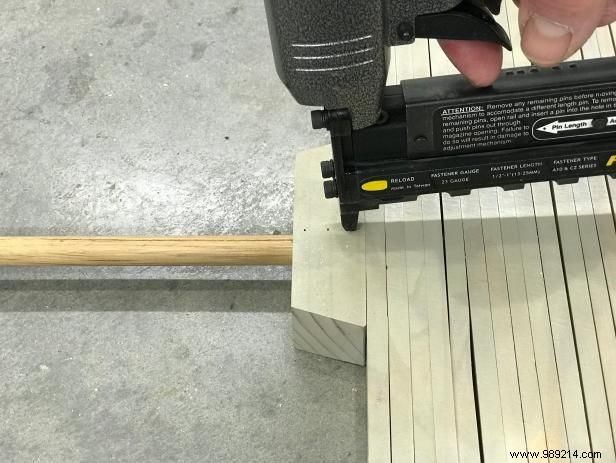
Disassemble, finish as desired (Image 1), then reassemble. Secure the upper triangle (Image 2), lower stop (Image 3), and circular base with a micro pinner.
Skip finish on the dowel rod to ensure slats slide on easily during reassembly.

Wade Works Creative