Family Encyclopedia >> Home & Garden

DIY Bohemian Ribbon Christmas Stocking: Step-by-Step Guide with Free Pattern

Introduction

DIY Bohemian Ribbon Christmas Stocking: Step-by-Step Guide with Free Pattern

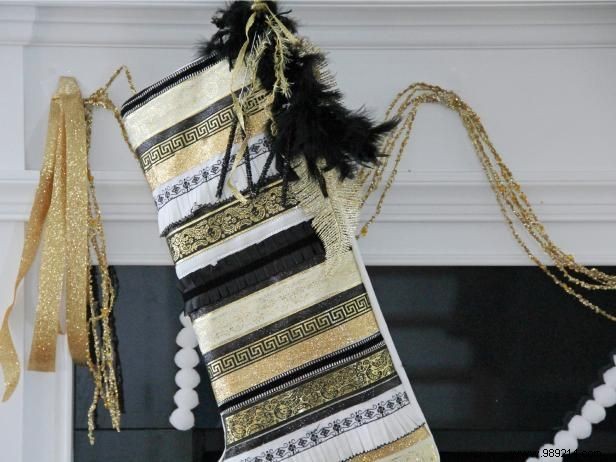
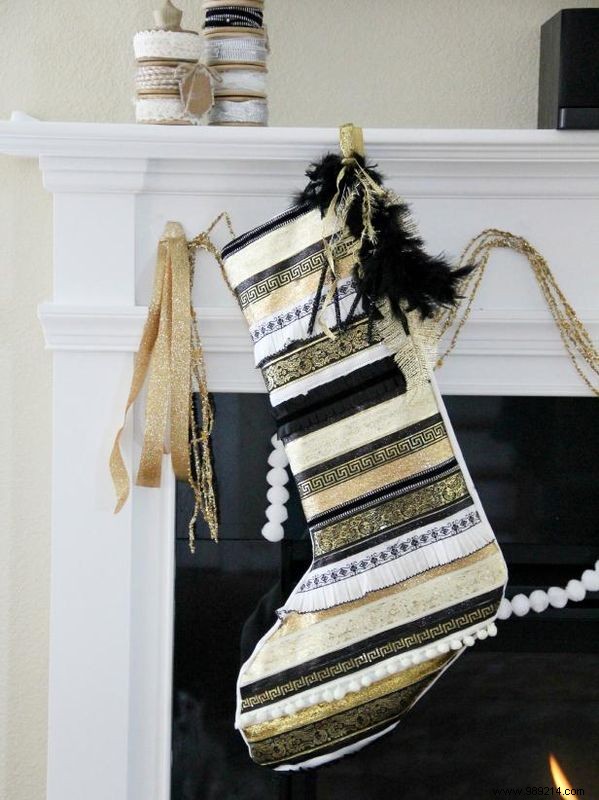
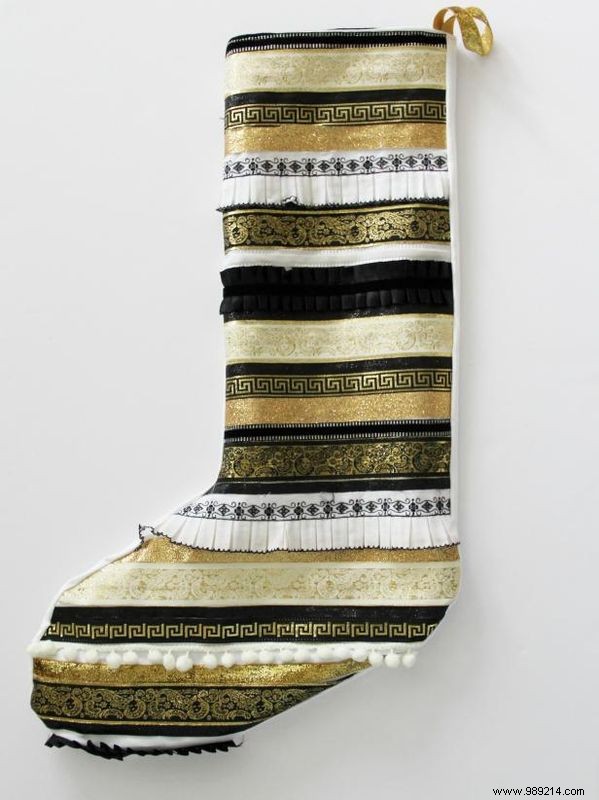
Infuse vibrant color into your holiday décor with this customizable Christmas stocking. Arrange narrow ribbon strips in a simple stitched pattern for a chic bohemian look. Bright, patterned ribbons create a playful vibe, but swap in your favorite palette for endless variety.

Step 1

DIY Bohemian Ribbon Christmas Stocking: Step-by-Step Guide with Free Pattern

Gather materials and print pattern

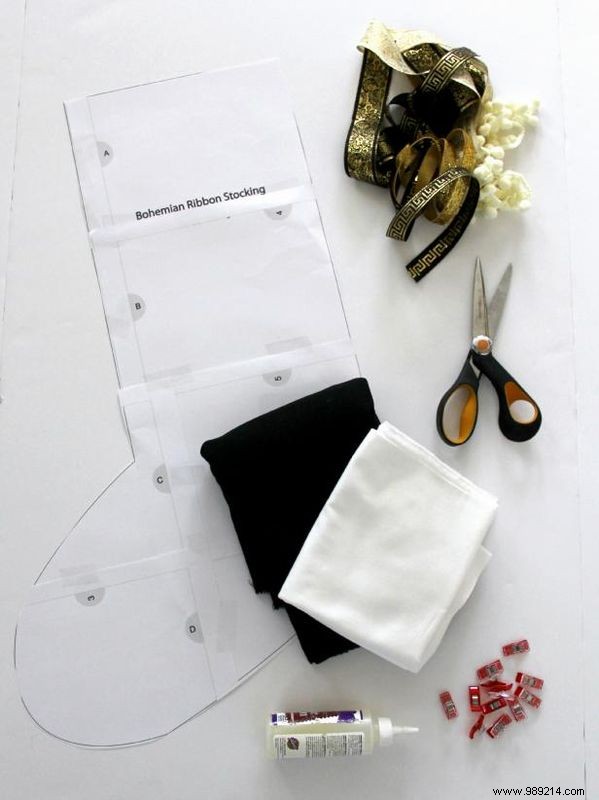
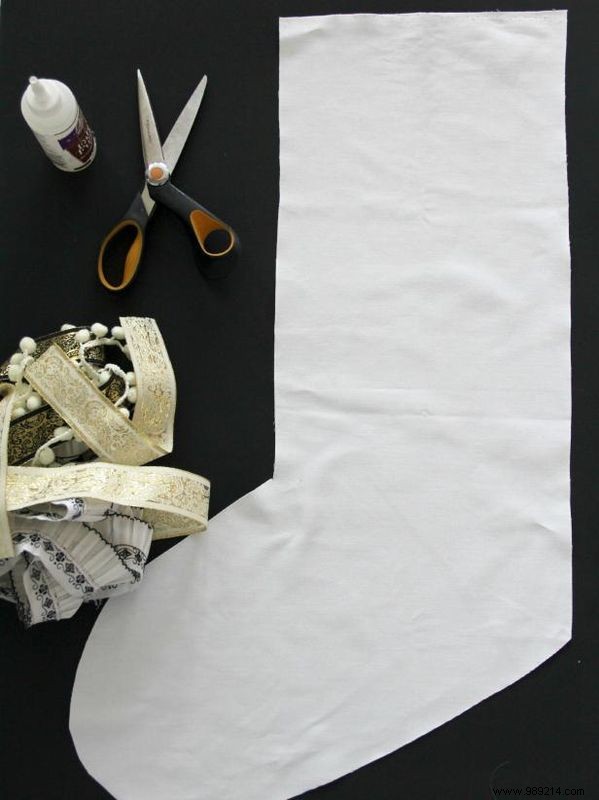
This finished stocking measures 21”h x 16”w. For a smaller size, scale the pattern when printing (70%, 80%, 90%, etc.). Download and print the stocking pattern.

Step 2

DIY Bohemian Ribbon Christmas Stocking: Step-by-Step Guide with Free Pattern

Cut fabric using the pattern

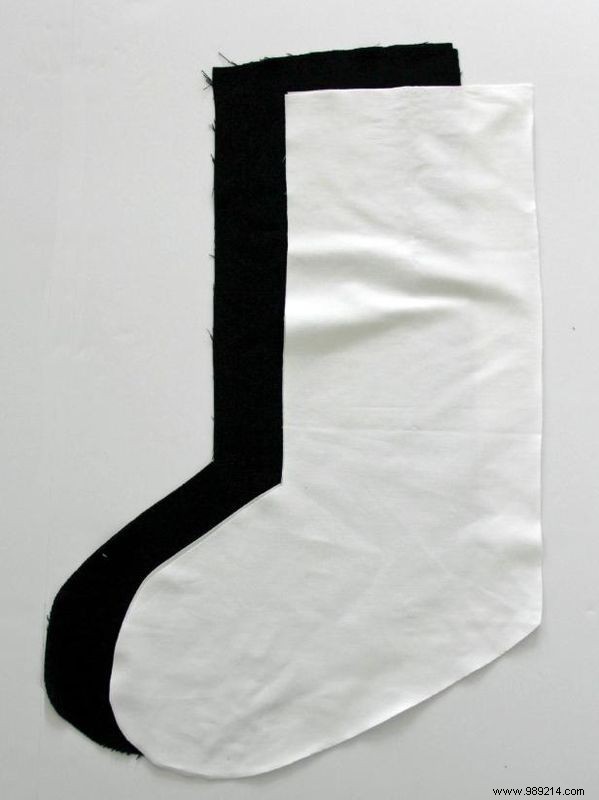
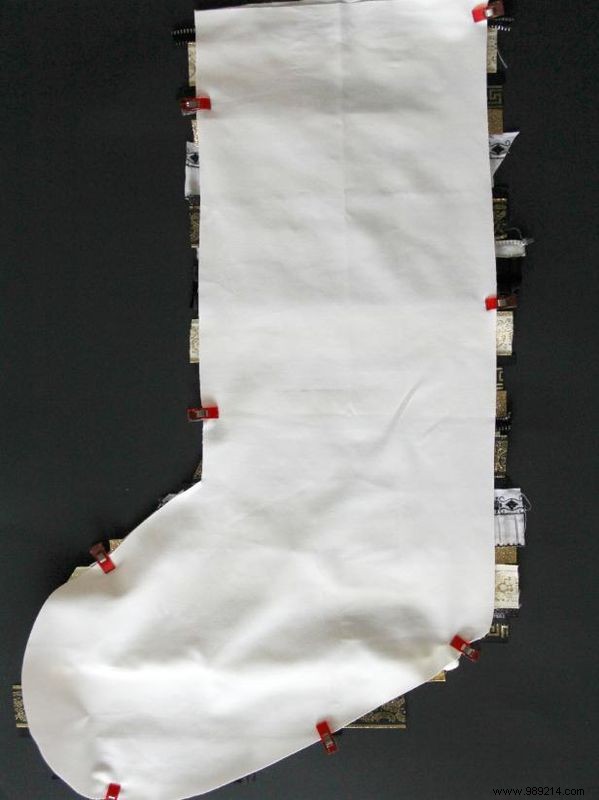
Cut out your fabric following the downloadable patterns. Cut two mirror-image pieces for the outer stocking fabric and two for the lining.

Step 3

DIY Bohemian Ribbon Christmas Stocking: Step-by-Step Guide with Free Pattern

Prepare the front stocking piece

Lay one outer stocking piece (the front side you want visible) right side up on paper or foil. Gather your ribbons, glue, and scissors.

Step 4

DIY Bohemian Ribbon Christmas Stocking: Step-by-Step Guide with Free Pattern

Cut the ribbons

Cut ribbon strips to match the width of your stocking.

Step 5

DIY Bohemian Ribbon Christmas Stocking: Step-by-Step Guide with Free Pattern

Glue the ribbons

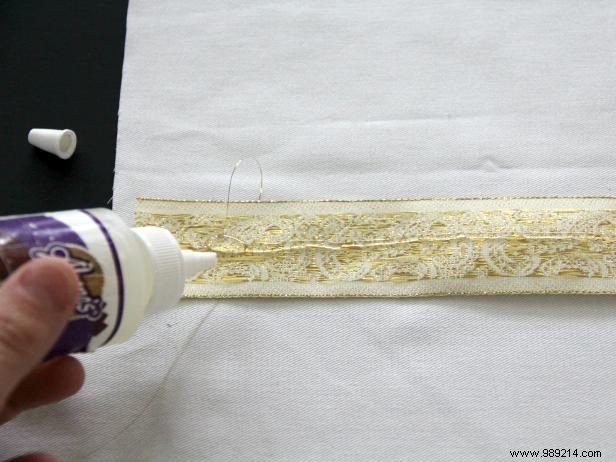
Apply a line of glue to the wrong side of each ribbon strip.

Step 6

DIY Bohemian Ribbon Christmas Stocking: Step-by-Step Guide with Free Pattern

Smooth down the ribbons

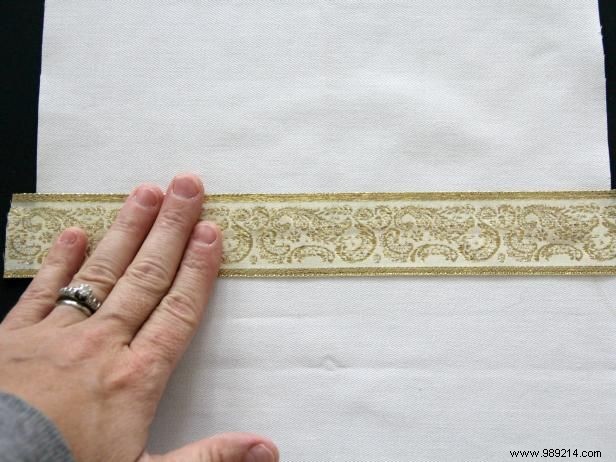
Place the glued ribbon wrong side down onto the stocking fabric, smoothing out any wrinkles.

Step 7

DIY Bohemian Ribbon Christmas Stocking: Step-by-Step Guide with Free Pattern

Layer with more ribbons

Repeat to cover the front with ribbons in your desired pattern. Overhanging ends are fine—trim later. Let glue dry for a few hours.

Step 8

DIY Bohemian Ribbon Christmas Stocking: Step-by-Step Guide with Free Pattern

Ribbons fully applied

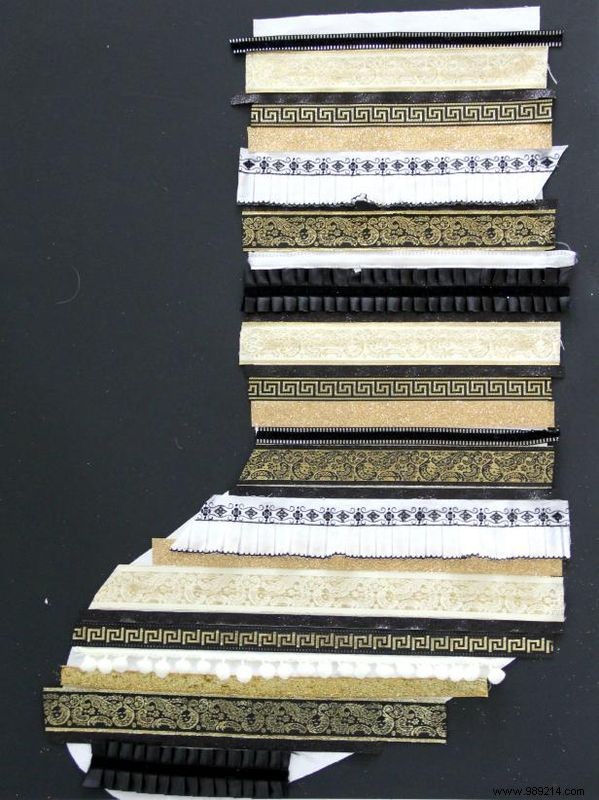
Your decorated front should now look like this.

Step 9

DIY Bohemian Ribbon Christmas Stocking: Step-by-Step Guide with Free PatternDIY Bohemian Ribbon Christmas Stocking: Step-by-Step Guide with Free Pattern

Sew front and back together

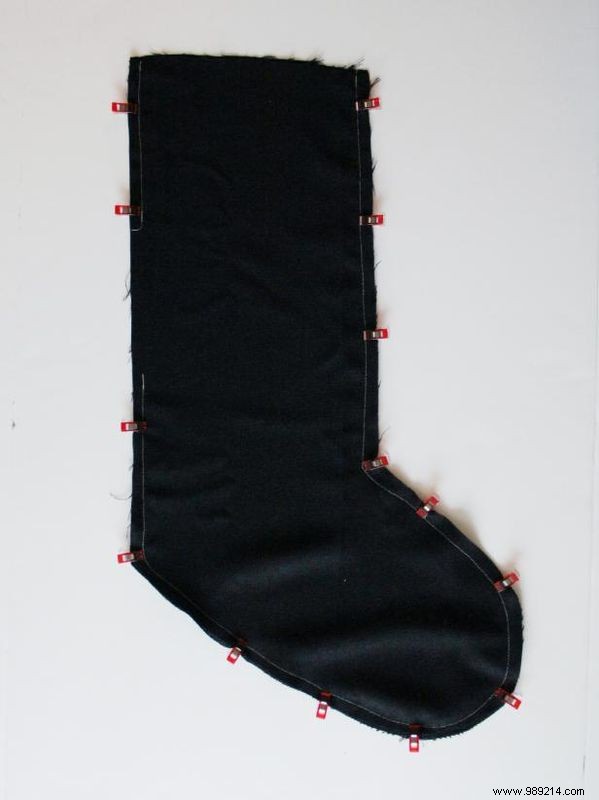
Place the plain back outer piece right sides together with the ribbon front, matching edges. Pin and sew sides, leaving top open. Trim excess ribbon from seams. Turn right side out.

Step 10

DIY Bohemian Ribbon Christmas Stocking: Step-by-Step Guide with Free Pattern

Sew the lining

Place lining pieces right sides together, pin edges, leaving a 5” opening on one side for turning and top unstitched.

Step 11

DIY Bohemian Ribbon Christmas Stocking: Step-by-Step Guide with Free PatternDIY Bohemian Ribbon Christmas Stocking: Step-by-Step Guide with Free Pattern

Create the hanging loop

Cut non-elastic ribbon to pattern length for the loop. Fold raw edges together to form loop. Pin raw edges to outer back seam and secure.

Step 12

DIY Bohemian Ribbon Christmas Stocking: Step-by-Step Guide with Free Pattern

Attach lining to outer

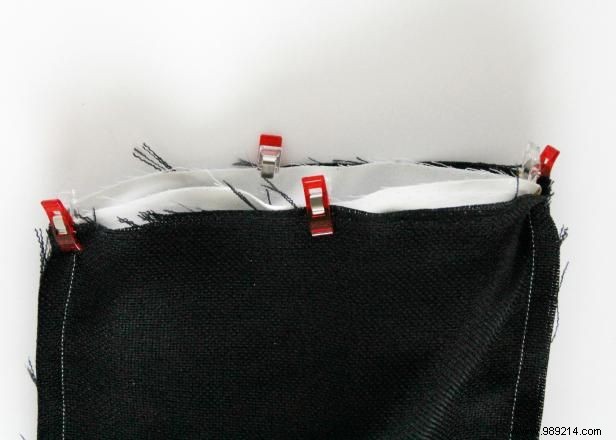
With lining inside out and outer right side out, slide outer into lining (right sides together). Match seams, pin top, and sew.

Step 13

DIY Bohemian Ribbon Christmas Stocking: Step-by-Step Guide with Free Pattern

Turn right side out

Pull stocking through lining opening to right side out. Close opening, tuck lining inside, and topstitch top edge if desired.

Step 14

DIY Bohemian Ribbon Christmas Stocking: Step-by-Step Guide with Free Pattern

Add bohemian accents

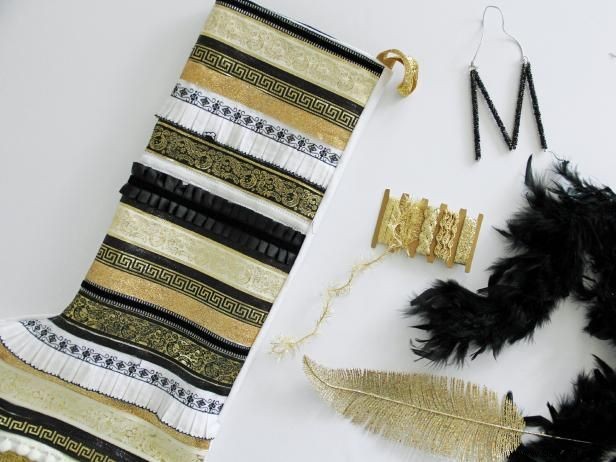
Enhance with rickrack, tassels, ribbons, feathers, or boa for flair. Bundle and tie at top with ribbon, then attach tassel to loop.

DIY Bohemian Ribbon Christmas Stocking: Step-by-Step Guide with Free Pattern