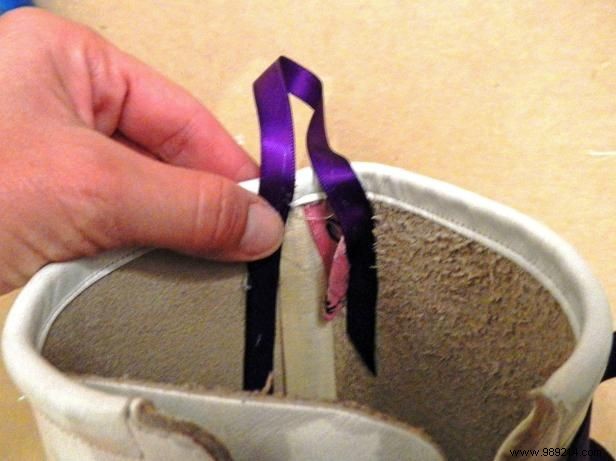
Start by removing the laces from the boot. Cut two 6-inch pieces of purple ribbon. Apply hot glue to each end and attach them to either side of the boot's seam, forming a sturdy hanging loop. Use plenty of glue to ensure it holds up under the weight of holiday gifts.
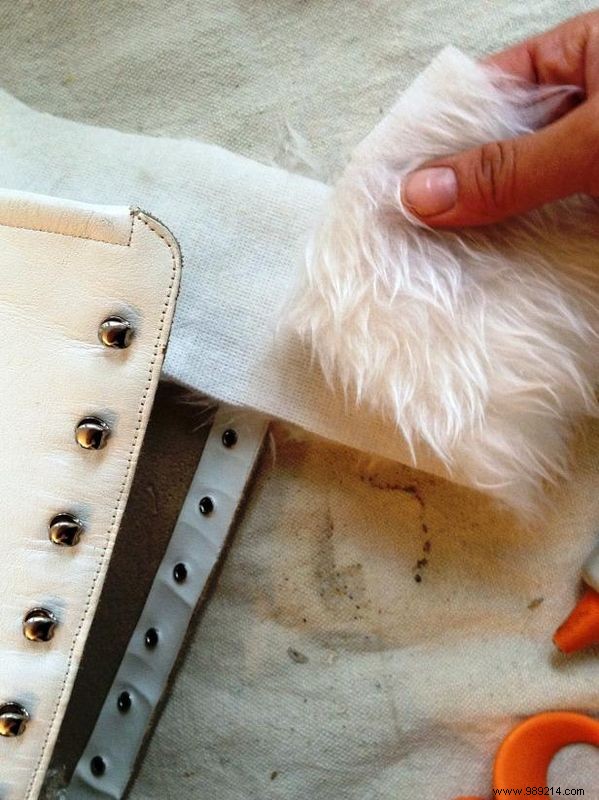
Measure the faux fur needed to wrap around the top of the boot, allowing at least a 5-inch overhang. This ensures the fur fully covers the boot's tongue when positioned correctly for a polished look.

Secure the faux fur to the inside of the boot using hot glue. Press firmly with your fingers to create a strong bond and a seamless finish.
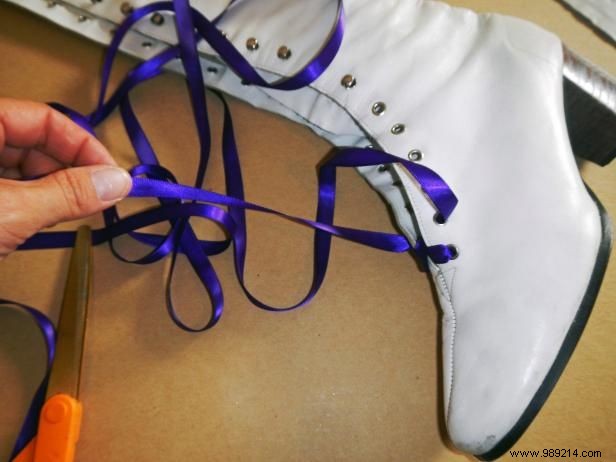
Thread ribbon through the boot's eyelets, lacing only halfway up. Stuff the foot and ankle areas with newspaper or packing material to maintain shape and reduce weight. Finish lacing, tie a bow, and let the ends hang naturally.

Susan Teare
Display your finished boot stockings on a mantel or shelf, keeping them at least 12 inches from any open flames or heat sources for safety.