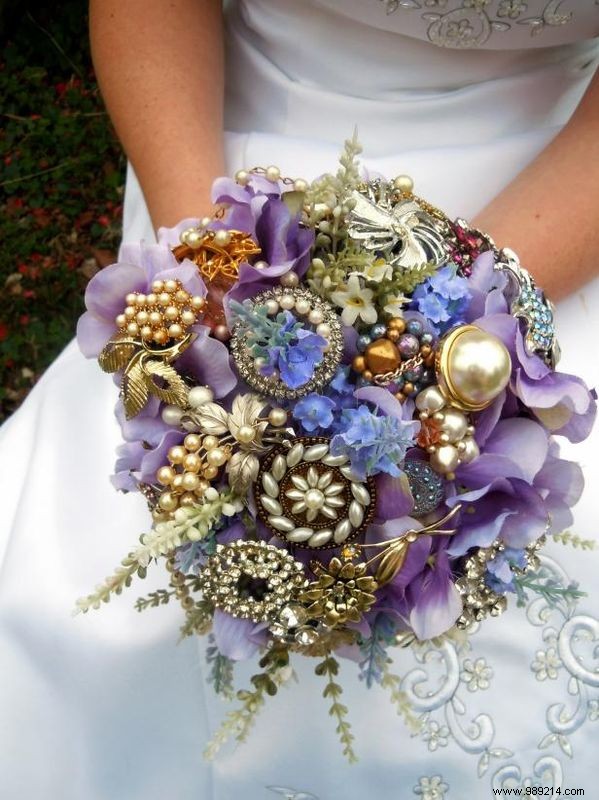
Brooch bouquets transform your wedding day into enduring memories. Crafted from cherished jewelry, these keepsakes can be treasured for years, symbolizing the love you share. Incorporate family heirlooms and meaningful pieces to honor those who've supported you every step of the way.
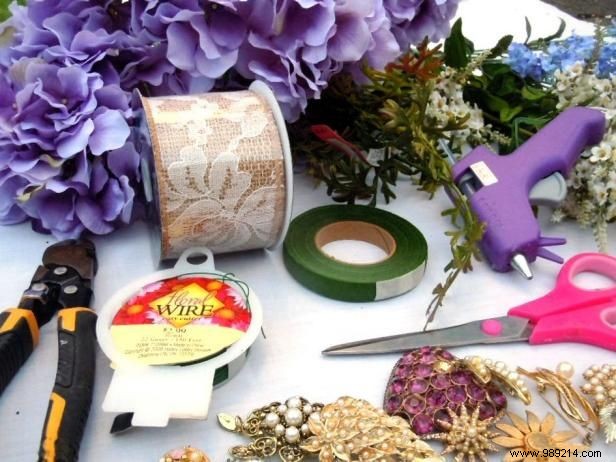
To create your brooch bouquet, gather these essentials: 30 to 60 brooches (or jewelry pieces like earrings, pendants, and pearl beads), silk flowers (hydrangeas work best), floral wire (22 gauge or larger), floral tape, wire cutters, scissors, hot glue gun, finishing tape (satin, burlap, linen, or silk), gold or silver paint, and a small paintbrush.
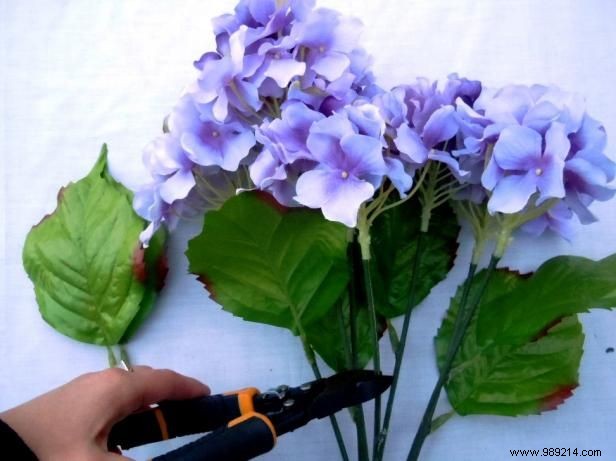
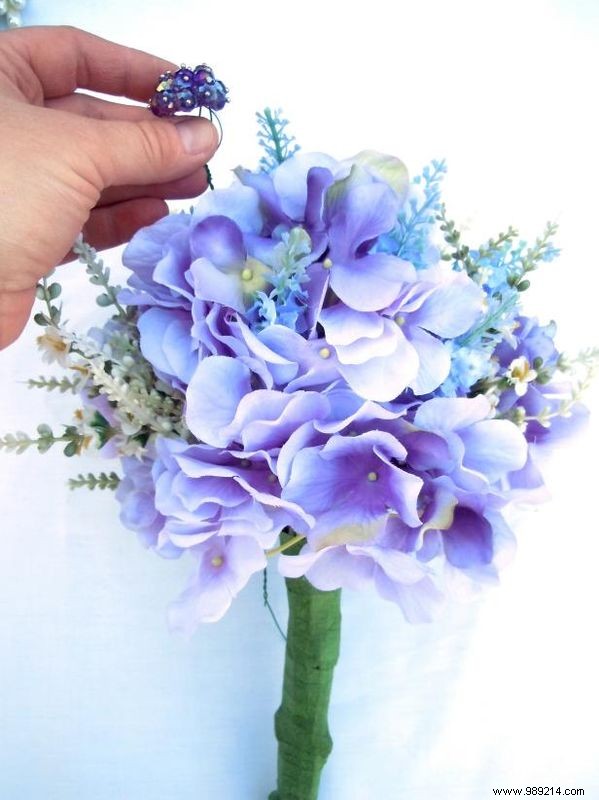
Gently pull all leaves from the silk flower stems. Remove any plastic bumps where leaves were attached. Once stripped of greenery, trim the stems to form the bouquet handle, leaving 6 to 8 inches from the flower base to the cut end.
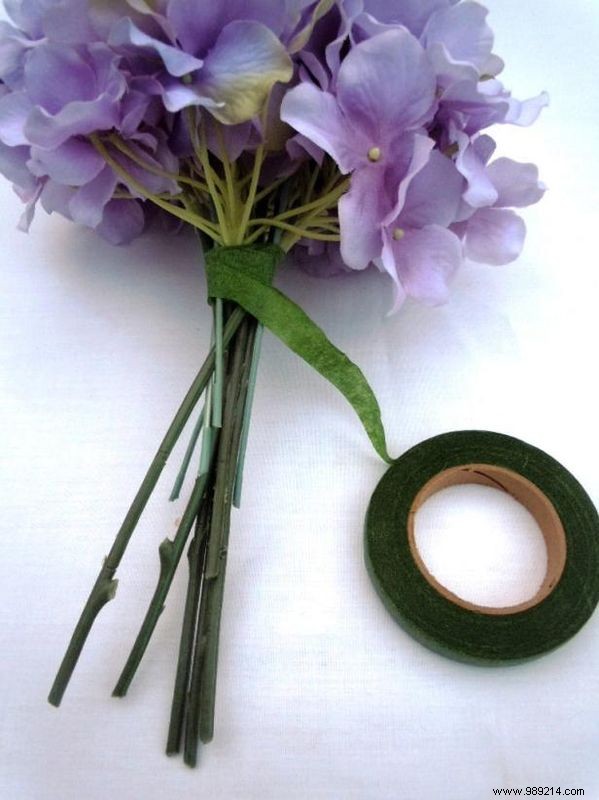
With stems trimmed, arrange the flowers into a compact bouquet, typically 8 to 9 inches wide. Mix flower types for variety, but silk hydrangeas provide an ideal base for brooches. Once shaped, secure the stems by wrapping floral tape from the top near the flowers, overlapping as you work down to the bottom.

Curating your brooches is the most rewarding part. Choose heirlooms, themed pieces, or colors that resonate. For a bouquet rich in sentiment, invite family and friends to contribute special items.
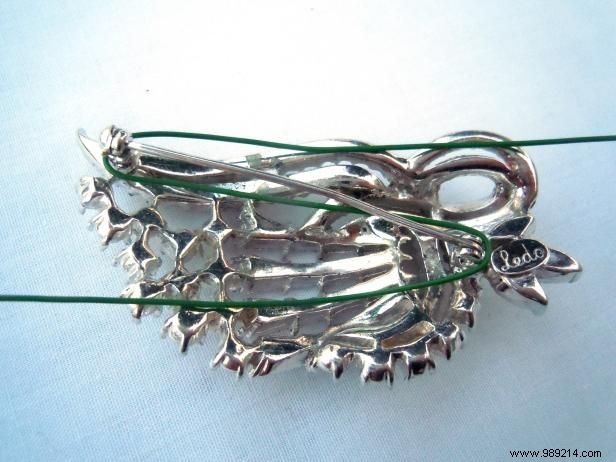
Cut floral wire to lengths 2½ times your bouquet stem. Bend each piece in half as a guide. For brooches with pins, wrap wire around the pin ends, cross in the middle, and twist tightly into a sturdy stem. For clip-style pieces, open the clip, wrap doubled wire around the base, cross it, close the clip, and twist the ends secure.
With brooches wired, insert them into the flower arrangement in groups of 8 to 10. Position securely against the flowers, then wrap floral tape around the stems to hold everything in place. Repeat until all brooches are integrated.
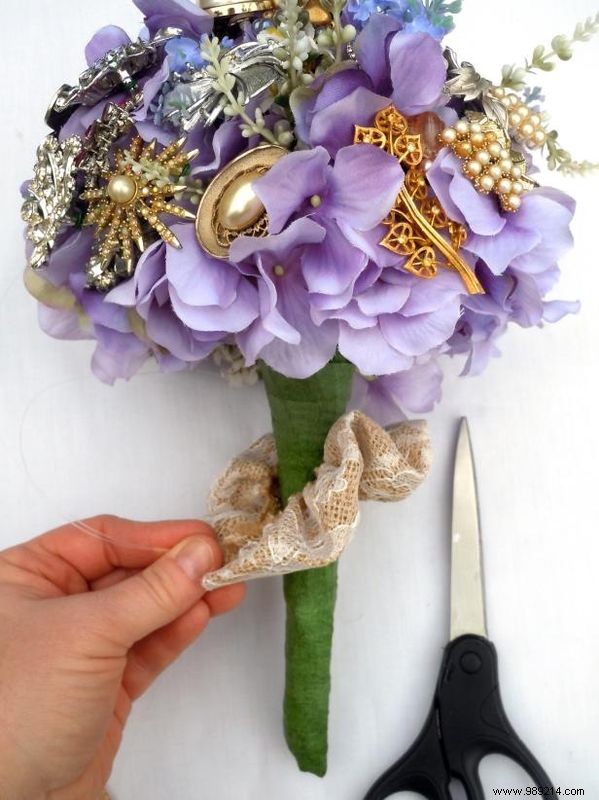
Conceal exposed wires with a decorative ruffle. Cut finishing tape to stem length. For wired ribbon, pull the wires to gather into ruffles; for unwired, weave in floral wire. Position under the flowers, twist wires to secure, tuck ends into blooms, and glue in place.
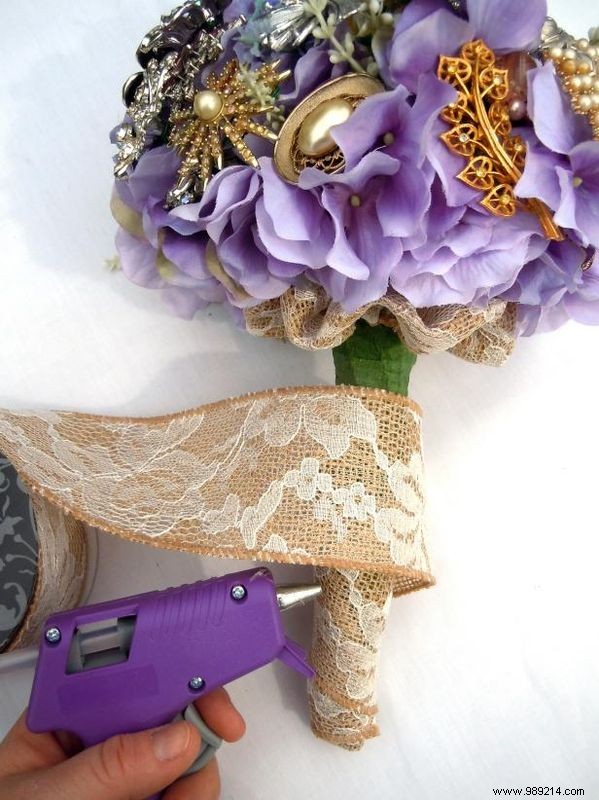
At the stem tip, fold a square of finishing tape into a triangle and hot-glue the center in place. Wrap the sides around the tip and secure. Spiral tape upward, gluing as you go. At the top, cut at an angle, tuck under the stems, and seal with hot glue.
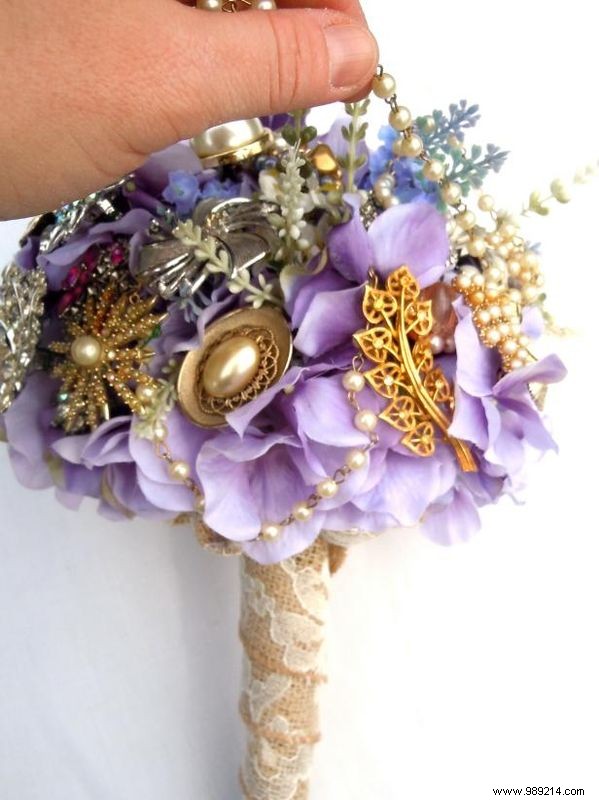
Weave a strand of pearls around the brooches for elegance. Glue any loose pieces secure. Paint visible green wires with gold or silver to blend seamlessly. These refinements complete your masterpiece.
Sarah Brobst
Your stunning brooch bouquet, brimming with memories and beauty, is now ready to shine on your wedding day.