Family Encyclopedia >> Home & Garden

DIY Braided Rug from Old T-Shirts: Easy Step-by-Step Tutorial Using a Sewing Machine

Introduction

DIY Braided Rug from Old T-Shirts: Easy Step-by-Step Tutorial Using a Sewing Machine

As a seasoned crafter with years of experience making recycled home decor, I've perfected a quick, reliable method for braided rugs. This approach uses simple braids and a sewing machine, cutting traditional weaving time dramatically while yielding durable, professional results.

Step 1: Create T-Shirt Yarn

DIY Braided Rug from Old T-Shirts: Easy Step-by-Step Tutorial Using a Sewing Machine

Part 1

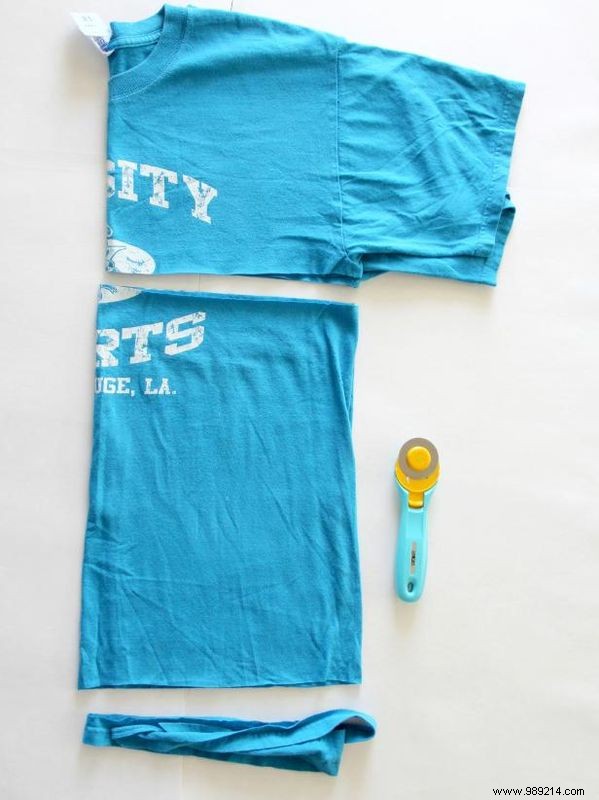
Cut the t-shirt just below the arms and remove the hem. Discard these pieces.

DIY Braided Rug from Old T-Shirts: Easy Step-by-Step Tutorial Using a Sewing Machine

Part 2

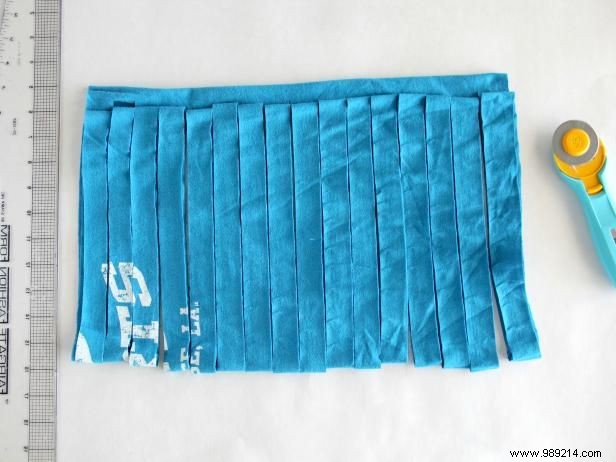
Fold the shirt in half, aligning side seams. Leave a 1-inch gap at the top and cut 1- to 2-inch strips from the bottom crease up, stopping short of the gap. Use a rotary cutter, scissors, and ruler for straight edges.

DIY Braided Rug from Old T-Shirts: Easy Step-by-Step Tutorial Using a Sewing Machine

Part 3

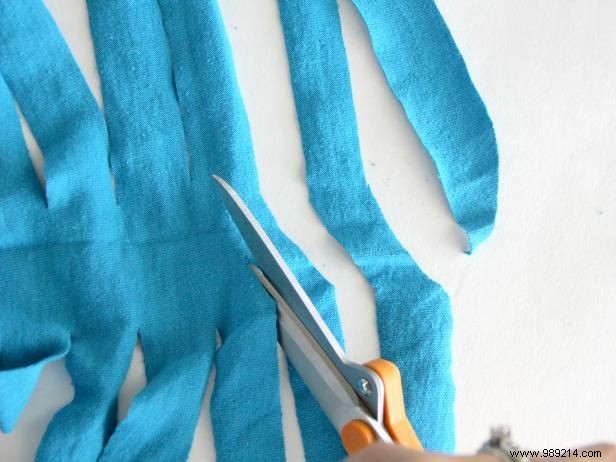
Lay the shirt flat with the uncut inch in the center. Make diagonal cuts connecting each strip's end to the next, creating one long continuous yarn strand.

Make T-Shirt Yarn

Step 2: Prepare the Yarn

DIY Braided Rug from Old T-Shirts: Easy Step-by-Step Tutorial Using a Sewing Machine

Pull Strips to Curl

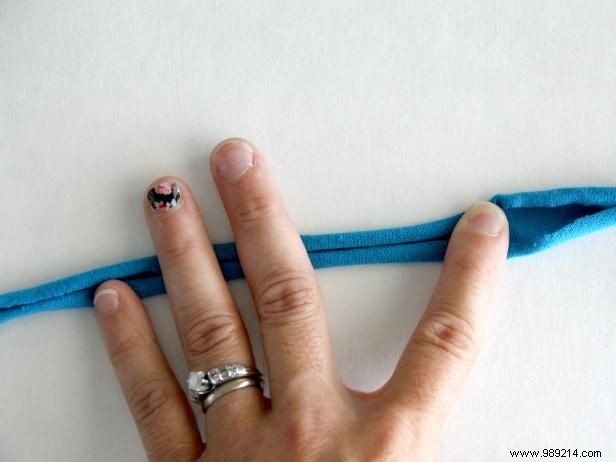
Gently pull each strip to curl the edges naturally, mimicking traditional yarn texture.

DIY Braided Rug from Old T-Shirts: Easy Step-by-Step Tutorial Using a Sewing Machine

Roll Strips

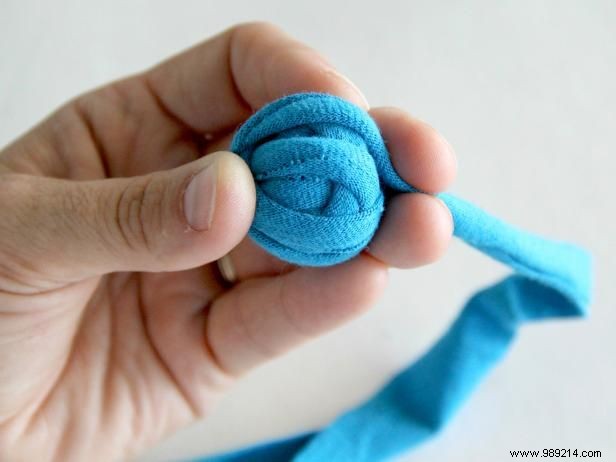
Roll the yarn into balls for easy handling.

DIY Braided Rug from Old T-Shirts: Easy Step-by-Step Tutorial Using a Sewing Machine

Make More Balls of Yarn

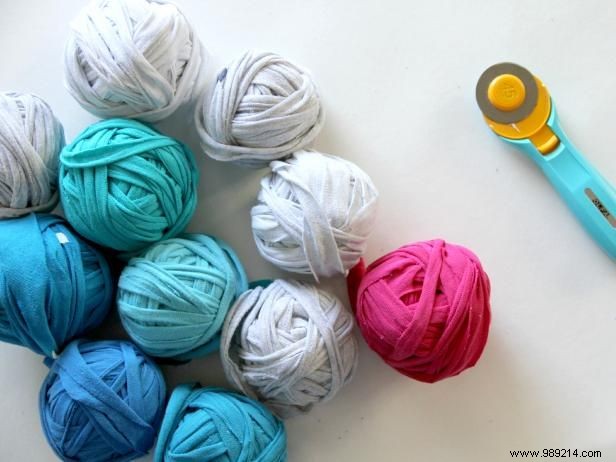
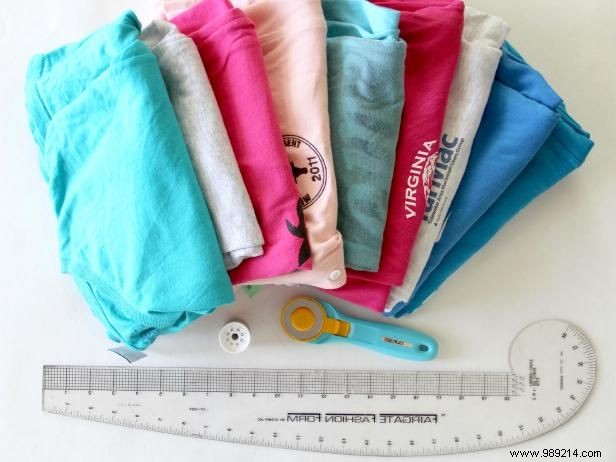
Repeat with additional shirts. For a 2' x 3' rug, prepare 5-6 skeins; for 4' x 6', use 10-12.

Prepare T-Shirt Yarn

Step 3: Braid the Strips

DIY Braided Rug from Old T-Shirts: Easy Step-by-Step Tutorial Using a Sewing Machine

Strips of Braided T-Shirts

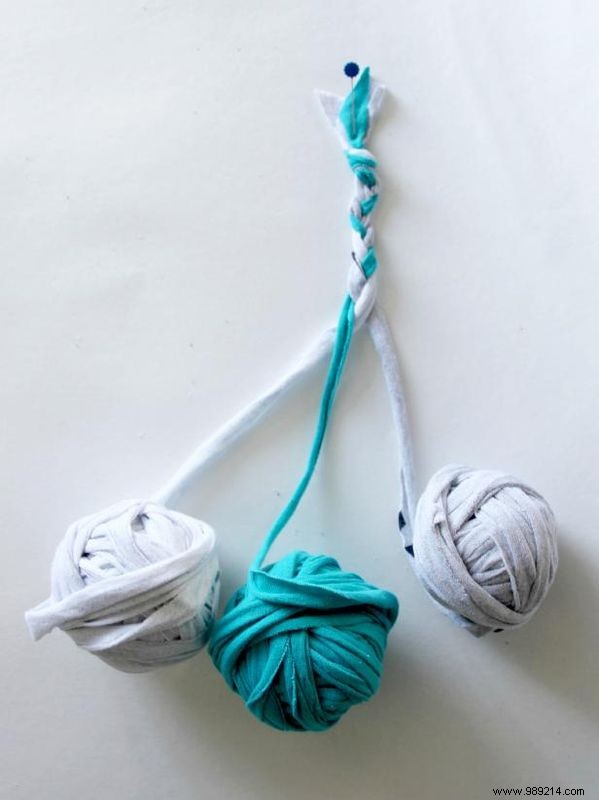
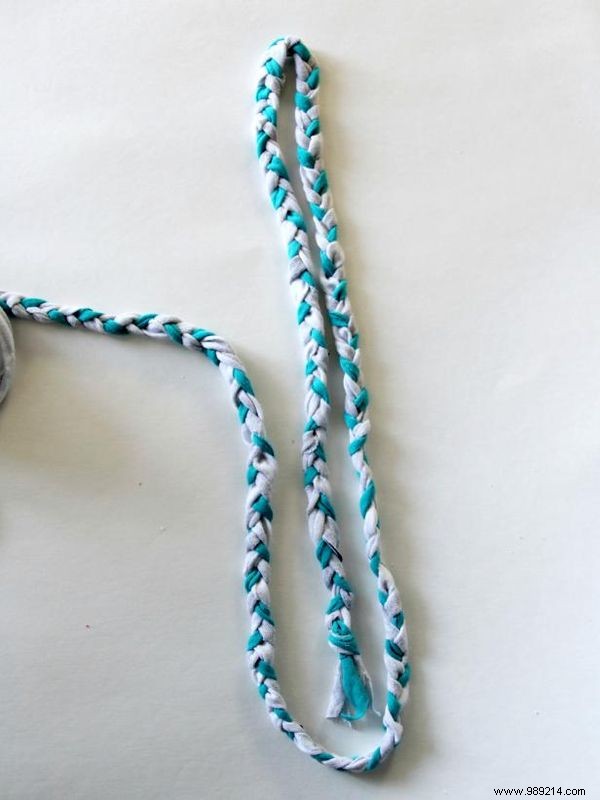
Knot the ends of three yarn skeins together. Braid tightly and evenly for about 5 feet to start. (Pro tip: Braid as you sew to avoid tangles—my preferred method from years of rug-making.)

Step 4: Form the Base

DIY Braided Rug from Old T-Shirts: Easy Step-by-Step Tutorial Using a Sewing Machine

Wrap Braids to the Right

For an oval rug, start with a long center strip and coil clockwise. For a circle, form a simple clockwise spiral. Wrap 2-3 times and pin securely.

Step 5: Set Up Sewing Machine

DIY Braided Rug from Old T-Shirts: Easy Step-by-Step Tutorial Using a Sewing Machine

Set Sewing Machine

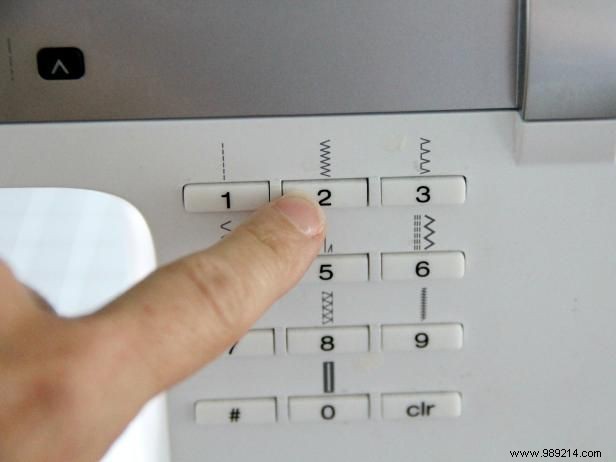
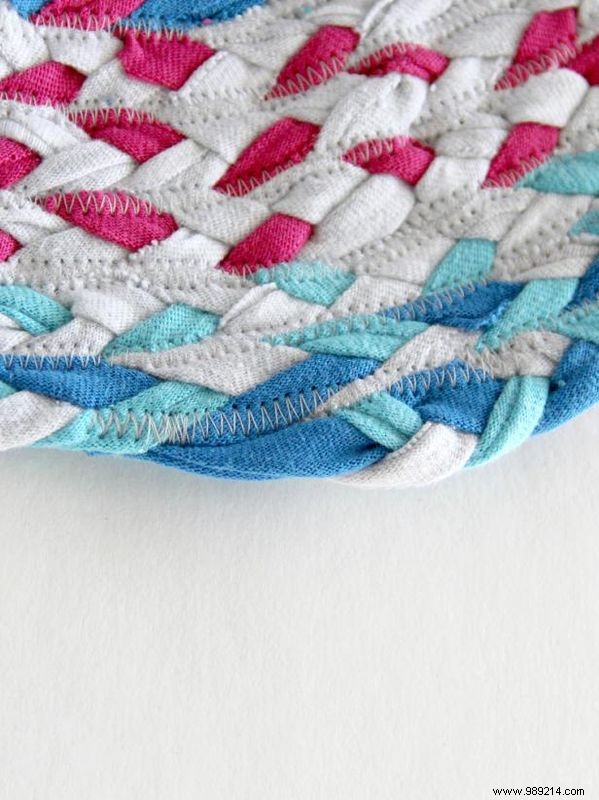
Select a zigzag stitch with the longest length for flexible seams.

Step 6: Sew Braids Together

DIY Braided Rug from Old T-Shirts: Easy Step-by-Step Tutorial Using a Sewing Machine

Sew Braids Together

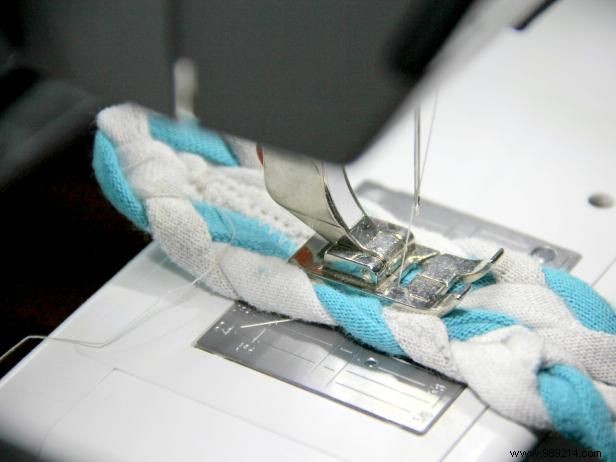
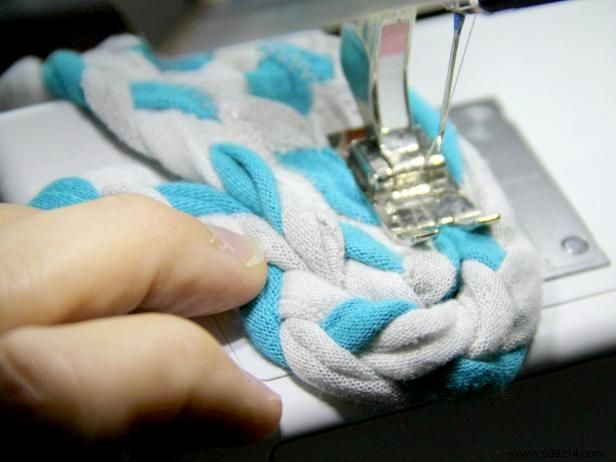
Stitch along braid edges, connecting layers securely as you coil outward.

Step 7: Navigate Curves

DIY Braided Rug from Old T-Shirts: Easy Step-by-Step Tutorial Using a Sewing Machine

Spin Around Curves

At curves, pivot the machine smoothly. T-shirt knit stretches, so keep tension loose to prevent puckering— a common pitfall I've learned to avoid.

Step 8: Switch Braids

DIY Braided Rug from Old T-Shirts: Easy Step-by-Step Tutorial Using a Sewing Machine

Switching to a New Braid

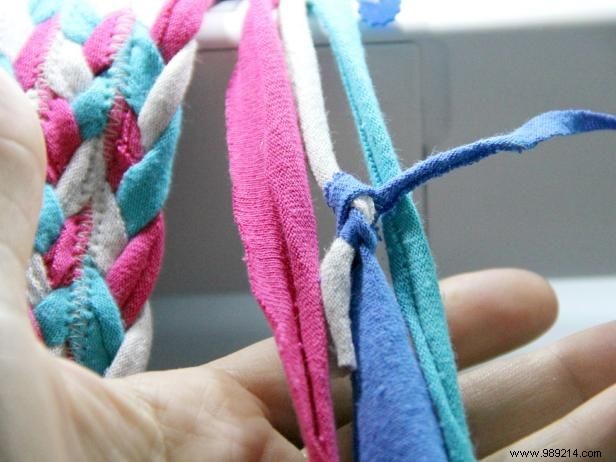
At braid's end, lower the needle into the rug, raise the foot, braid more length, then resume sewing. For skein ends, tie loosely to a new one and continue.

Step 9: Finish the Rug

DIY Braided Rug from Old T-Shirts: Easy Step-by-Step Tutorial Using a Sewing Machine

Rug Finish

At desired size, cut thread, tuck under, and zigzag-sew the end in place.

Step 10: Press Flat

DIY Braided Rug from Old T-Shirts: Easy Step-by-Step Tutorial Using a Sewing Machine

Iron Flat

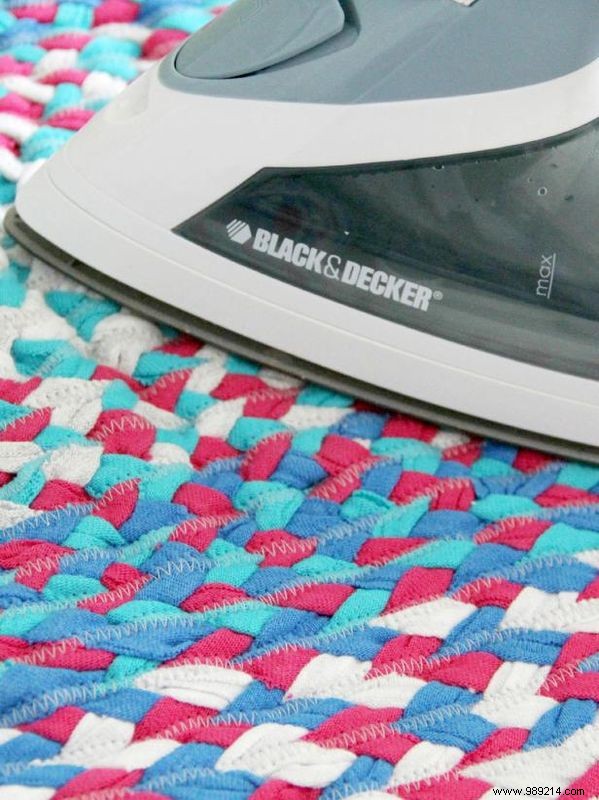
Press with an iron for a smooth, professional finish.

Step 11: Enjoy Your Masterpiece

DIY Braided Rug from Old T-Shirts: Easy Step-by-Step Tutorial Using a Sewing Machine

A Soft and Braided Masterpiece

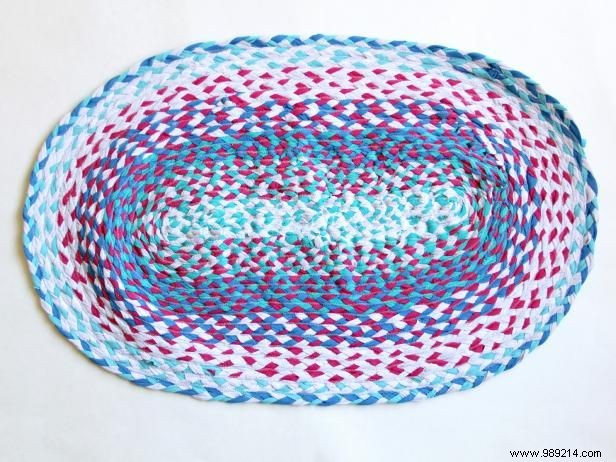
Relax on your eco-friendly, custom rug—crafted sustainably from upcycled tees.