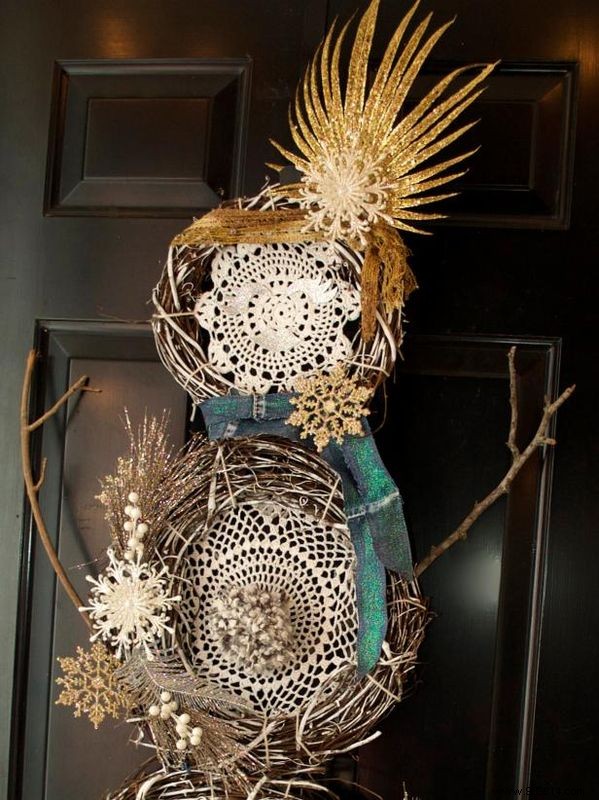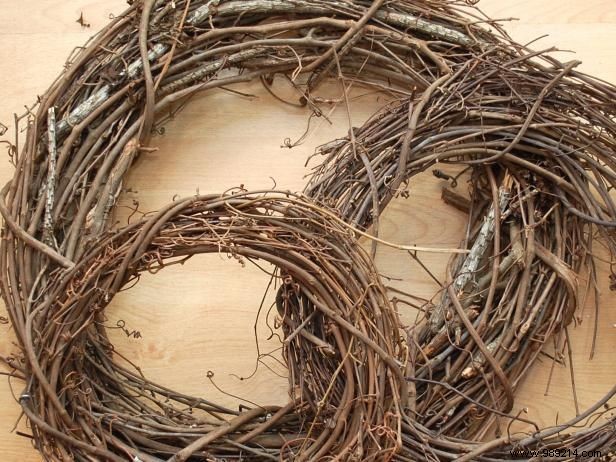
As a crafter with years of experience in boho holiday decor, start by collecting three vine wreaths in different sizes to build the snowman's body.
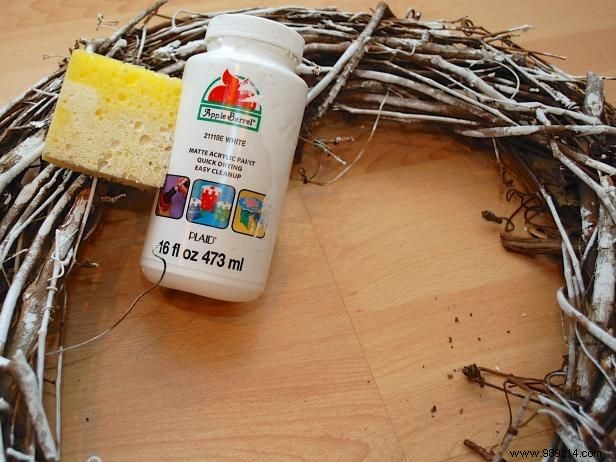
Apply white paint using a sponge for a rustic, textured finish—perfection isn't the goal here. Let them dry completely to ensure durability.
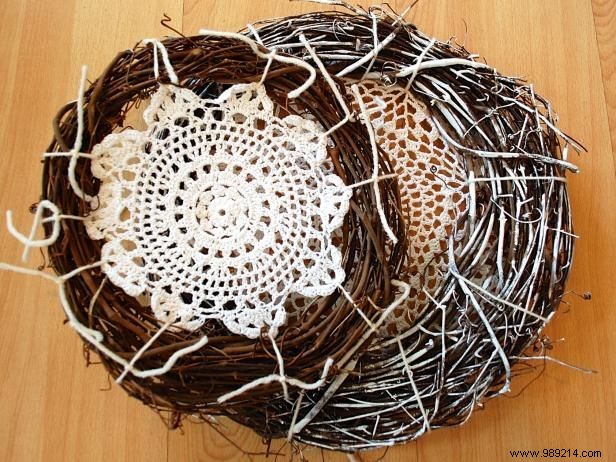
Secure doilies to the back of each wreath with yarn. Hunt for budget-friendly options at thrift or craft stores; lace yardage works too when cut to fit. Tie securely so they can be fluffed for volume.

Use zip ties to connect the three wreaths, stacking the smallest at the top and the largest at the bottom for a balanced snowman shape.
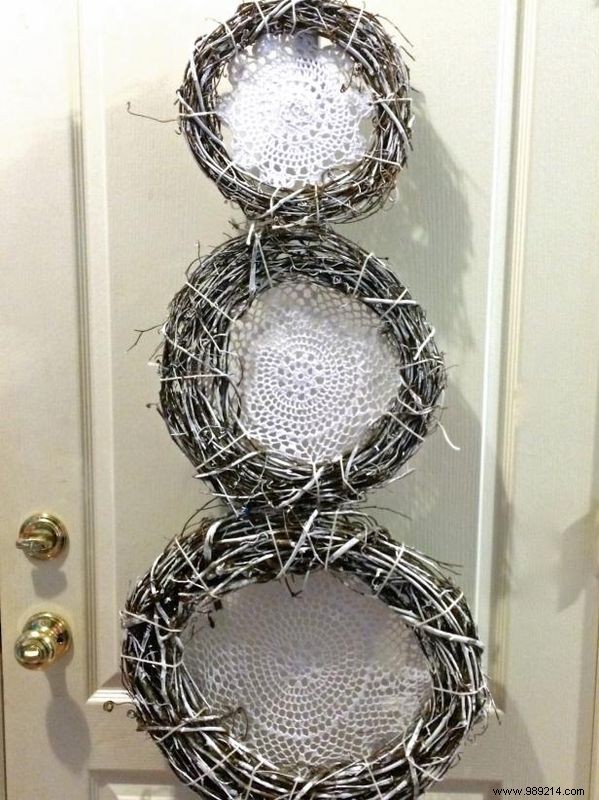
Hang the wreath on a door with a hanger now—it makes adding details much easier and safer.
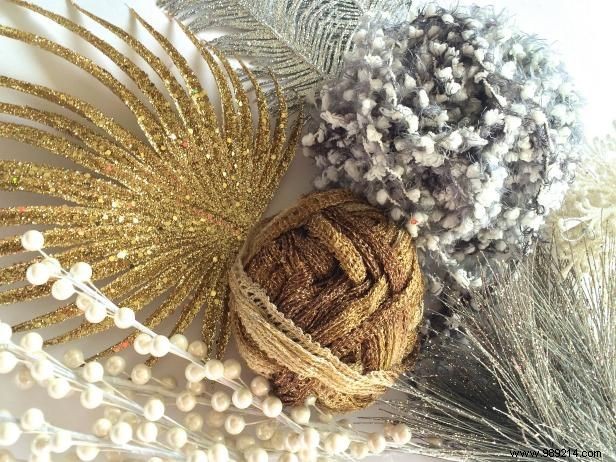
Customize with a hot glue gun and floral elements from the craft aisle. Add as much or as little as suits your boho vision for this snow lady.
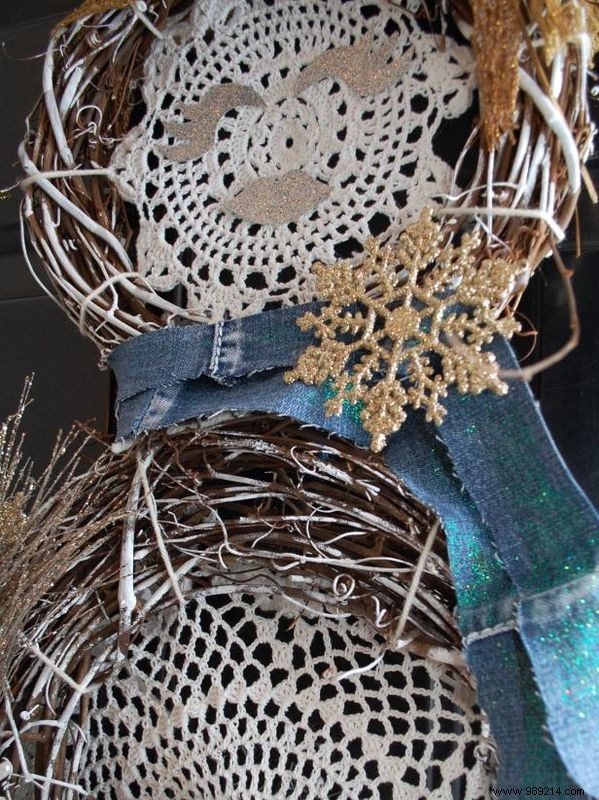
Craft a whimsical face with glittered canvas, wrap her in a cozy denim scarf, and finish with a stylish headband for personality.
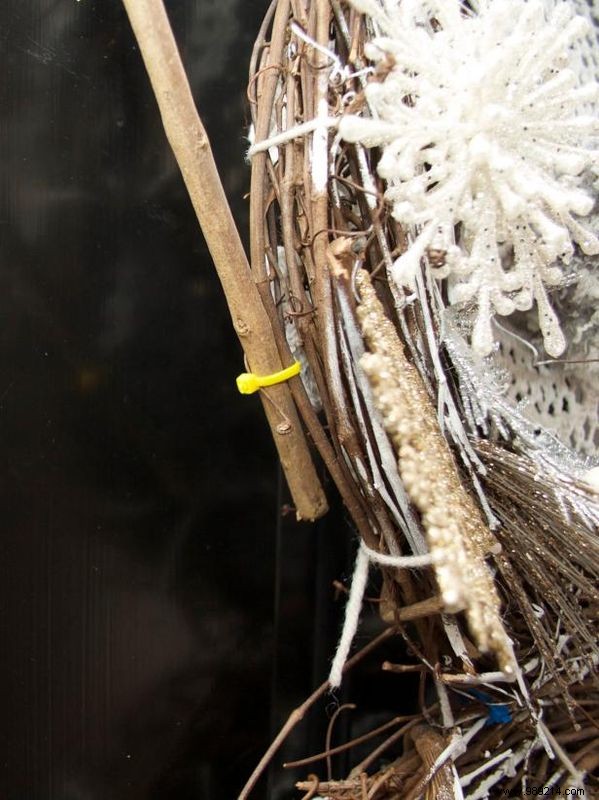
Secure two stick arms using strips or ties for that authentic snowman charm.