Transform ordinary pumpkins into a festive, glowing centerpiece. With years of crafting holiday decor, I've perfected this technique: hollow them out, paint silver for shimmer, then weave in Christmas lights and crystals for dazzling effect.
Using a sharp knife, cut holes in the bottom and top of all three pumpkins and scoop out the insides. Position the bottom hole slightly off-center to accommodate the light strand plug. For the top pumpkin, avoid cutting near the stem. Ensure holes are large enough to thread lights through easily.
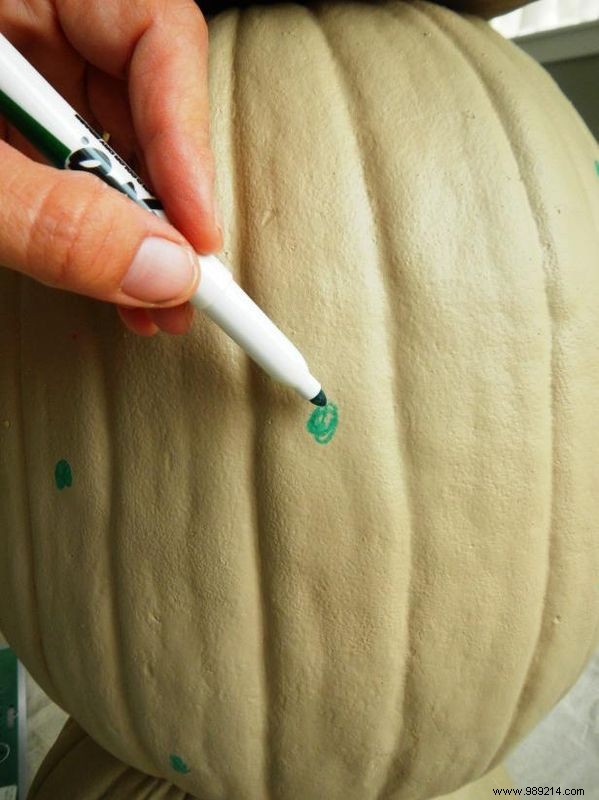
With a dry-erase marker, draw small circles on each pumpkin where you want the light bulbs to emerge, planning an even, attractive pattern.
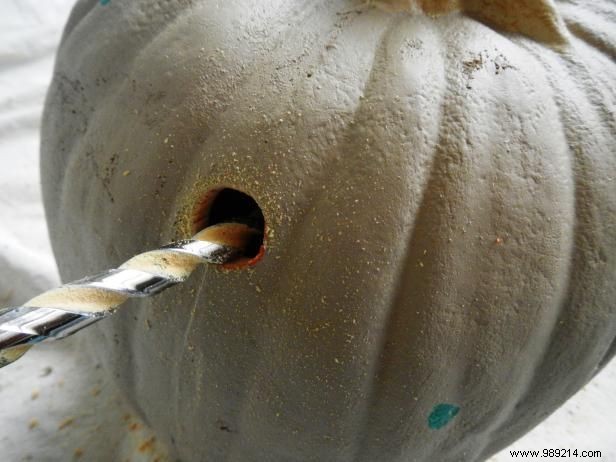
A serrated knife or drill works best to excise the marked circles. Test-fit a bulb socket (remove the bulb first) and enlarge as needed until it passes through snugly—secure enough to hold the bulb without slipping.
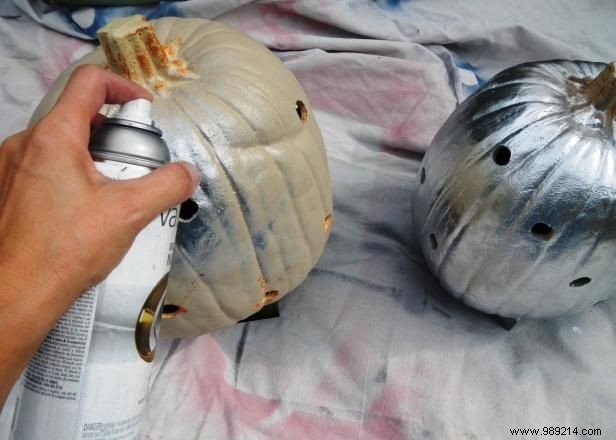
Place pumpkins on a protected tarp and apply metallic silver spray paint evenly. Allow full drying time for a professional, glossy finish.
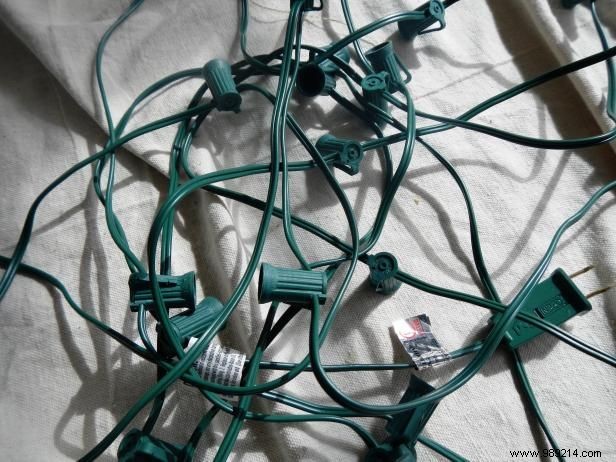
Verify your Christmas lights function properly, then unscrew all bulbs from sockets. This simplifies feeding the strand through the pumpkins.

Begin at the bottom pumpkin: pull sockets through marked holes and secure bulbs. Leave ample cord at the base for plugging in. Advance up through each pumpkin, allowing slack between for stability and shape.
Enhance the sparkle by wrapping pre-cut glass crystal strands around the base, middle, and top of each pumpkin for that extra touch of elegance.