DIY Hanging Spoon Pendant Necklace: Easy Upcycled Jewelry Tutorial
By Lucie Rowe
Required Materials and Tools
- Spoons (gold-colored spoons work well since no heating is involved)
- Rotary tool with cutting wheel or hacksaw
- Safety glasses and gloves
- Drill or drill press
- Drill bit suitable for metal
- Punch and hammer
- Old decorative earrings or brooches
- Two-part epoxy resin
- Bowl of sand or raw rice
Step-by-Step Instructions
- Choose a spoon to serve as the base for your pendant. No heating is required, so gold-colored spoons are ideal.
- Secure the spoon—handle facing out—in a vise. Avoid overtightening to prevent distorting the spoon bowl.
- Cut the handle with a rotary tool and cutting wheel or a hacksaw. Cut flush with the bowl or leave a short stem. Safety Tip: Always wear safety glasses and gloves when cutting metal. Freshly cut edges get very hot—avoid touching them.
- Smooth the cut edge with a rotary tool and wire wheel or by hand sanding.
- Locate where to drill a small hole in the stem or base for the necklace chain. Use a punch and hammer to create a starter notch to guide the drill.
- Drill the hole using a drill press, rotary tool, or hand drill with a metal-appropriate bit.
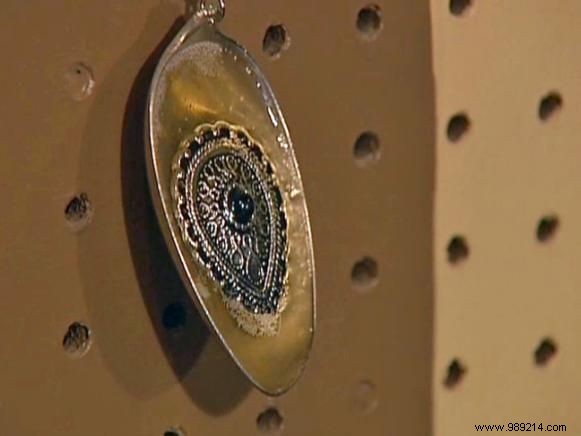
- Choose an old earring or brooch (or part of one) to feature. Place it in the spoon bowl, then stabilize the spoon in sand or rice to hold it steady while epoxy dries.
- Mix enough two-part epoxy to fill the bowl (available at home improvement or craft stores). Use a disposable container and follow package directions. Mix in glitter or beads for extra sparkle if desired.
- Confirm the spoon is stable and the decoration positioned perfectly, then slowly pour the epoxy into the bowl.
- Let dry for at least 24 hours, then attach to a necklace chain with jump rings.
- For an alternative, use clear enamel instead of epoxy—apply in multiple layers per package instructions.