As a seasoned woodworker with years of experience crafting custom holiday decor, I've reimagined the traditional Christmas wreath with mid-century modern flair. This geometric starburst design blends symmetry and subtle asymmetry, evoking a snowflake or flower crown while delivering timeless holiday cheer. Durable and weatherproof, it's perfect for outdoor display year after year.
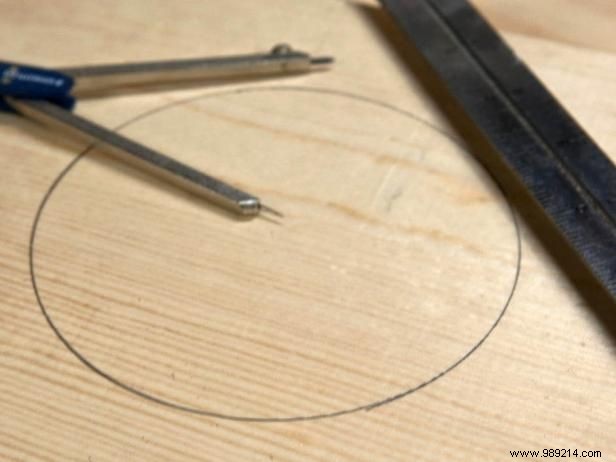
Use a compass or circular guide to draw a 5-inch circle on a 1x8 wood board.
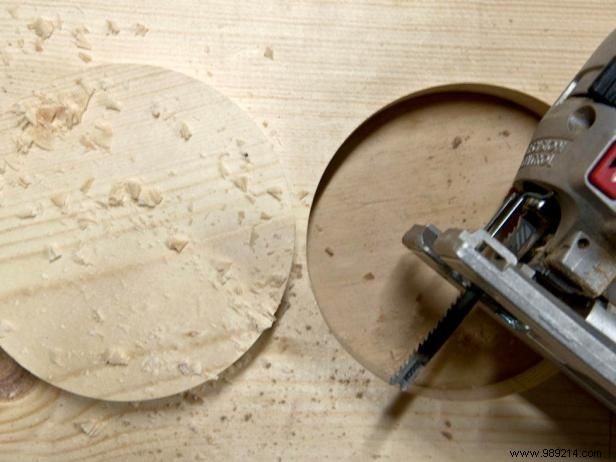
Drill a starter hole, then use a jigsaw to cut out the interior circle.
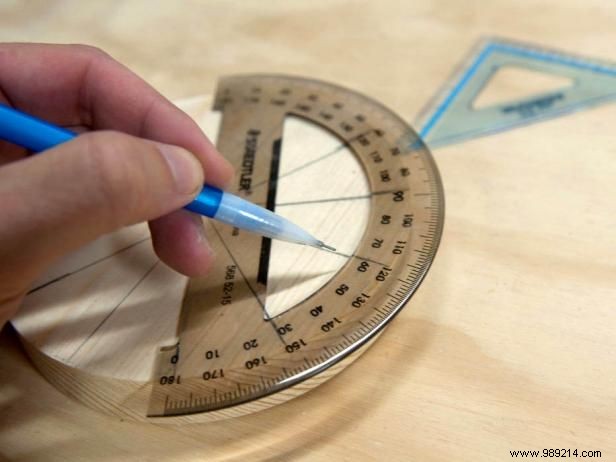
With a protractor, mark the disk every 30 degrees (0, 30, 60, 90, 120, 150, 180) on both halves for 12 evenly spaced points, like clock positions. Transfer these marks to the disk's outer edge.
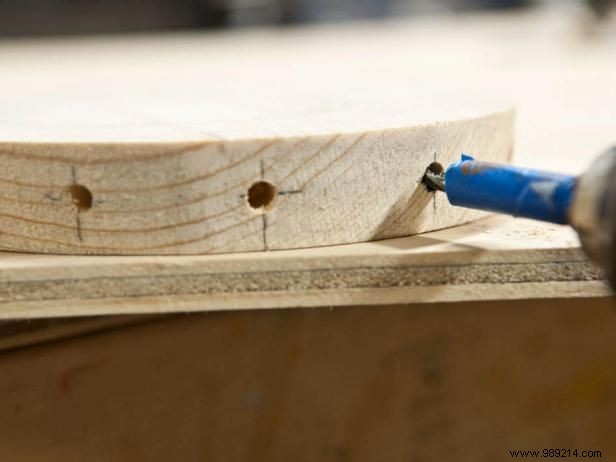
Use a 3/16-inch drill bit to bore holes at each of the 12 marks, 3/4-inch deep. Wrap masking tape around the bit as a depth stop for consistency.
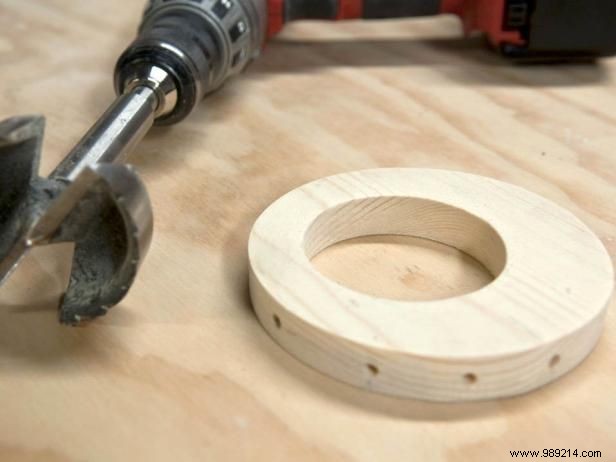
Draw a 3-inch circle on the disk, positioned slightly off-center but ensuring at least 7/8-inch of wood remains on all sides. Cut it out with a jigsaw or a 3-inch hole saw.
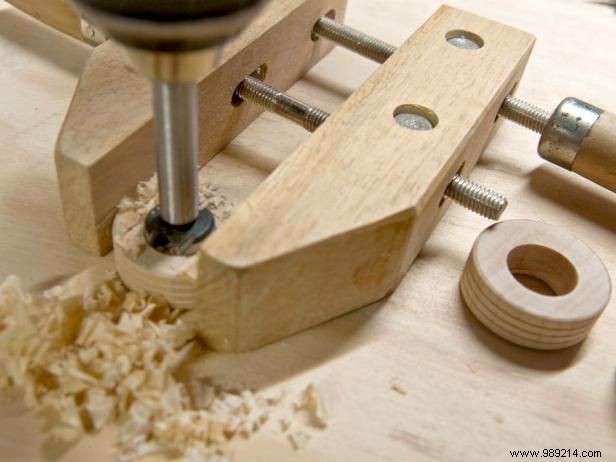
For the orbiting satellites, source 1-1/2-inch hardwood wheels from craft or hobby stores' unfinished lumber section. If unavailable, cut 3/4-inch disks from a 1-1/2-inch rod. Enlarge the axle hole to 3/4-inch for a lighter, crown-like appearance—off-center is fine for asymmetry. Clamp each securely and drill, leaving at least 3/8-inch on one side for pins.
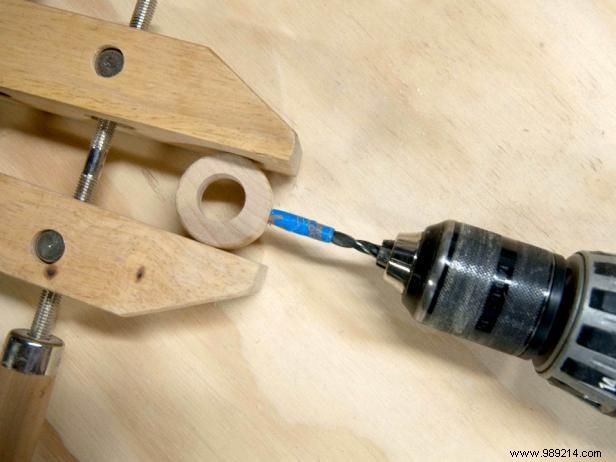
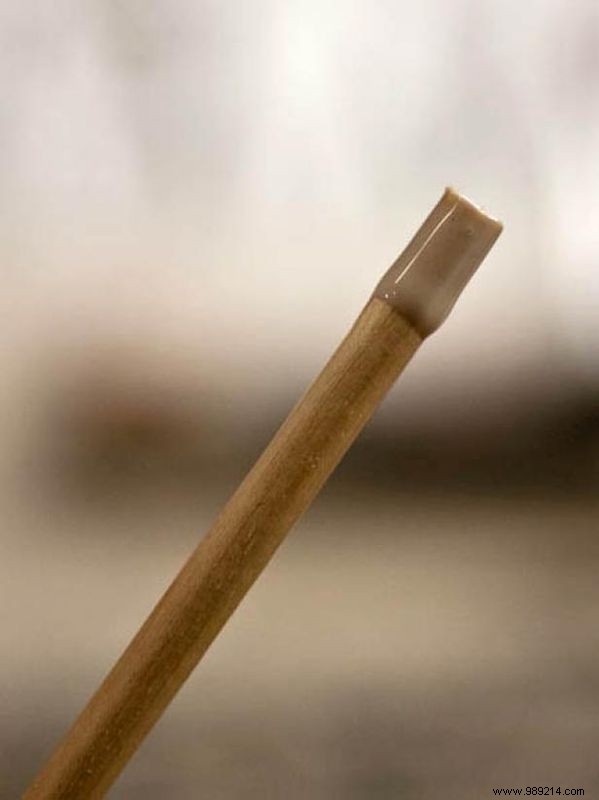
Drill a 1/4-inch deep hole with a 3/16-inch bit on one side of each satellite for the pin spokes.
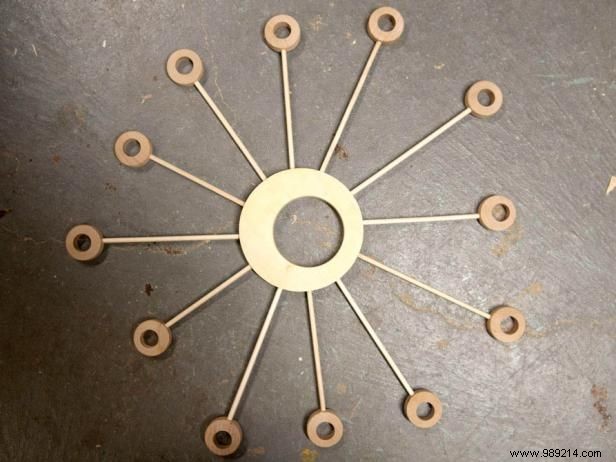
Position the central disk and 12 satellites. Cut dowel pins to varied lengths (e.g., 6, 5-5/8, 5-1/4, and 4-3/4 inches) for balance. Dry-assemble to perfect the starburst layout.
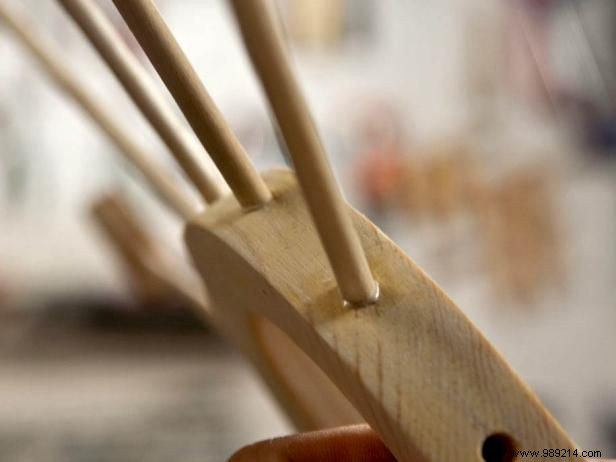
Once satisfied, apply glue. Dip one end of each pin in wood glue for full circumferential coverage, insert into satellites, withdraw slightly, and press firmly. Let dry at least one hour. Repeat for attaching rays to the central hub, using medium weight to secure.
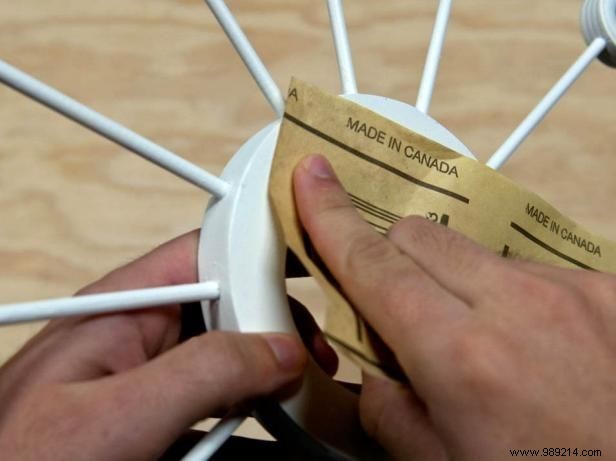
For outdoor durability through winter, sand with 150- then 220-grit paper and clean thoroughly. In a ventilated area, apply exterior primer. Dry, lightly sand with 220-grit, then add a second coat to seal against moisture.
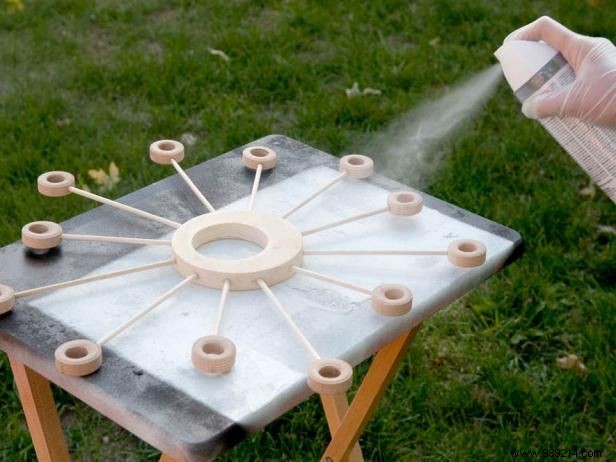
Finish with white spray paint followed by clear sealer for a robust, reusable weather-resistant surface.