Hanging non-woven wallpaper is a clean, quick, and professional process. This breathable fabric material excels in wallpapers, making installation straightforward for DIY enthusiasts and pros alike.
Follow this step-by-step guide, informed by years of hands-on experience in wall coverings.
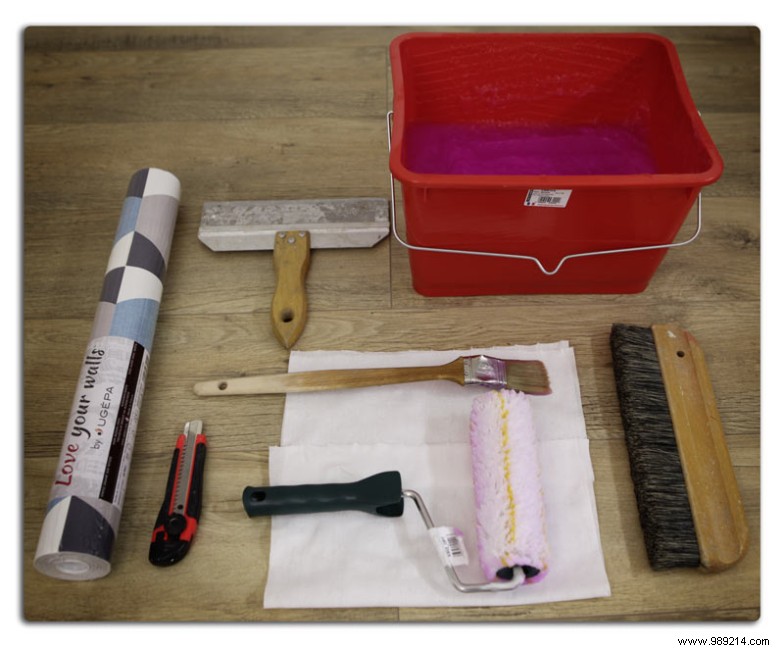
Gather Your Tools and Materials
Non-woven wallpaper requires minimal prep—no messy glue on the paper itself. Work efficiently with these essentials:
- Level or plumb line
- Paste brush
- Wallpaper roll(s)
- Utility knife (use caution)
- Smoothing brush
- Non-woven wallpaper adhesive
- Your non-woven wallpaper
Step-by-Step Installation
- Sand the wall lightly to smooth minor imperfections if needed.
- Verify you have the correct number of rolls to avoid mid-project store runs.
- Align the first strip perfectly: Use a level for plumb, and mark a faint guideline on the wall.
- Mix glue if powdered; opt for tinted versions to track coverage.
- Apply glue directly to the wall section using a paste brush and roller.
- Position the strip along the line, then smooth it flat with your hand.
- Smooth thoroughly with a wide brush.
- Cut excess at the baseboard using a utility knife and squeegee.
- Wipe away excess glue with a clean, damp sponge.
- Glue the next wall section and butt seams edge-to-edge. Non-woven won't shrink.
- Continue until complete—precision pays off.
Non-woven wallpaper shines in practicality: Easy to install and remove dry in one piece—no strippers needed. Repaper seamlessly anytime.
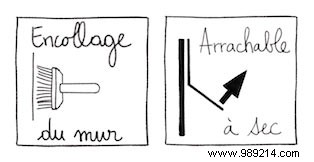
Look for these key pictograms to confirm non-woven quality. At Scenolia, choose rolls or custom one-piece panels (best with two people for seamless results).