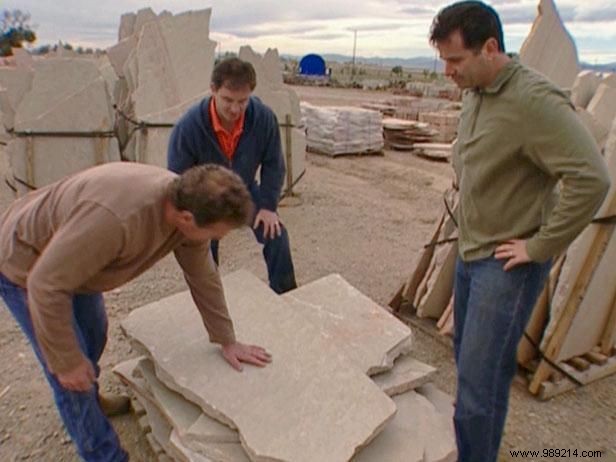
With years of experience sourcing stone from quarries and yards, start by selecting a slab suited for a coffee table: roughly 3 feet long, 2 feet wide, and 2 inches thick (Image 1). Prioritize color and texture while inspecting for cracks or flaws that could weaken the structure. Transport it carefully to your workspace and support it on a stable platform or bed of sand for safe handling.
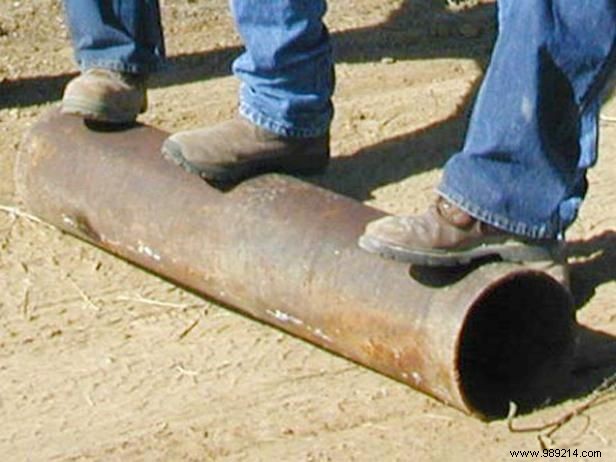
The base can repurpose an old table frame, a tree stump, or creative scrap. For a custom welded steel base, visit a junkyard for sturdy structural steel—avoid aluminum, stainless, or cast iron. Ideal finds include Schedule 40 pipe (Image 2), a disc plow base, and truck leaf springs, ensuring reliable support for the heavy top.
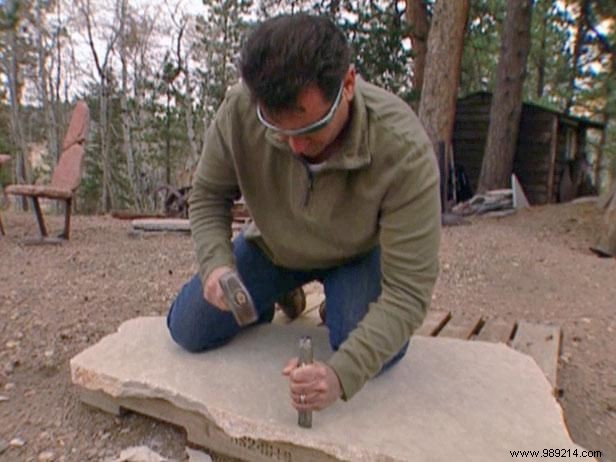
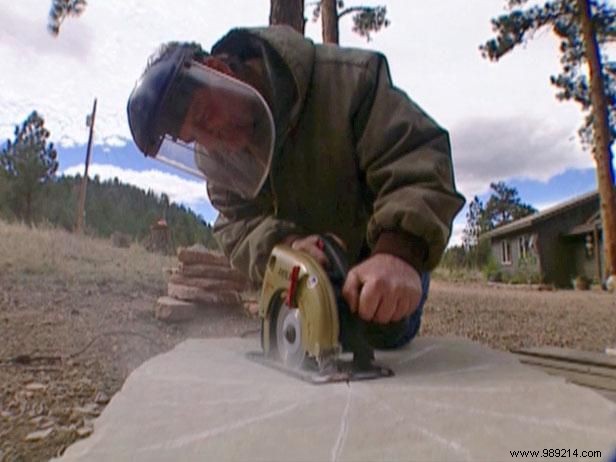
Using professional-grade tools like a stone hammer and carbide chisel (Image 1), refine the slab to your desired form. For geometric edges, score initial lines with a circular saw or grinder (Image 2). Sketch freestyle with chalk or a stone scribe.
Work in small sections to avoid unpredictable breaks—the smaller the chip, the better the control. Employ undercutting: trim the lower edge first to reduce leverage and ensure precision. Finish with a lighter hammer and carbide chisel to smooth sharp edges. Always prioritize safety with protective eyewear.
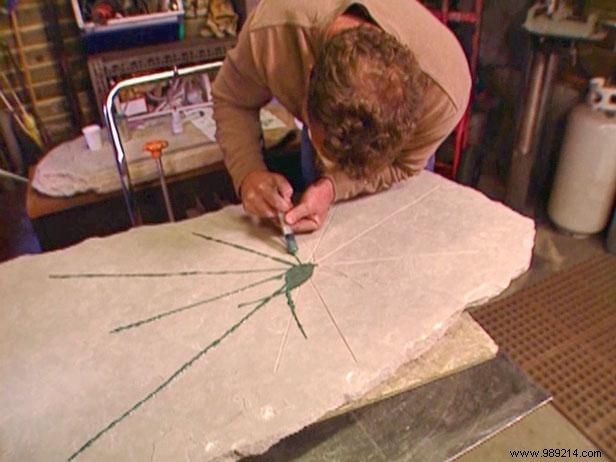
Elevate your tabletop with custom designs. Sketch patterns in chalk, then score 1/8-inch deep grooves using a diamond-blade circular saw for straight lines or a grinder for curves—repeat for wider channels.
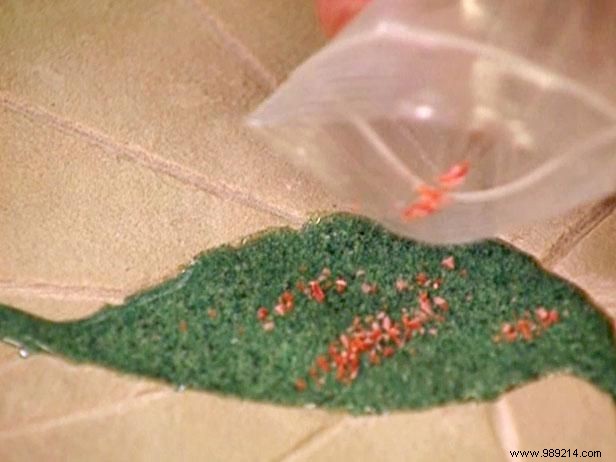
Create inlays from crushed stone, epoxy, and hardener sourced from craft suppliers (Image 1). Mix thoroughly and apply via syringe for precision (Image 2), avoiding overfill. Use finely ground pigments for smooth flow. Cure for about four hours before further work, yielding a professional, embedded finish.
Raw stone develops character but stains and absorbs moisture easily. Seal for a matte natural look or use clear resin for gloss.
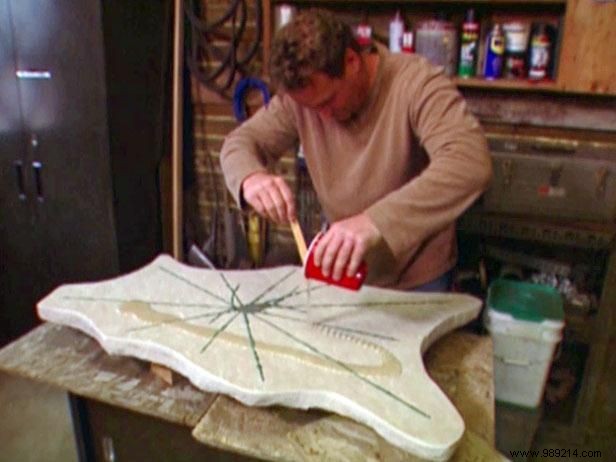
Prop the slab on plywood or scrap wood. Pour resin evenly, spread with a tongue depressor, and feather edges. Allow full cure before assembly to protect your craftsmanship.
As an experienced fabricator, assemble the base from junkyard salvage: Schedule 40 pipe, plow disc, and truck leaf springs. Novices should consult a welding shop.
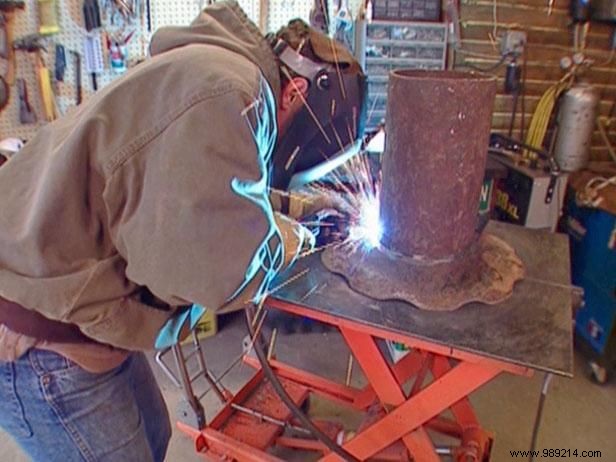
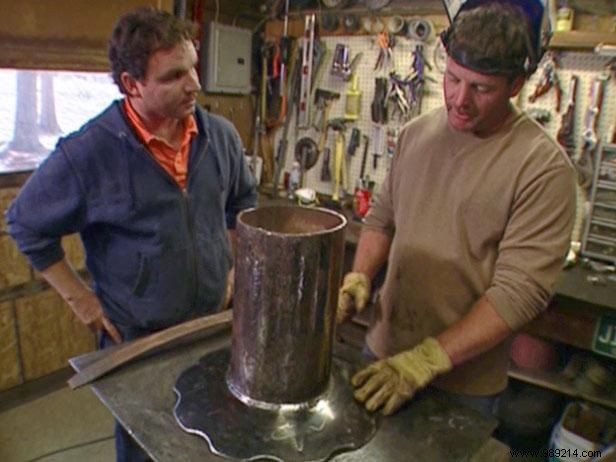
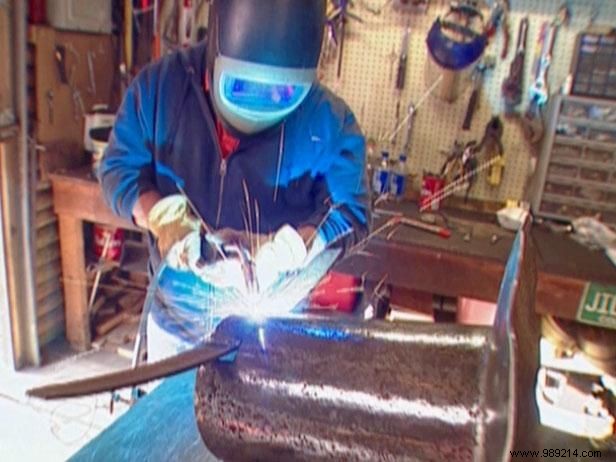
Cut pipe to height with an abrasive hacksaw (Image 1), deburr and derust ends. Prep the disc base similarly, ensuring clean mating surfaces. Level the pipe with a magnetic tool, tack in sections (Image 2), then grind clean (Image 3).
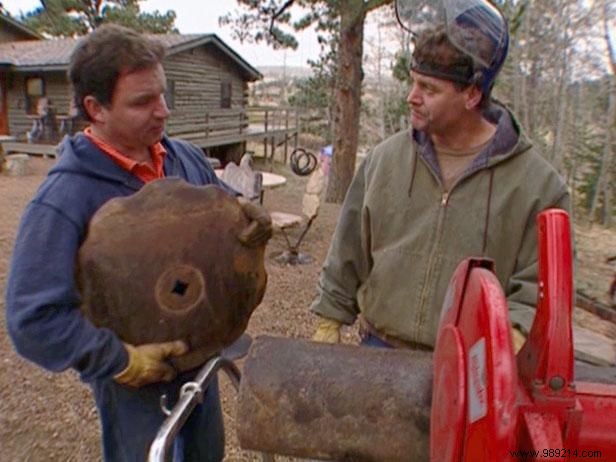
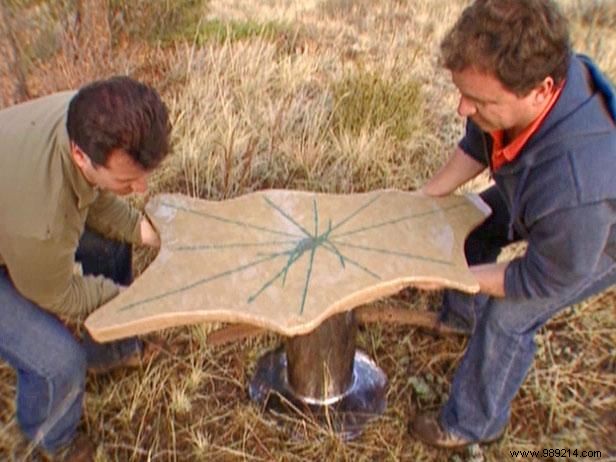
Add lateral supports: notch pipe for leaf springs using a plasma cutter (Image 4), fit, level, and weld securely for unyielding stability.
With stone cured and base ready, unite them for a heirloom-quality coffee table blending stone's timeless beauty with steel's strength.