As a seasoned woodworker with over a decade crafting custom furniture, I recommend laying the walnut slab across a pair of sawhorses. Reserve one intact side for the tabletop, divide the other into four sections for sturdy legs, and save a small extra piece for later.

Mark four evenly spaced 14-inch lengths along the walnut slab for the legs. Use a 17-inch circular saw to crosscut at these marks—the large blade handles the thick wood effortlessly.
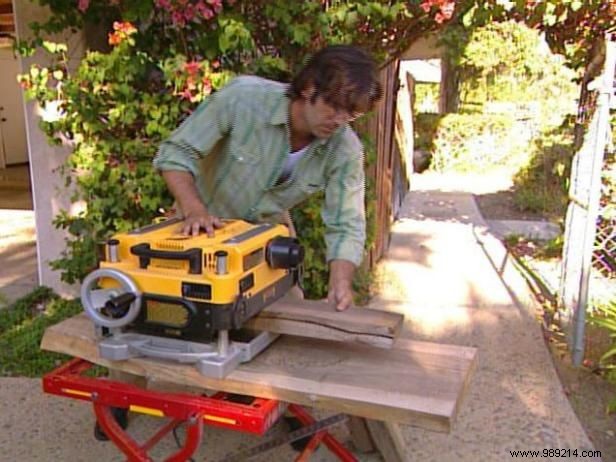
Cut the legs as squarely as possible, then run them through a planer for uniform thickness and a smooth finish. Angle one end of each leg about five degrees to ensure your table sits stable despite the natural tabletop contours.
Precisely measure and mark lines on both the top and bottom of the tabletop for leg attachment. Angle the legs inward for a sleek, modern aesthetic and enhanced stability.
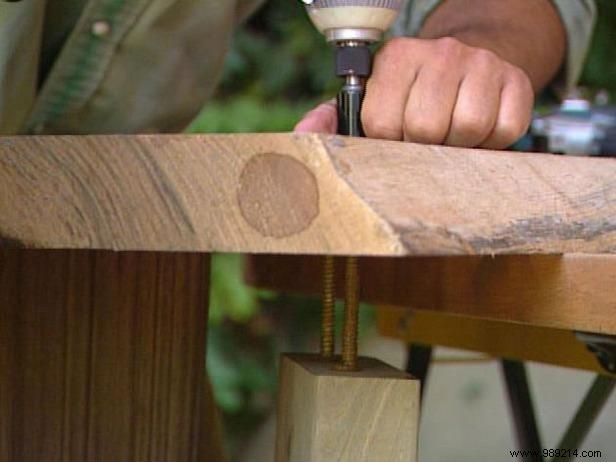
Employ a Forstner bit to bore two large holes through the walnut slab at each leg mount—these allow screws to sink deeply and invisibly. Switch to a standard bit for pilot holes in the legs, marking 6 inches from the tip with tape for accurate depth.
Apply wax to the 6-inch screws for smooth threading into the dense walnut. Position the legs beneath the table, ensuring pilot and Forstner holes align perfectly.
With a hex driver on your drill, drive the screws through the tabletop into the legs. The heads recess fully below the surface. Tighten each pair gradually for a snug, secure fit.
Attach a plug cutter to your drill and bore into the spare walnut piece to form plugs that conceal the screws. Finish the backs with a hacksaw for clean plugs.
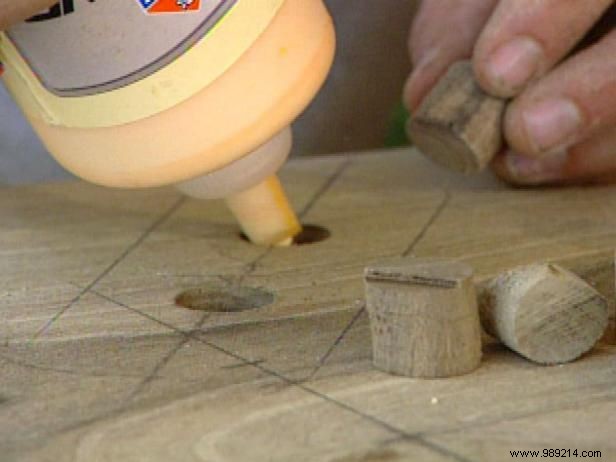
Apply wood glue to the plugs and tap them into the eight leg holes from the tabletop side. Clamp if needed, wipe excess glue with a damp cloth, then trim flush with the surface.
Sand the entire table progressively for a silky-smooth, professional-grade surface.