Family Encyclopedia >> Home & Garden

DIY Elegant Wedding Table Numbers from Vintage Books: A Step-by-Step Guide

Introduction

DIY Elegant Wedding Table Numbers from Vintage Books: A Step-by-Step Guide

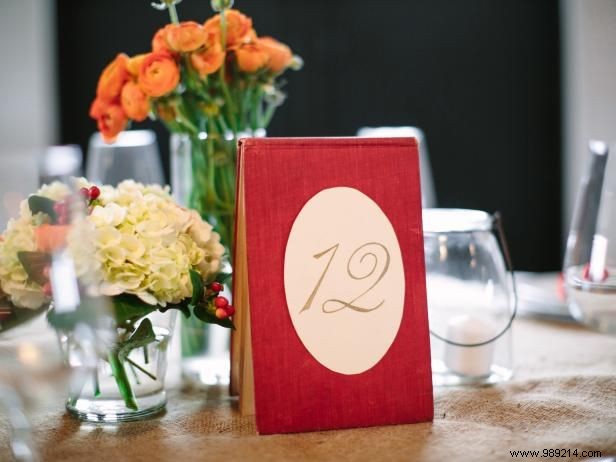
Create sophisticated table numbers from old books to elevate your wedding reception. As a veteran wedding crafter with years of experience personalizing events, this 'Book of Love' DIY adds timeless romance and charm.

The Book of Love

Step 1

DIY Elegant Wedding Table Numbers from Vintage Books: A Step-by-Step Guide

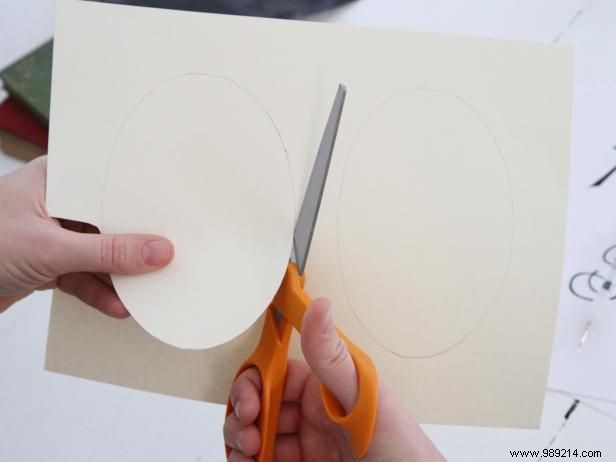
Cut out an oval template and trace it onto cream cardstock for each table number. Then carefully cut out the ovals.

Trace and Cut Ovals

Step 2

DIY Elegant Wedding Table Numbers from Vintage Books: A Step-by-Step Guide

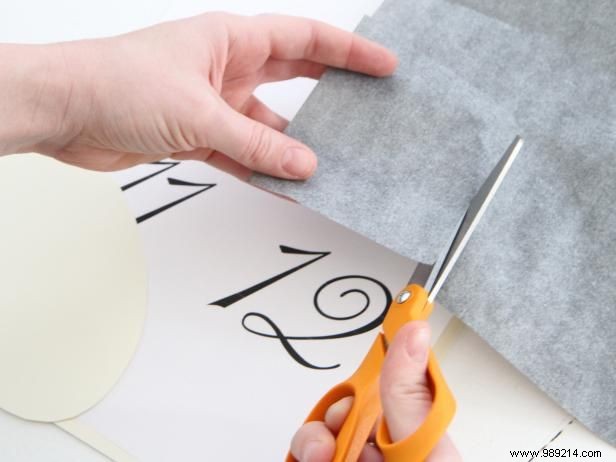
Cut a rectangle of graphite paper large enough to cover the numbers for your table.

Prepare Graphite Paper

Step 3

DIY Elegant Wedding Table Numbers from Vintage Books: A Step-by-Step Guide

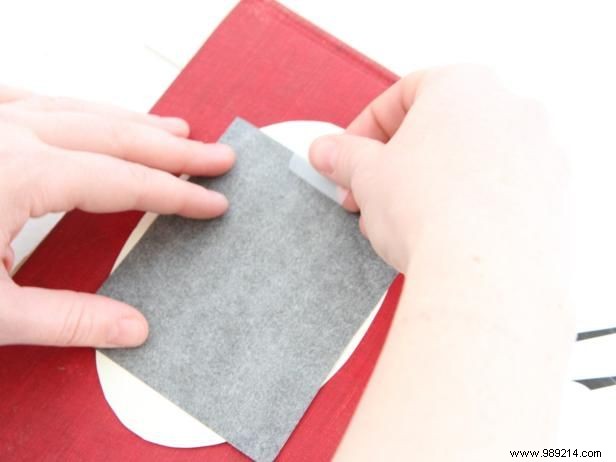
Center the graphite paper on your oval and secure it with tape at the top and bottom.

Place Graphite Paper

Step 4

DIY Elegant Wedding Table Numbers from Vintage Books: A Step-by-Step Guide

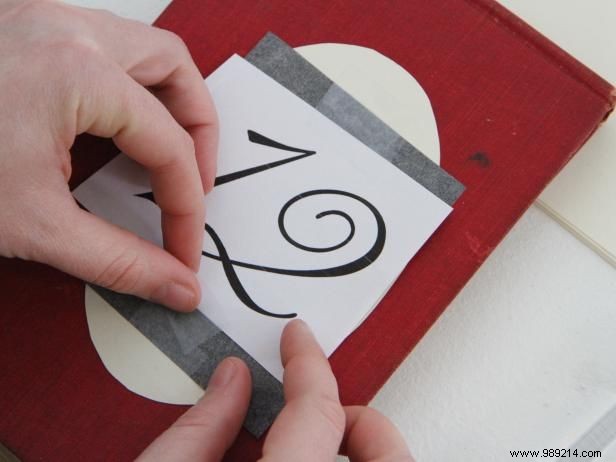
Center the table number template on the oval and secure with tape at the top and bottom.

Position Table Numbers

Step 5

DIY Elegant Wedding Table Numbers from Vintage Books: A Step-by-Step Guide

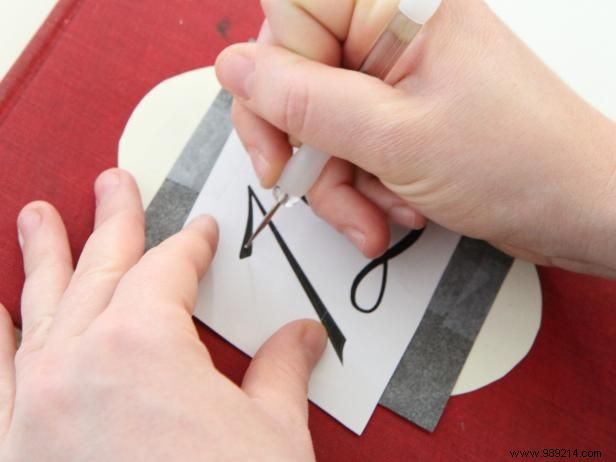
Using a tracing tool, press firmly while tracing the numbers onto the oval.

Trace the Numbers

Step 6

DIY Elegant Wedding Table Numbers from Vintage Books: A Step-by-Step Guide

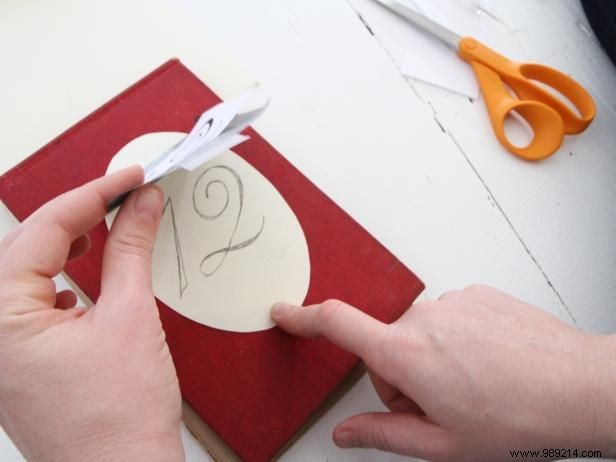
Carefully remove the graphite paper and number template.

Remove Graphite Paper

Step 7

DIY Elegant Wedding Table Numbers from Vintage Books: A Step-by-Step Guide

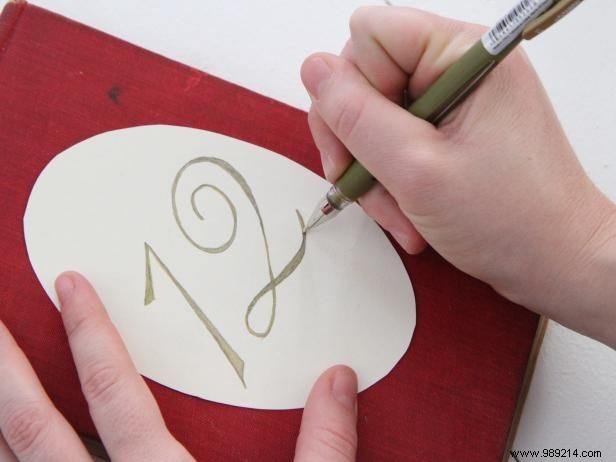
Fill the traced lines with a metallic gold pen for a luxurious finish.

Fill with Gold

Step 8

DIY Elegant Wedding Table Numbers from Vintage Books: A Step-by-Step Guide

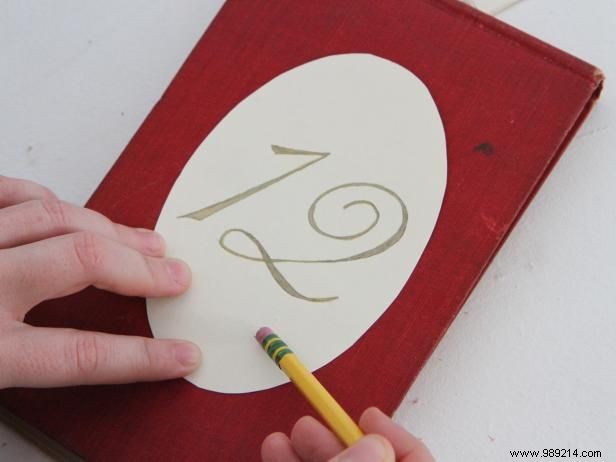
Use a pencil eraser to gently remove any remaining graphite smudges.

Erase Smudges

Step 9

DIY Elegant Wedding Table Numbers from Vintage Books: A Step-by-Step Guide

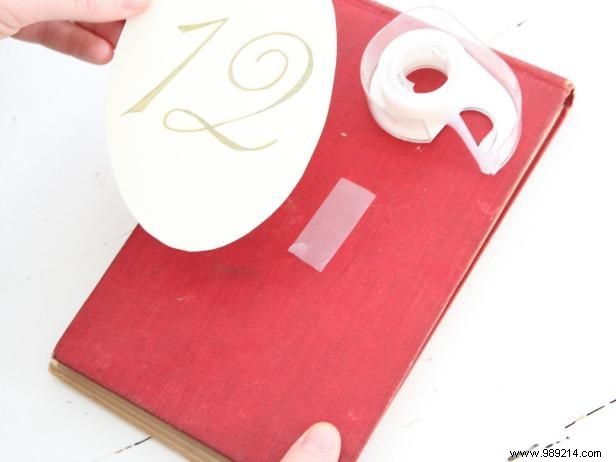
Attach the finished oval to the center of an old book page using double-sided tape.

Secure to Book