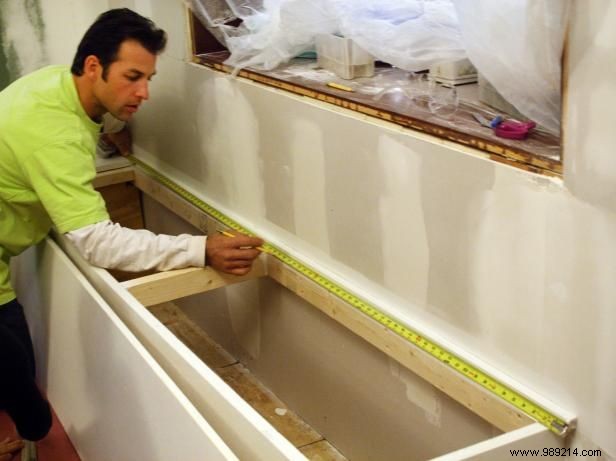
Measure along the walls to determine the ideal length for your bench seat. Using a hacksaw, cut two 2x3s to this length for the frame.
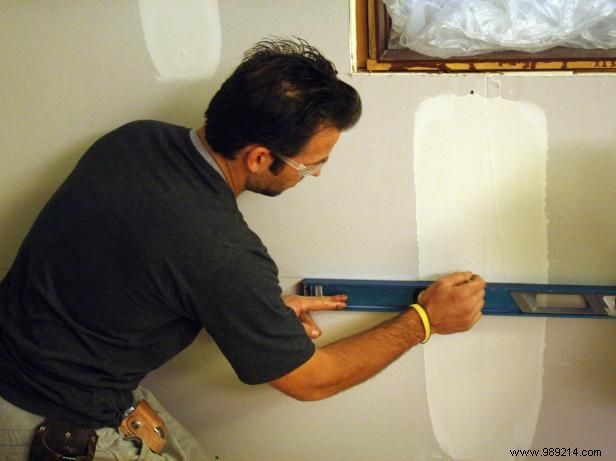
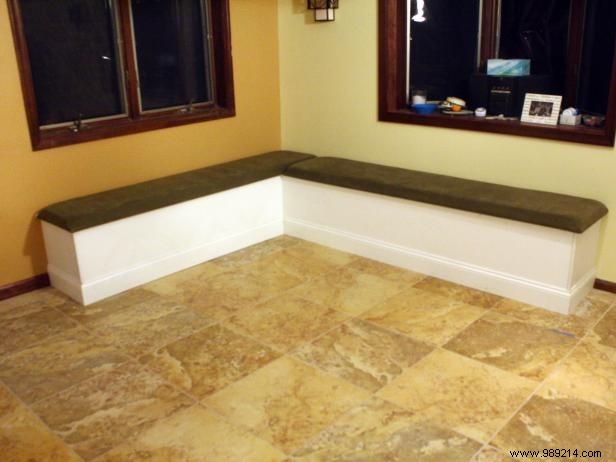
The standard seat height is 18 inches, with a 16-inch depth. Measure 18 inches up from the floor and use a 4-foot level to draw a straight line across each wall at this mark.
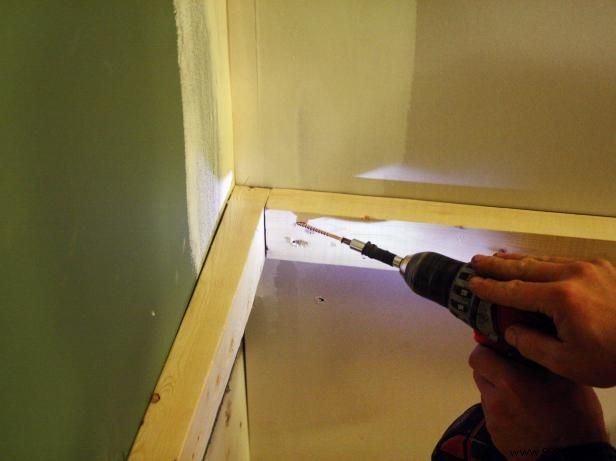
Locate the wall studs. Position a 2x3 along the level line and secure it to each stud with two screws. Repeat on the opposite wall. For extra strength at the corner, screw the 2x3s together.
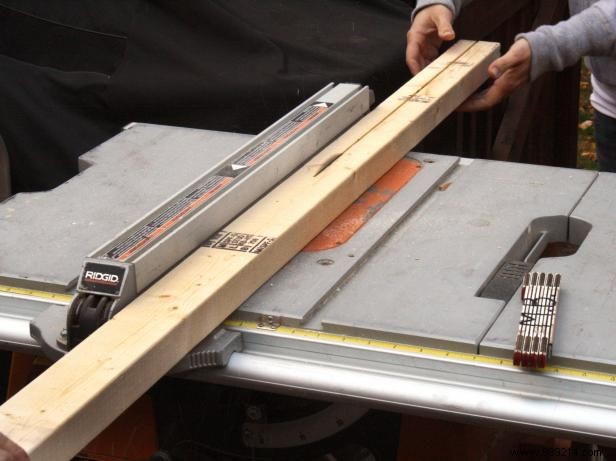
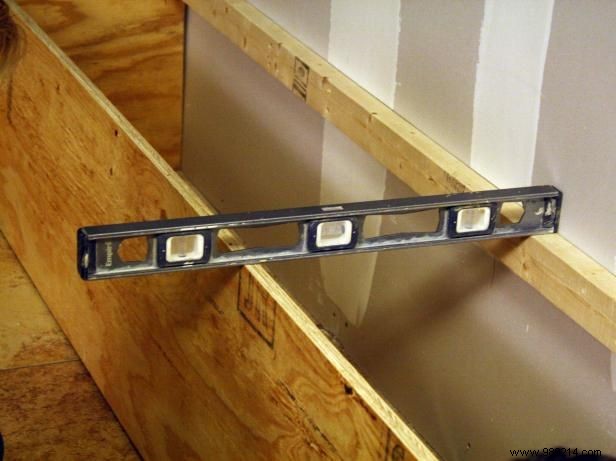
Cleats are narrow wood supports embedded into the floor and wall for stability. Use a table saw to rip a 2x3 in half lengthwise, yielding two cleats. Cut them to match the length of the mounted 2x3s with a hacksaw. Cut one cleat an extra 16 3/4 inches long. Also cut two 16-inch cleats and set aside.
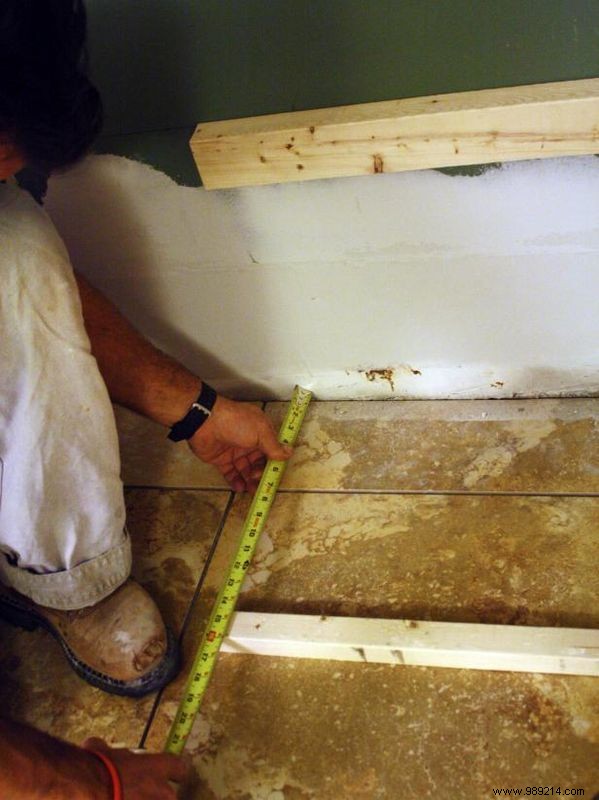
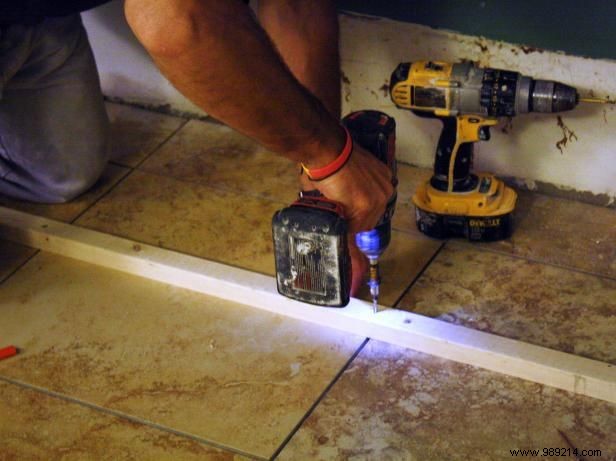
Measure 16 inches from the wall to the floor (Image 1). Position the cleats at this mark on the floor. Butt the longer cleat against the wall cleat, aligning it 16 3/4 inches from the end of the wall 2x3. Leave a 3/4-inch gap between the wall cleat and floor cleat. Secure all cleats with screws (Image 2).
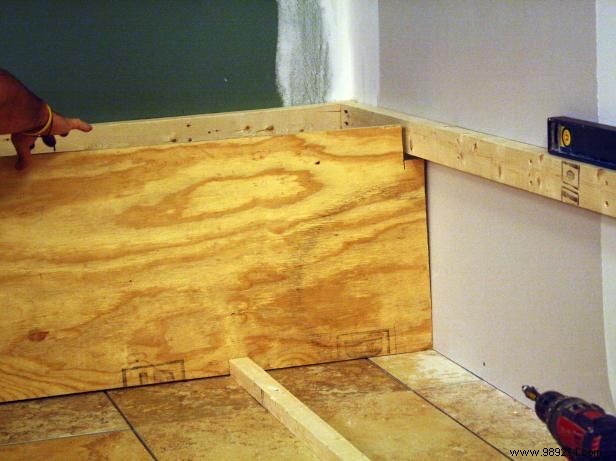
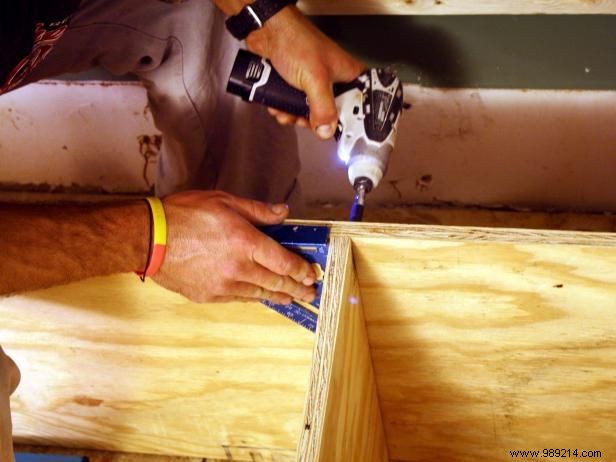
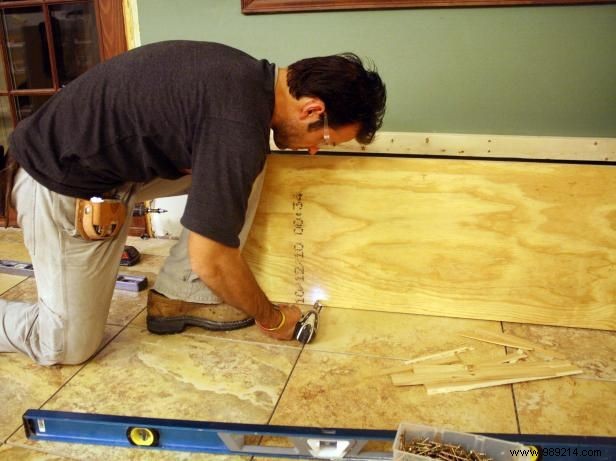
Rip a sheet of 3/4-inch plywood into two panels: 18 inches tall by the bench length. These form the end faces. Cut two more 16 x 18-inch plywood pieces and set aside. Slide one face through the 3/4-inch cleat gap (Image 1). Notch the corner for a snug fit. Position the second face, square them up, and drill pilot holes (Image 2). Level across the tops with shims if needed (Image 3). Secure to the cleats (Image 4).

Secure a reserved 16-inch cleat to the floor at the open bench edge. Position the 16 x 18-inch plywood against it and the front face. Ensure it's square and level, then screw into the cleat and plywood face. Repeat for the other end.
Rip a 3/4 x 1-1/2-inch furring strip in half lengthwise to create two 3/4 x 3/4-inch pieces. Cut to fit from the bench corner to the ends. Attach to the ledger and wall using construction adhesive and a nail gun.
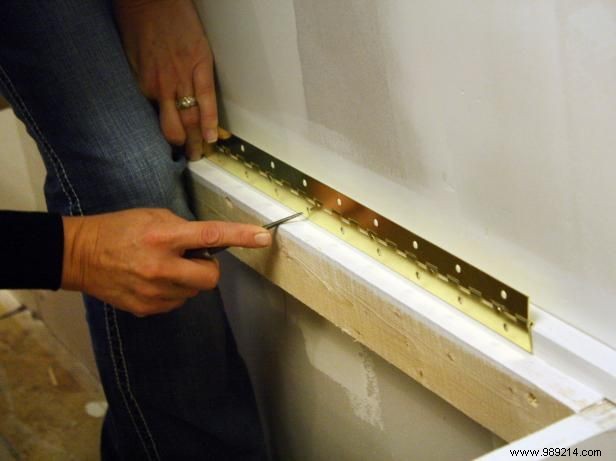
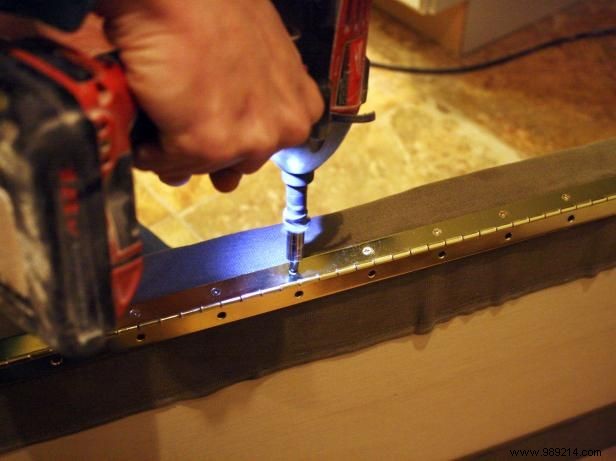
Mark the center point on the furring strip (Image 1). Mark centers on the piano hinges. Align and mark screw holes on the furring strip with an awl (Image 2).

Measure the bench's depth and length. Cut 3/4-inch plywood for the lid, adding 1 inch for overhang. For a corner bench, one lid extends fully, the other from the bench edge inward. Mark the center and hinge screw holes with a center punch.
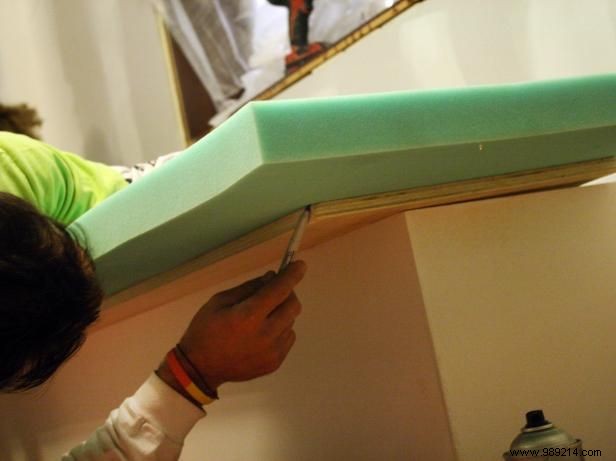
With lids positioned, place high-density foam on top and trace the lid edges with a marker. Trim the foam, then shave 3/4 inch off each side.
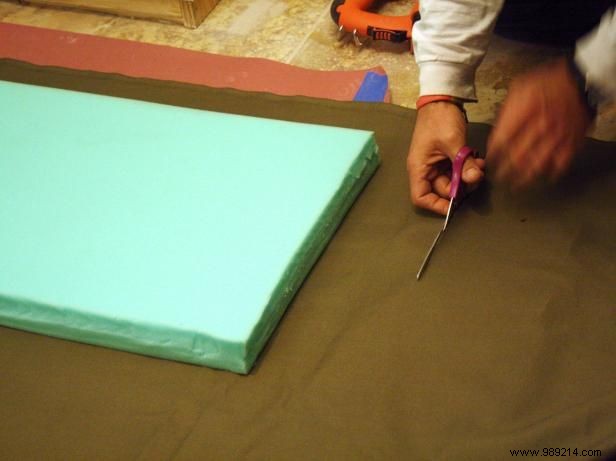
Lay fabric face down. Center the foam on it, then the lid on the foam. Trim fabric to extend 5 inches beyond each lid edge.

Fold fabric edges over the lid top. Staple evenly around the sides, pulling taut. Do corners last.
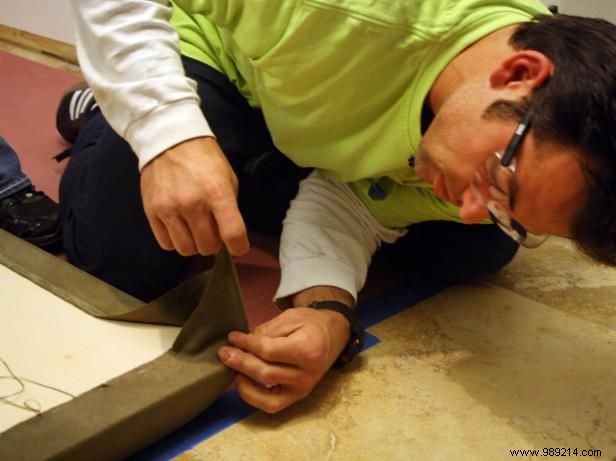
Smooth and fold corners like gift wrap, then staple securely. Trim excess fabric.
Mark the center on the upholstered lid. Screw the piano hinge to the lid, aligning centers. Position the lid, align with the furring strip marks, and secure. Add trim if desired.