Before starting construction, carefully design the cabinet to match your space and equipment needs. In this project, the alcove measured 45" deep, 89-1/2" wide, and 83-1/2" high. The resulting cabinet is 23-7/8" deep, 82-1/4" wide, and 85-1/2" high. The gaps around the cabinet will be filled with molding during final installation. Always measure your AV equipment precisely and tailor the design accordingly for a seamless fit.
Once the design is finalized, cut the 4x8 plywood sheets to the cabinet's depth of 23-7/8". Each sheet yields two 8-ft-long panels. Using a circular saw, cut these to the required lengths: two side panels at 45" long, two at 32" long; center vertical panels, one at 45" and one at 32"; top, center, and bottom panels at 85-1/2"; and seven 30" shelves.
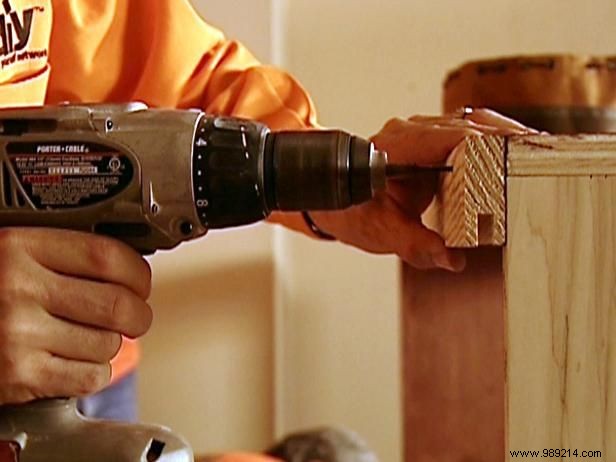
To accommodate adjustable shelves, attach a pegboard piece inside each side panel. Drill through every other hole in the pegboard (spaced 1" apart) to create 2" shelf pin holes. Sand all exposed surfaces with 220-grit sandpaper using circular motions for a smooth finish. For assembly, drill countersunk pilot holes for screws: position the countersink to go through the panel with enough depth for the screw head. Drill holes 3/8" from each end of the side panels, spaced about 10" apart.
With holes drilled, dry-fit the pieces. Assemble by applying glue to the ends of each 85-1/2" shelf (top, center, bottom). Align and secure with 2-1/4" deck screws in the pre-drilled holes. To elevate the unit off the floor for base trim clearance, attach a 4" high base frame matching the bottom shelf dimensions, built from 1" solid wood.
Stain the entertainment center using a soft cloth, rubbing along the wood grain. Allow 6-12 hours for complete drying before handling.
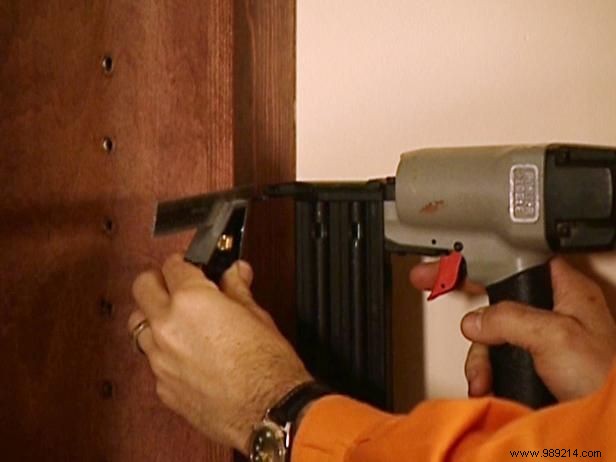
While the stain dries, cut face molding to cover the front edges of all shelves and vertical panels. This conceals plywood edges and reinforces shelves. Secure with 1" finish nails, then fill nail holes with wood filler.
The back panel uses 1/4" stain-grade plywood. Cut a 4x8 sheet to 32" x 85-1/2" for the base unit. Stain and nail with 1" finish nails. For the top, cut three panels 30" wide by 45" tall and stain.
For sliding rear panels at the top, cut two 1" x 2" pieces to 85-1/2" long. Use a table saw to cut grooves in the 1" edge: 1/2" deep on the upper track and 3/4" on the lower. Attach tracks to the back, top, and bottom of the upper unit with 2-1/4" deck screws. Insert the back panel into the top slot first, then the bottom, and slide into position.
Position the base unit, leaving equal space on each side for trim. Place the top unit on and secure halves with 1" screws. Measure and cut colonial trim and base to length. Fasten with 1" finish nails, filling holes with paintable putty.