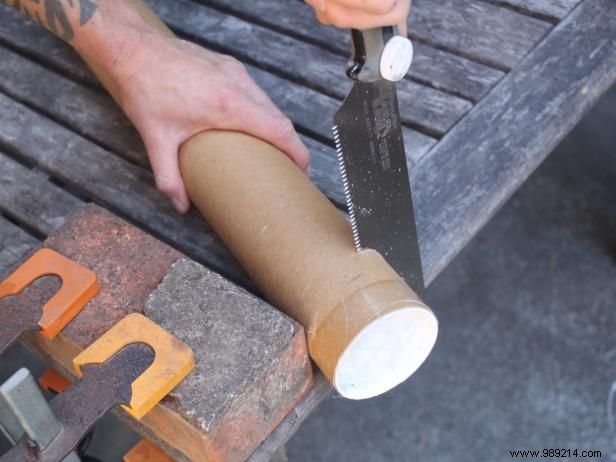
Using the edge of a table as a guide, cut one end of the shipping tube at a 30-degree angle. This precise angle ensures stability for your bookends.
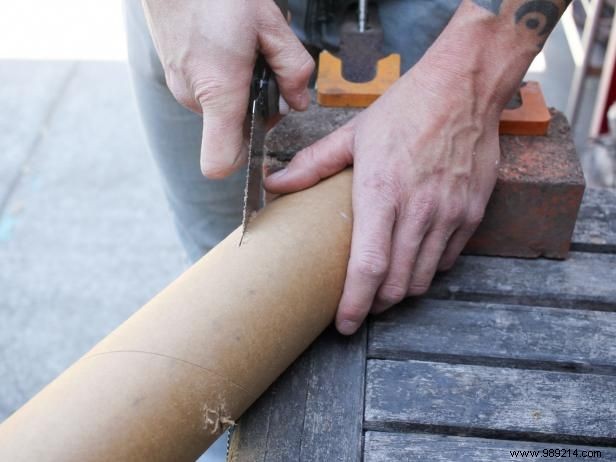
Place the freshly cut end against a flat edge, such as a brick, set perpendicular to the table edge. Leave about two inches from the cut end to the table edge, then use the table edge to guide your saw through the tube, creating your first cylinder shape.
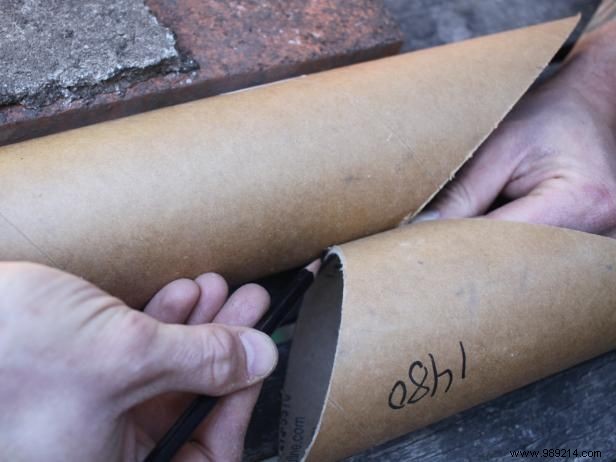
Match the first form and mark the cut location with a pencil, ensuring the short side measures about two inches for consistency.
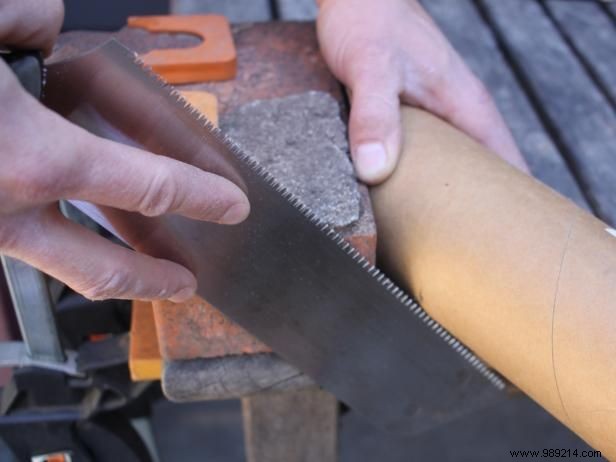
Position the steep cut edge against your flat surface, align the mark with the table edge, and saw through using the edge as a guide. You now have two matching forms.
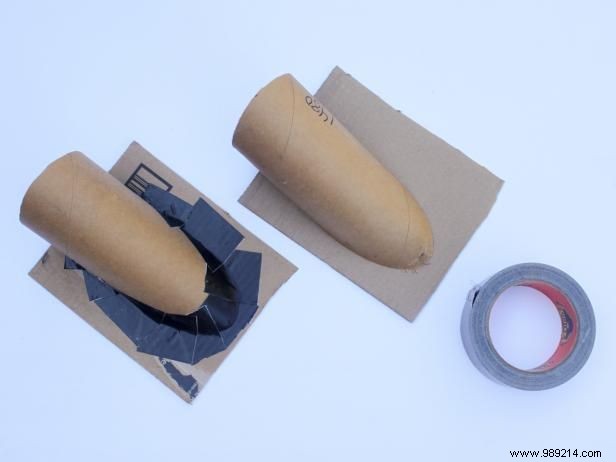
Seal one end of each form with tape and a piece of cardboard to prevent leaks during pouring.

Mix the concrete per the manufacturer's instructions to a thick, lumpy consistency similar to mashed potatoes for optimal strength and finish.
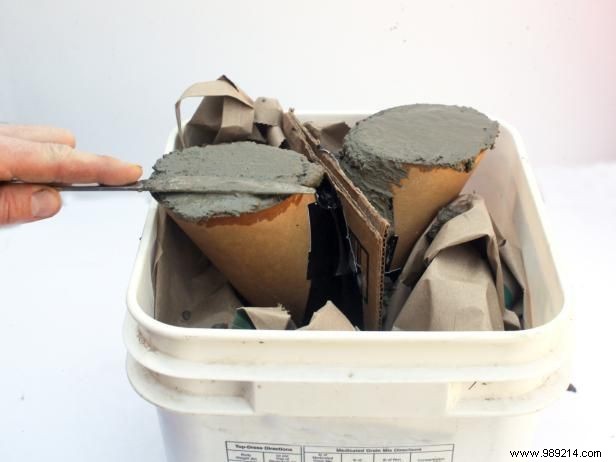
Prop the forms upright in a bucket, ensuring they remain level. Pour the concrete slowly, shaking gently to release air bubbles for a smooth surface. Level the top and allow to cure fully.
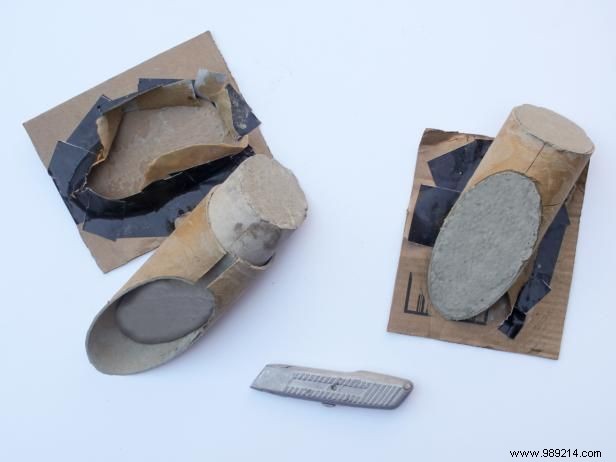
Once cured, remove the concrete from the forms. Cut a slot in the tube if necessary for easy release.
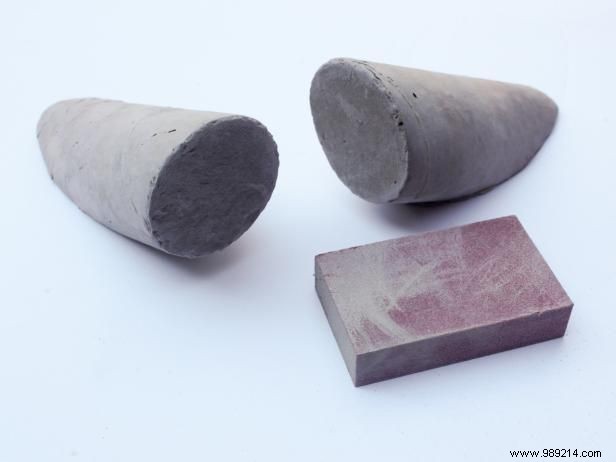
Sand any rough edges. For a finer finish, lightly dampen the concrete surface before sanding, a technique I've refined over years of concrete crafting.
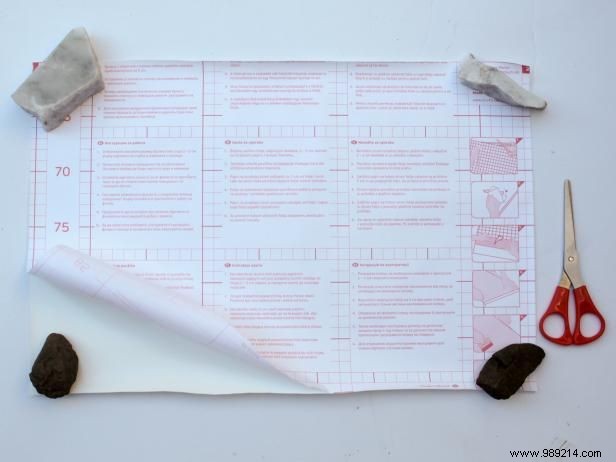
Cut contact paper larger than your concrete piece. Weigh down corners with rocks, then peel off the backing. If adhesion is weak, apply a light spray adhesive to both surfaces.
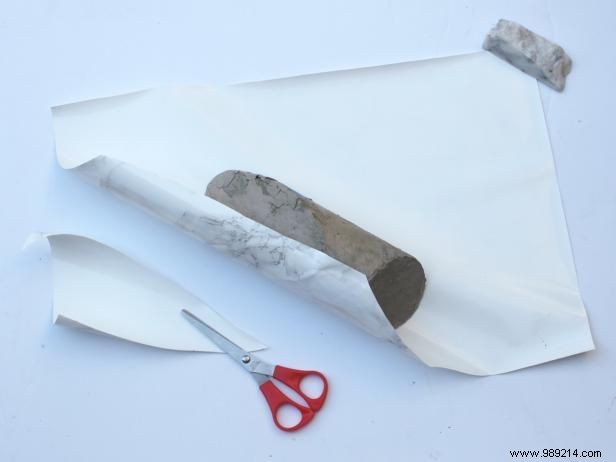
Place the concrete on the contact paper and smooth firmly from the center outward to avoid bubbles. Trim along the short edges, allowing slight overlap, and repeat for full coverage.
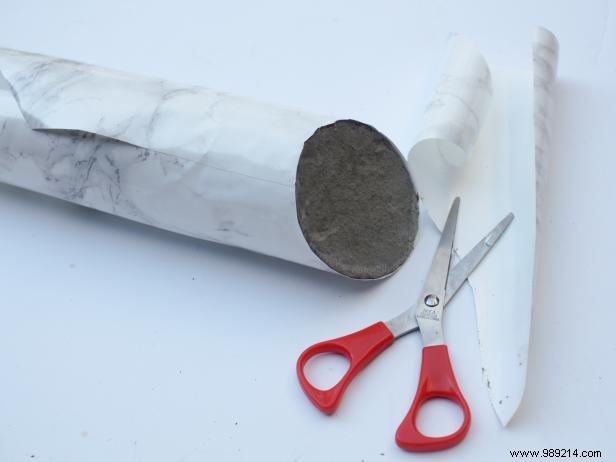
Carefully cut off excess contact paper at the top and bottom of the bookend for a clean edge.
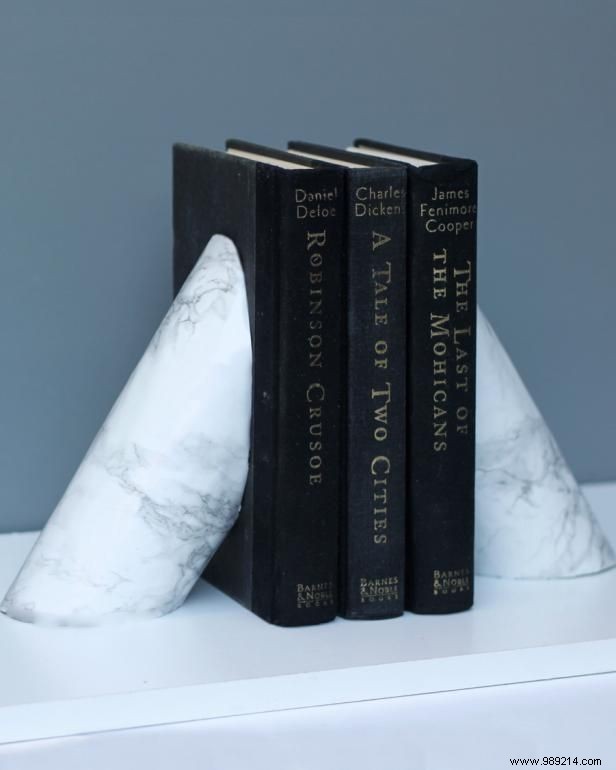
Repeat steps 10-12 on the second bookend. Display your stylish, custom imitation marble bookends with confidence!