Based on hands-on experience sourcing and restoring these classics, here are the essential signs of a genuine mid-century modern piece:
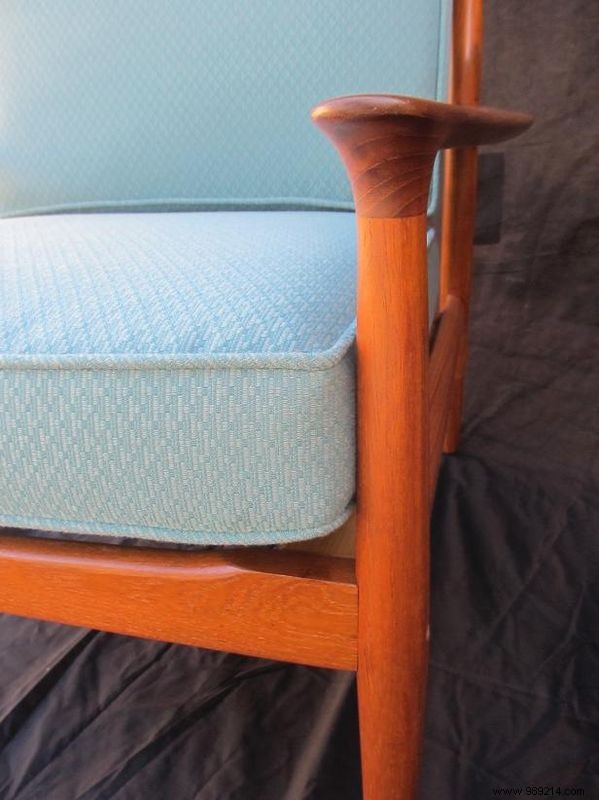
1. The wood. Authentic pieces feature solid teak, rosewood, or walnut. Veneers on tables and flat surfaces are common and still high quality.
2. Seamless construction. True originals avoid nails or screws. Danish designers pioneered dowel and threaded fittings, making repairs straightforward.
3. The finish. Natural finishes highlight the wood's beauty, though some pieces have solid colors like black.
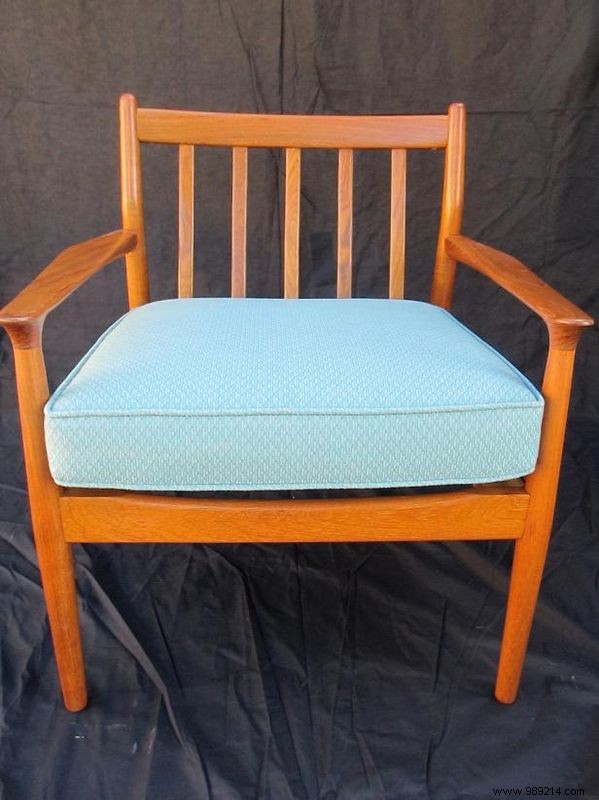
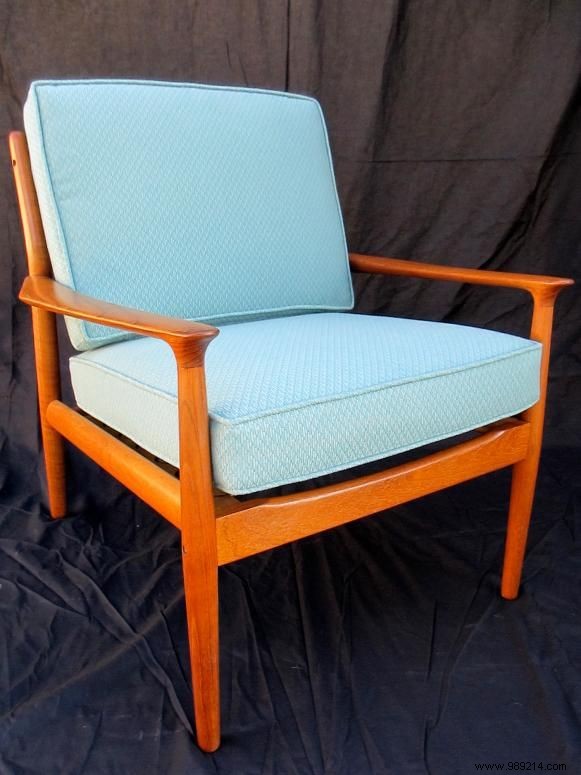
We discovered this teak chair at a retro furniture store. Despite its worn appearance, it had solid bones: no cracked wood, and dents/scratches under 1/8-inch deep—critical for natural finishes where sanding must fully address damage. The original seat cushions simplified recreating new ones.
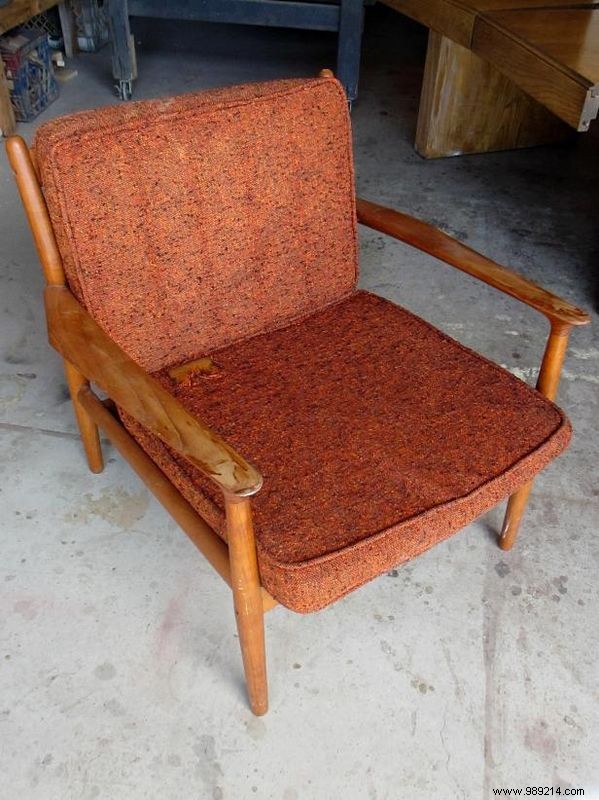
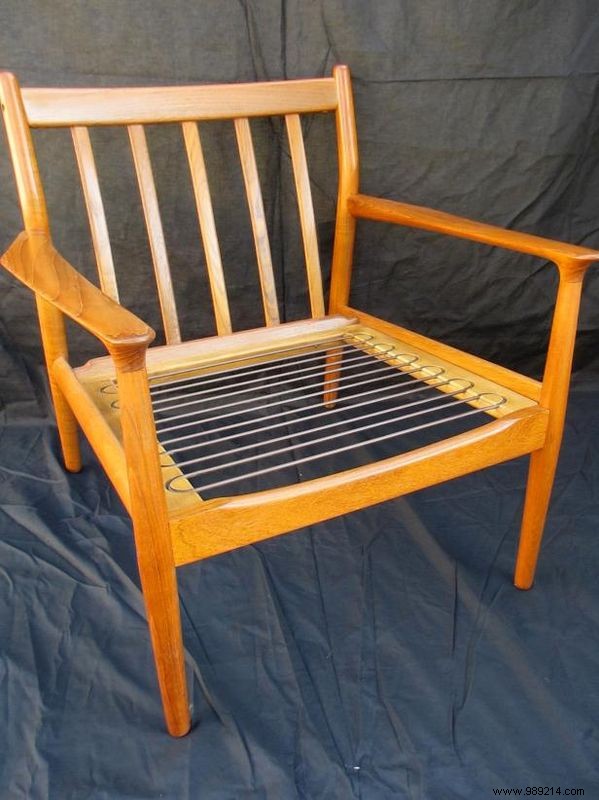
Remove the cushions and loop springs under the seat. Our chair's ties were intact—a rare plus, as they're tough to replace. When buying, ensure loops are present or negotiate a steep discount if absent.
Jasco stripper works best, thanks to its wax that traps fumes on the wood. Wear safety glasses and rubber gloves. Brush on a generous, even coat across the entire chair. Keep water handy. Avoid re-brushing coated areas to maintain chemical effectiveness.
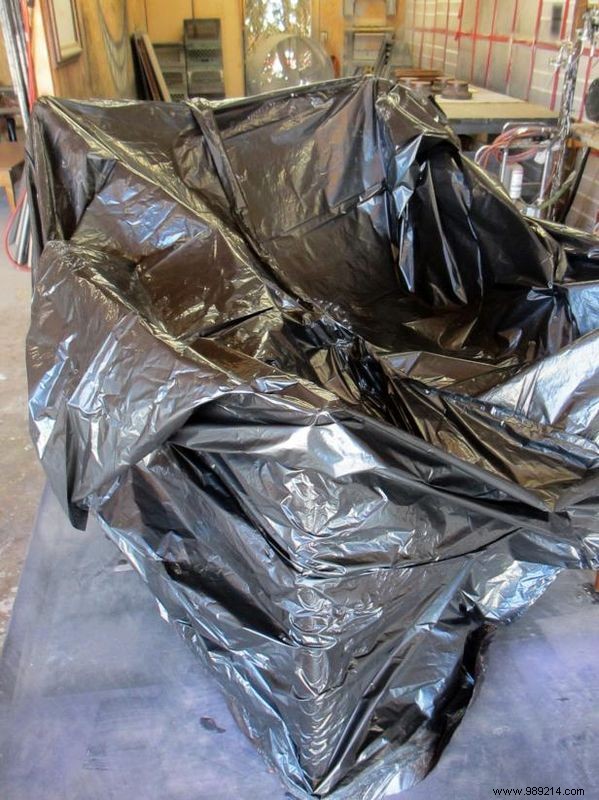
To accelerate, cover with black plastic bags for 20 minutes—no need to seal fully, but one large bag is ideal. Then, scrape off softened finish with a metal tool.
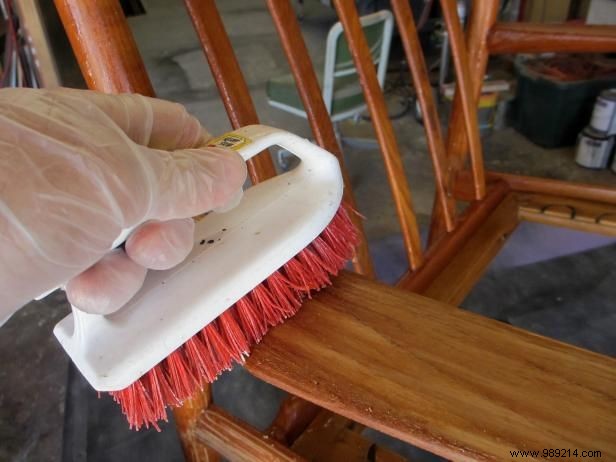
Scrub with odorless mineral spirits and a plastic bristle brush to remove residue. This deactivates the stripper safely, even in wood pores. The surface may look whitish—sanding will fix it.
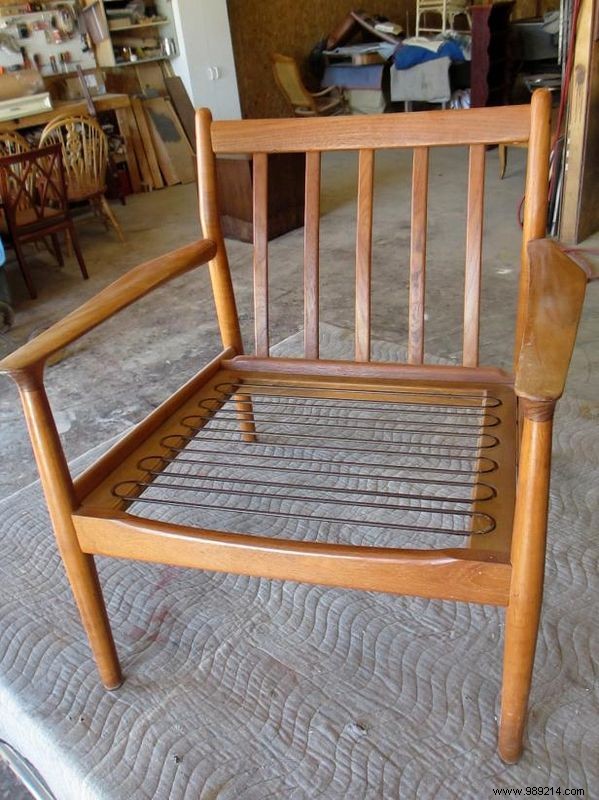
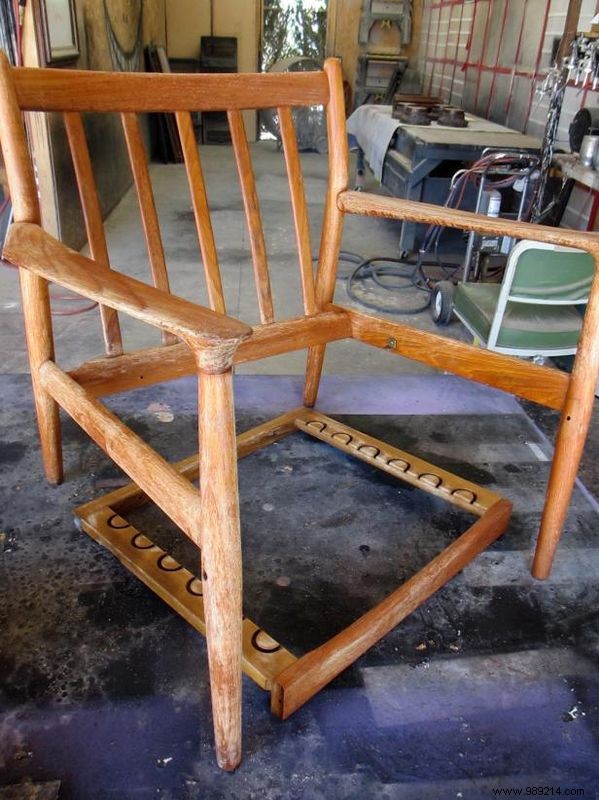
Disassemble after stripping: it's messy with nooks, and intact handling simplifies it. Plus, sanding disassembled parts is easier. Our chair broke into four: right side, left side, seat, and back.
This step defines success—proceed methodically. Use 150-grit on a palm sander, following contours. Invest in quality paper; it lasts and clogs less. Sand evenly, avoiding edge digs that leave marks. Hand-sand tight spots.
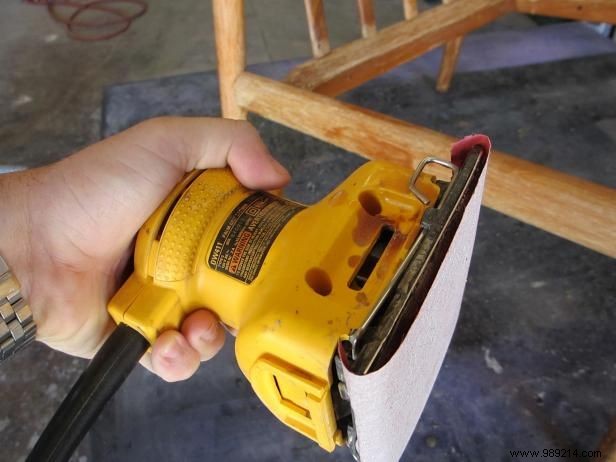
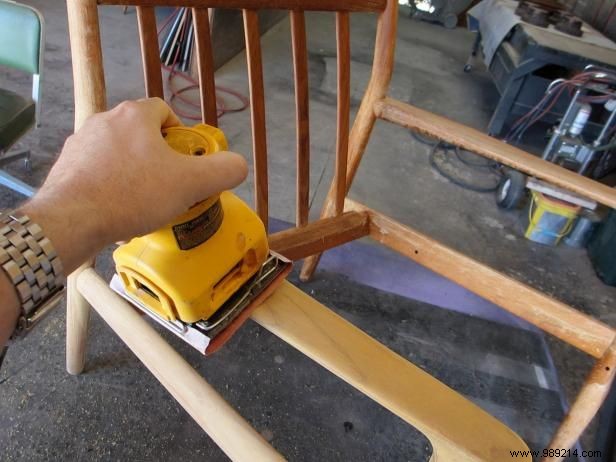
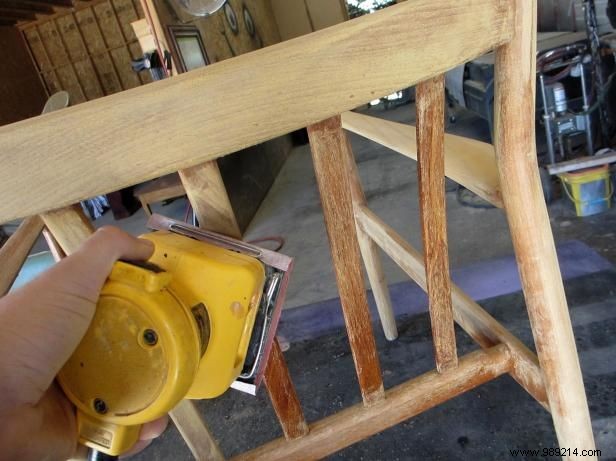
Cut 150-grit sheets into quarters, fold, and tackle contours. Sand with the grain, using short strokes in tight areas.
Critical: All sanding imperfections show in the final finish. Thorough sanding ensures a pro-level result.

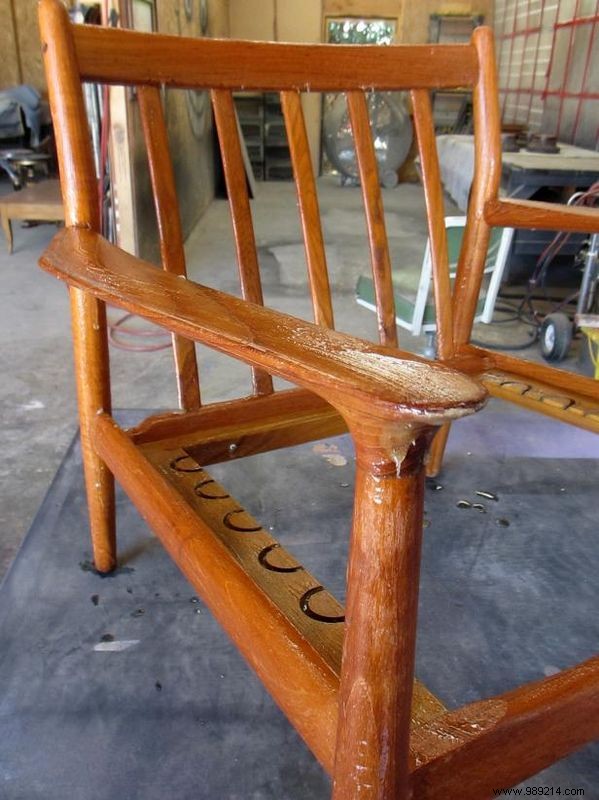
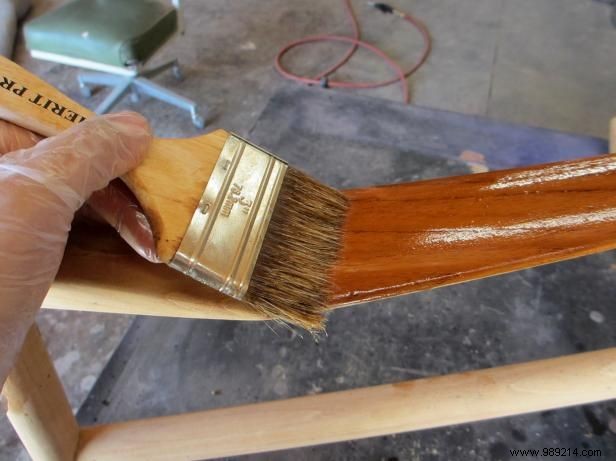
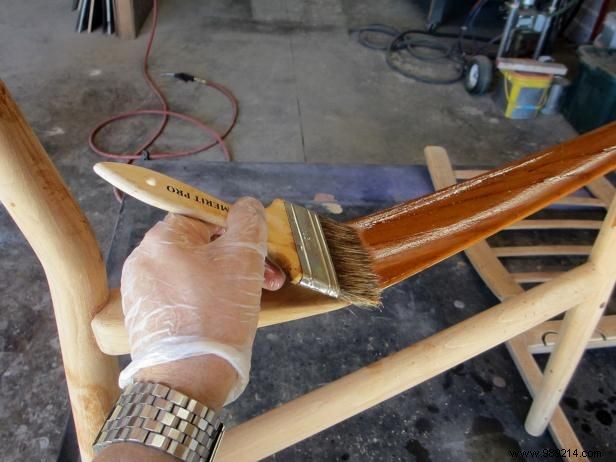
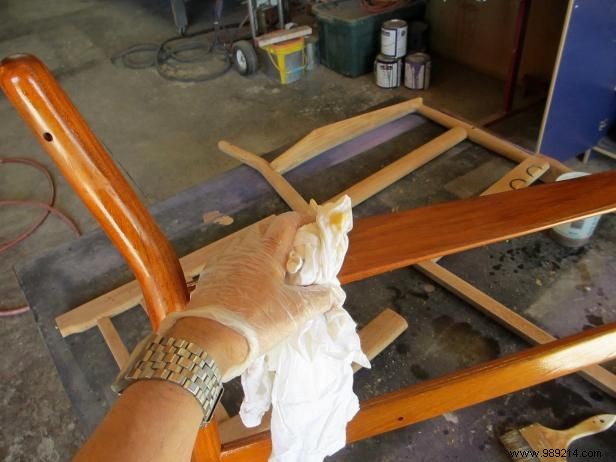
For teak's signature warm glow, apply teak oil to penetrate and seal while enhancing natural tones. Pour into a small container, brush on with a chip brush. Let sit 5-7 minutes (3-4 in heat), then wipe excess with a clean cloth.
Critical: Remove all excess to avoid sticky buildup. Air-dry pieces 12+ hours.
Option 1: Teak oil alone for a matte, natural look. Reapply every 2 years—ideal for low-use pieces, skipping full refinishing.
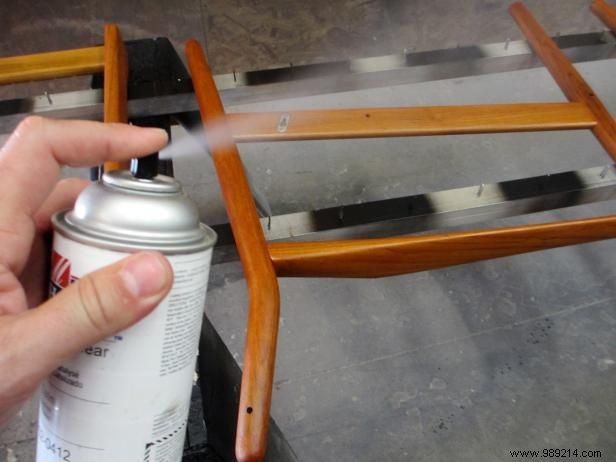
Option 2: Spray 2-3 satin lacquer coats (Deft brand) for durable protection lasting 15 years. Spray 8-10 inches away, moving fluidly. Lightly 320-grit sand between coats to smooth—don't cut through oil. Brush-on works but risks drips on curves.
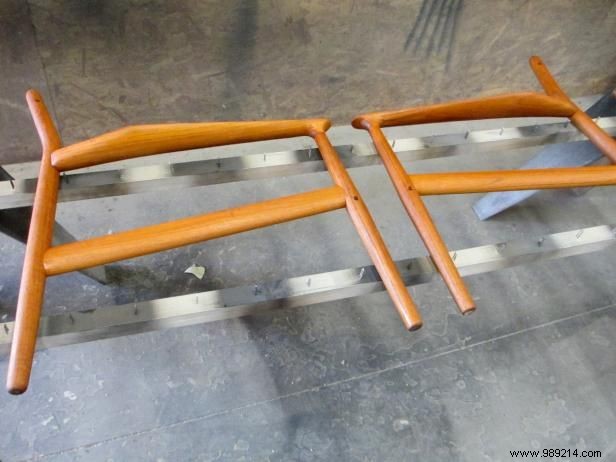
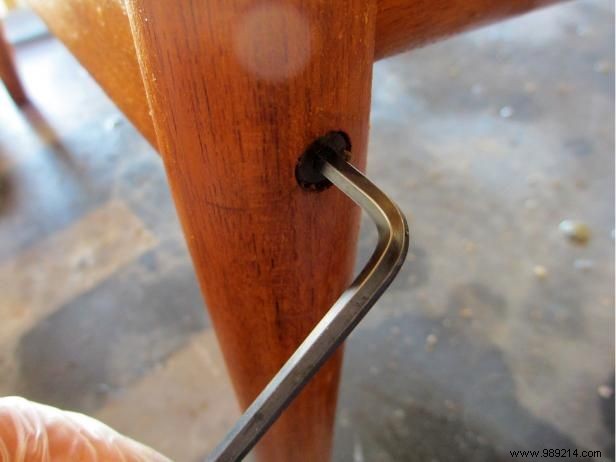
Dry 24 hours, then reassemble reverse-order. Secure firmly but not overly tight.
For best results, use a local upholsterer for cushions and covers. Expect 2.5 yards fabric (solid) or 3.5-4 yards (patterned). Add piping for a polished finish.