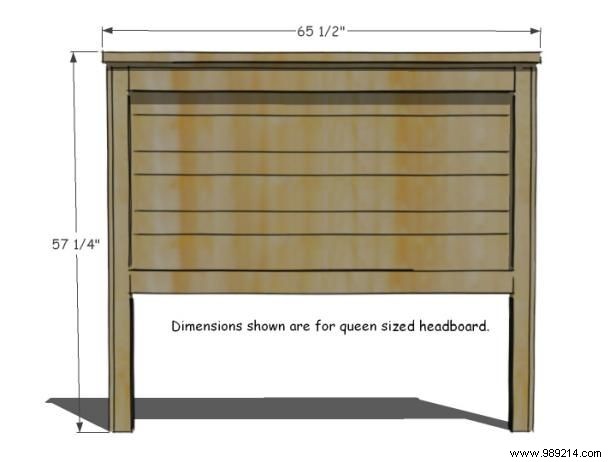
The dimensions below are optimized for a queen bed, with a cut list provided for other sizes like full, twin, or king.
As a professional woodworker with years of hands-on experience building custom furniture, I recommend selecting straight lumber with rustic character—boards featuring natural blemishes, cracks, and knots add authentic charm. Have your lumberyard pre-cut the boards per the cut list to streamline the process. Always work on a clean, level surface, wear safety glasses, and ensure good ventilation, especially when applying finishes.
When selecting lumber, sight down the board like an arrow on a bow to check for straightness—it's a reliable trick I've used on countless projects.
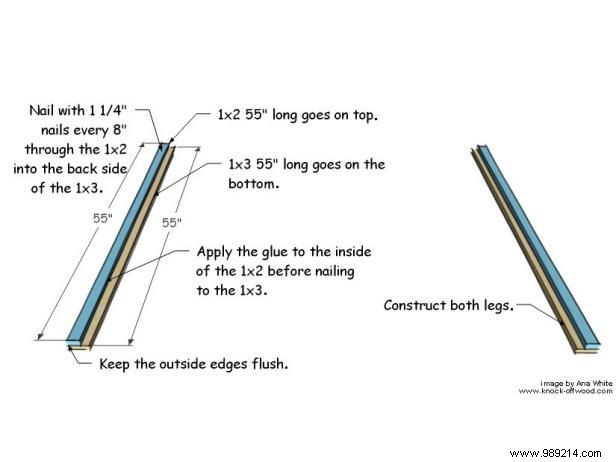
Apply wood glue to one side of a 1x2 inner leg piece. Position it glue-side down on a 1x3 leg piece, aligning the outside edges and ends perfectly. Secure with 1-1/4-inch nails every 6-8 inches. Repeat to build two legs. Tip: Fine-tune alignment while nailing to ensure flush outer edges for a seamless professional look.
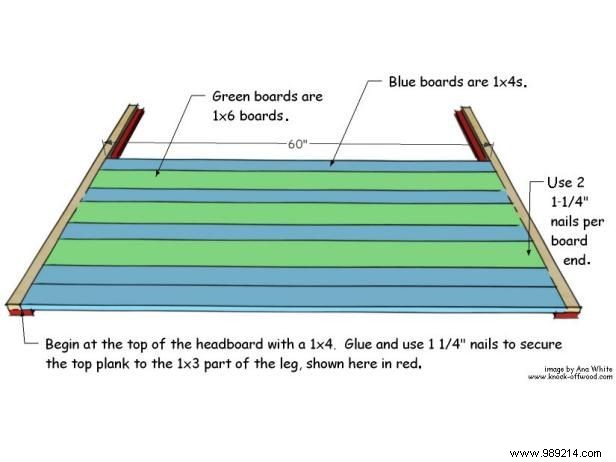
Starting at the header's top, apply glue to the ends of a 1x4 panel board. Lay it across the legs and fasten with two 1-1/4-inch nails per end, securing both sides as shown. Continue with remaining panels, alternating 1x4s and 1x6s per the pattern, using glue and nails. Tip: For enhanced rustic appeal, lightly chisel or distress edges before attachment—I've found this technique elevates the planked design beautifully.
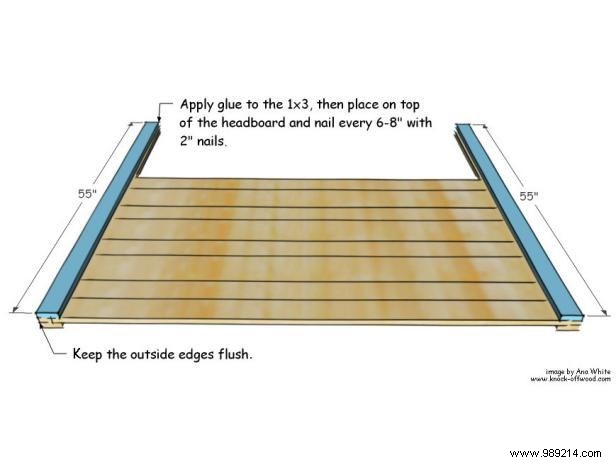
Apply glue to one side of two 1x3 leg pieces and position them on the headboard legs as illustrated. Nail every 6-8 inches with 2-inch nails, keeping top and outer edges perfectly flush.
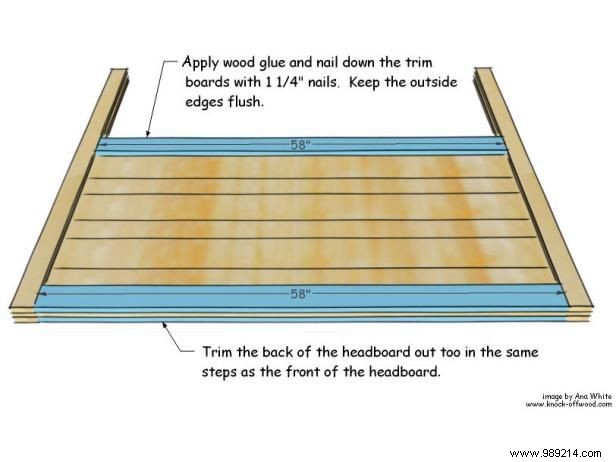
Glue and nail 1x4 trim boards to the header's top and bottom on both sides using 1-1/4-inch nails. Maintain flush outer edges for a polished finish.
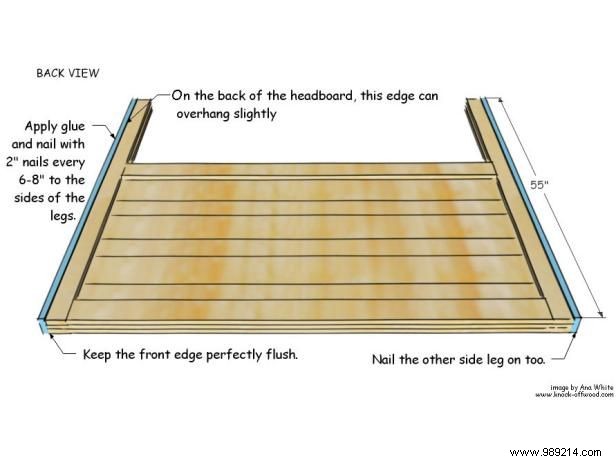
With the header face down to minimize visible nails, glue and attach the remaining two leg pieces to the leg sides. Align front edges flush (back may overhang slightly). Use 2-inch nails every 6-8 inches.
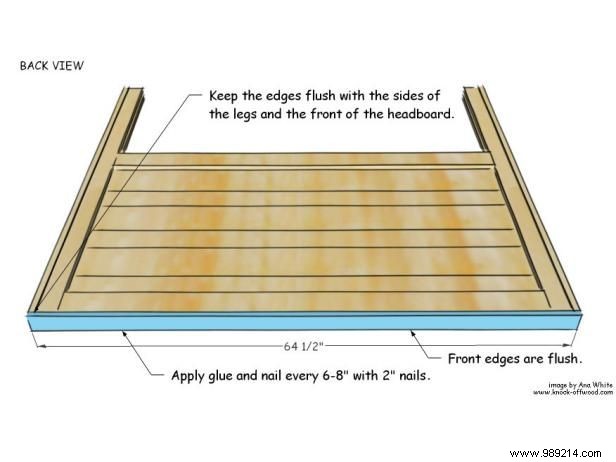
Glue the top of the header, align the top trim with the outer legs, and nail every 6-8 inches. Keep front and outer edges flush.
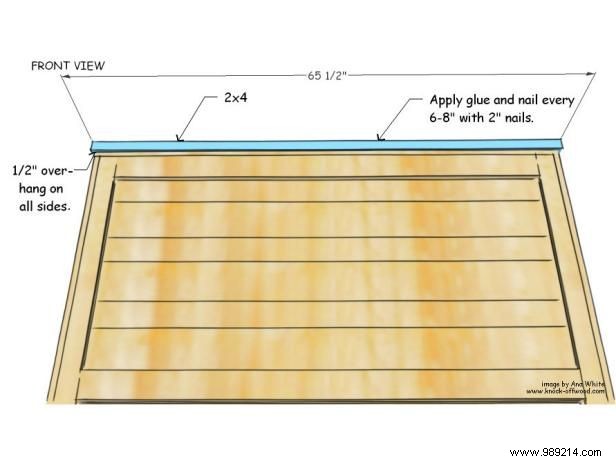
Apply glue to the header top. Position the 2x4 top piece centered with a 1/2-inch overhang on all sides. Secure with 2-inch nails every 6-8 inches. Tip: For king-size builds, use scrap wood nailed perpendicularly to hold panels steady during assembly.
Fill nail holes with wood filler, let dry, and sand progressively: 80-grit, refill and dry, then 120-grit, followed by 150-grit for a smooth surface. Vacuum with a soft brush, wipe with a damp cloth. In a ventilated space, apply spray primer per instructions and let dry fully. Brush on paint along the grain in two coats, drying between each. Distress edges with sandpaper and chisel cracks between boards. Wax distressed areas, buff to your desired patina, and seal with clear coat.
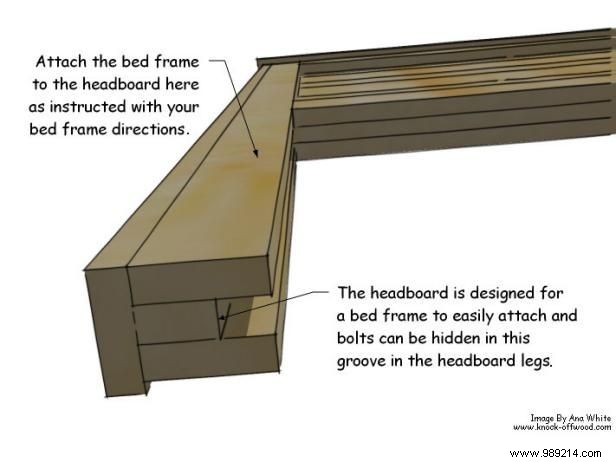
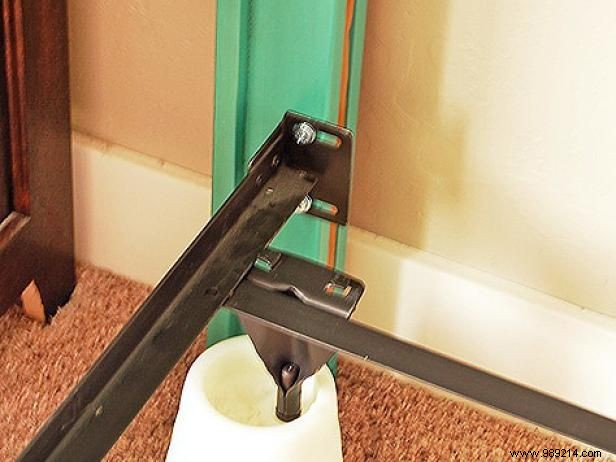
Follow your bed frame's instructions to securely mount the headboard.
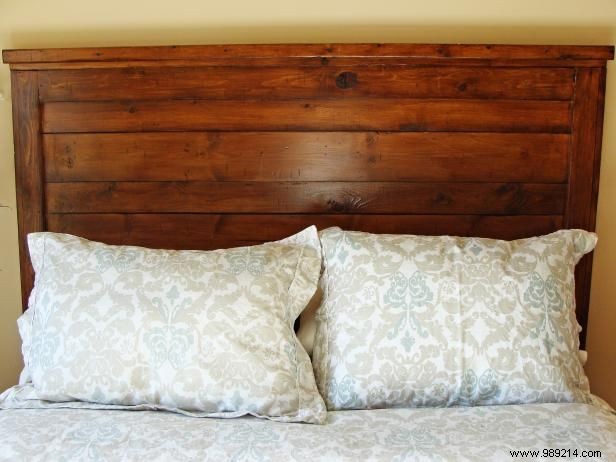
Highlight the solid wood's grain with stain. This example uses two coats of dark walnut oil-based stain topped with satin oil-based polyurethane. Photo by Nicole Barr.