Dip-dyeing is a simple, budget-friendly technique to infuse custom colors into your holiday décor. Craft a coordinated set in your favorite palette or personalize one for each family member with unique shades.
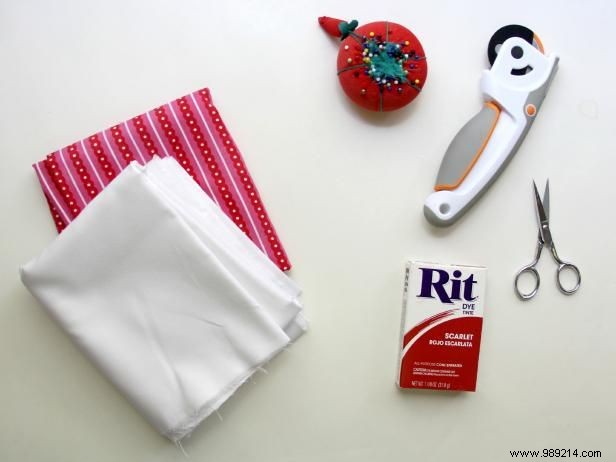
As an experienced sewist who's made dozens of holiday stockings, I recommend: the downloadable stocking pattern; a pack of Rit Dye; ½ yard outer cotton fabric; ½ yard cotton lining fabric; 1 yard interfacing or cotton batting (optional for extra structure); and sewing essentials (pins, scissors, thread, sewing machine).
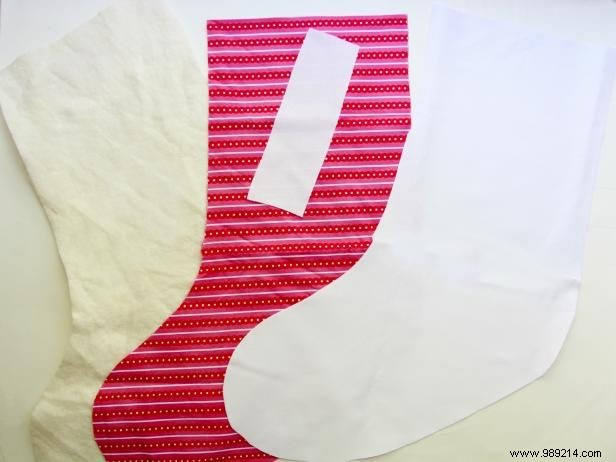
Print the pattern. Cut two outer stocking pieces, two lining pieces, two optional batting pieces, and one hanging loop from your fabrics.
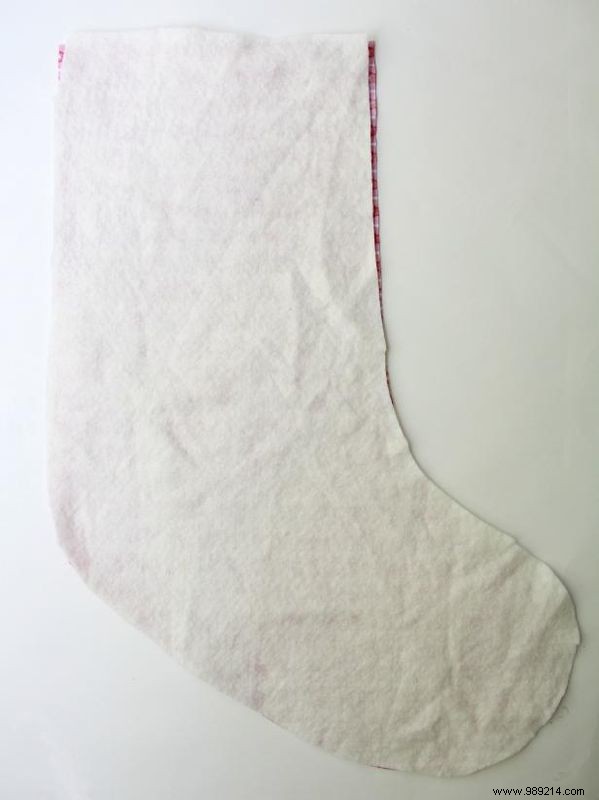
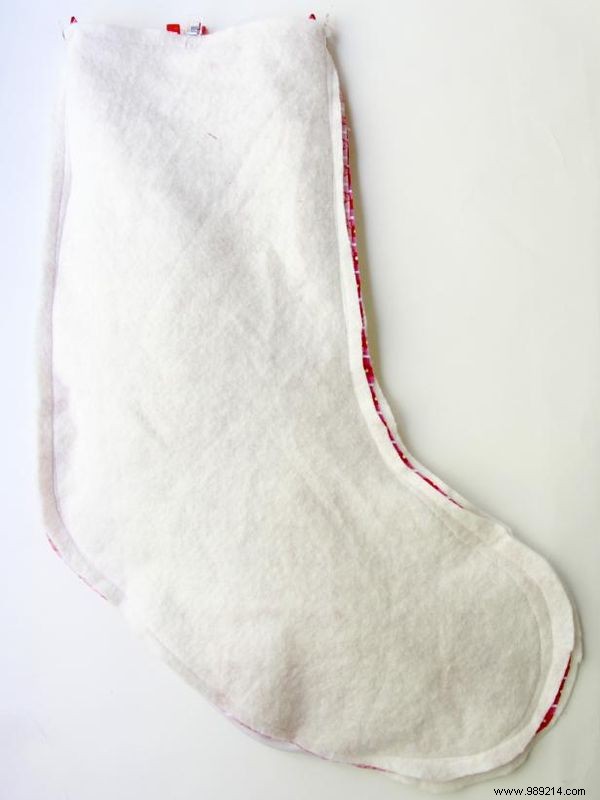
If using interfacing or batting, fuse it to the wrong side of each outer stocking piece following the package instructions for professional results.
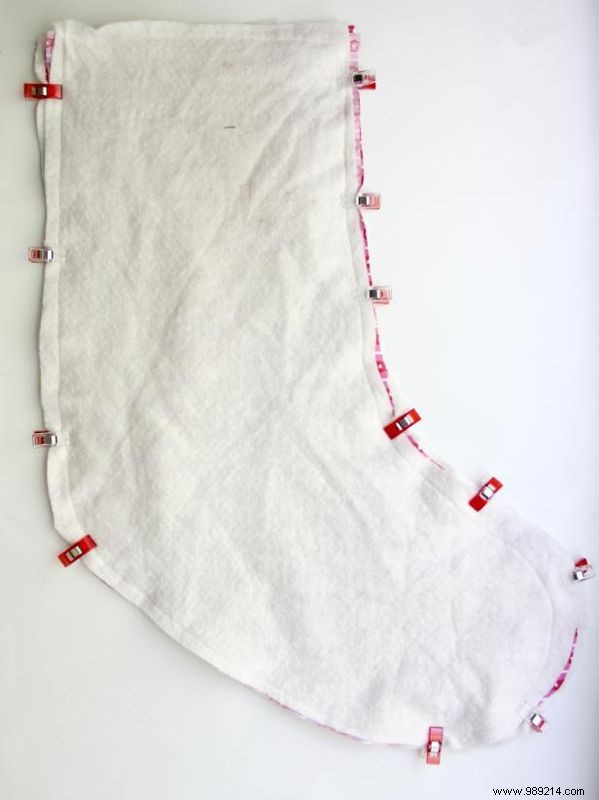
Place the lining pieces right sides together and pin around the outer edges, leaving the foot area open. Sew around the sides and curves, but not the top edge or foot opening.
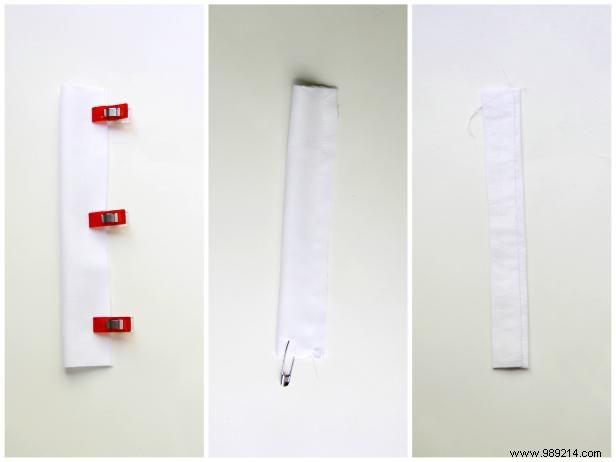
Fold the loop strip in half lengthwise, right sides together. Sew the long edge, then turn right side out using a safety pin or loop turner. Press flat with the seam inside.

Fold the loop in half to form a circle, aligning raw edges. Position along the top back edge of one outer stocking piece and baste or pin in place for secure attachment.
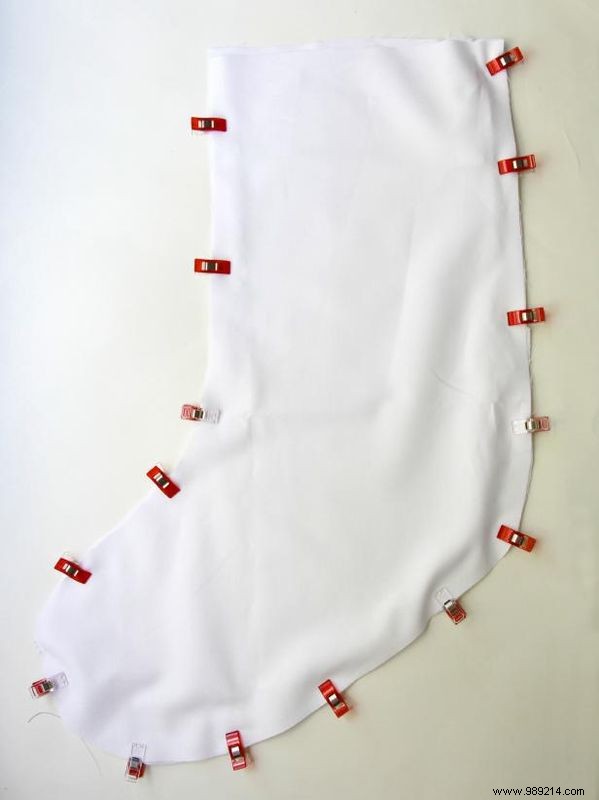
Place the outer stocking pieces right sides together (with loop sandwiched between), pin around the edges, and sew the sides and curves—leaving the top open.

Turn the outer stocking right side out through the top opening. Gently push out curves with your fingers or a tool, then press all edges for a crisp finish.
Slip the lining inside the outer stocking, wrong sides together, matching side seams and top edges. Pin and sew around the top edge. Reach through the lining's foot opening to turn everything right side out, then hand-stitch the lining opening closed. Press the top edge.
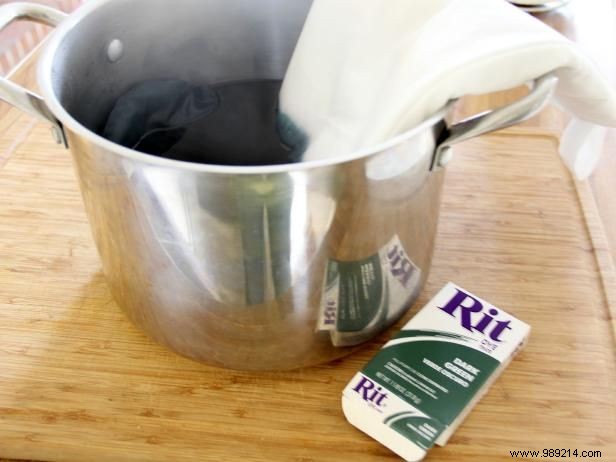
Prep the dye per Rit package instructions. Dip one edge of the stocking into the dye bath for the recommended time. Rinse until water runs clear, then wash and air-dry. Pro tip: Fold for stripes or ombré effects.
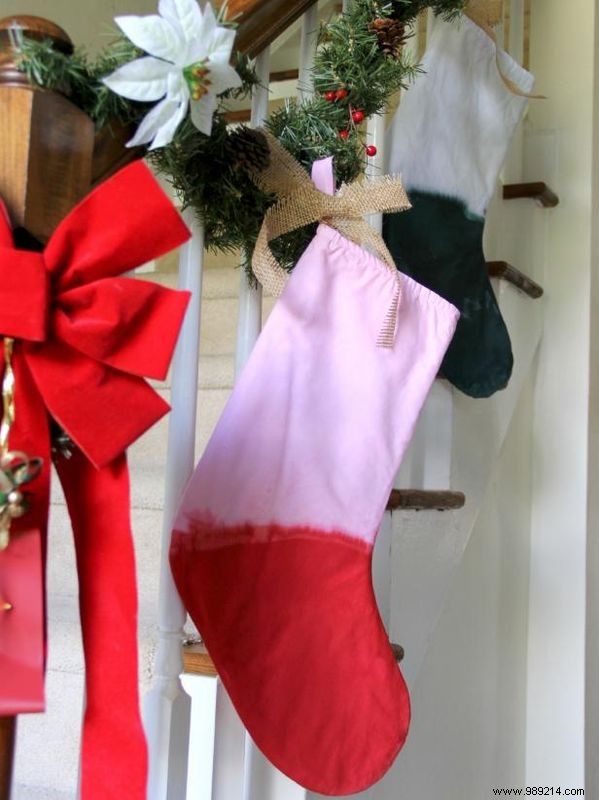
Your custom color block Christmas stocking is complete. Mix bold hues, retro tie-dye vibes, or subtle stripes—your family will cherish these handmade heirlooms for years.