Solid wood features distinctive growth rings that run the length of the board and are visible at the cut end. Due to its higher cost compared to other materials, it's not ideal for painted shelves. Reserve solid wood for stain-finished applications in high-visibility rooms where quality and appearance matter most.
A strong alternative is plywood. Its cut end shows layered wood bands, offering superior strength and weight capacity over solid wood. Available in wide 4' x 8' sheets perfect for shelving, plywood's downside is its unappealing appearance, often requiring multiple paint coats to cover imperfections. It's best for low-visibility spots like garages or basements. Opt for veneered plywood (oak, mahogany, or maple) for a more attractive grain, though the edges still reveal layers—and costs rise if painting is planned.
Particleboard has improved significantly, now boasting a smooth, even surface without large chunks. Like plywood, it's sold in convenient 4' x 8' sheets but needs painting for a finished look.
Laminated particleboard provides an affordable, paint-free option with its smooth white melamine surface. Readily available in home improvement stores' shelving aisles, it's both economical and hassle-free.
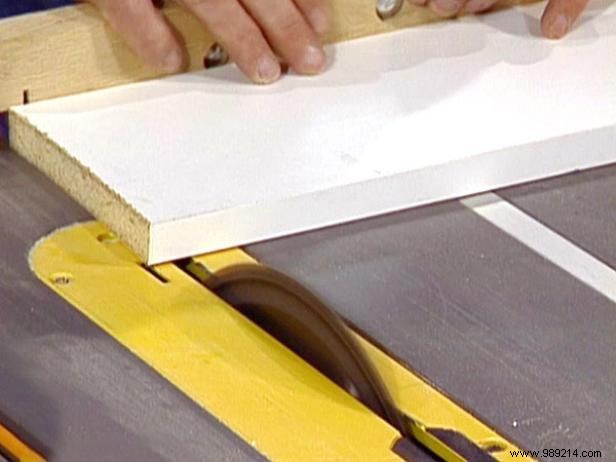
Accurate cutting is crucial for laminate shelving to avoid rough, chipped edges—often from dull blades or saber saws. For flawless results, use a sharp carbide-tipped blade on a table saw, ideally with many teeth (this one has 64; some have up to 100). Secure the board and feed it steadily through the blade for a clean, jag-free cut.
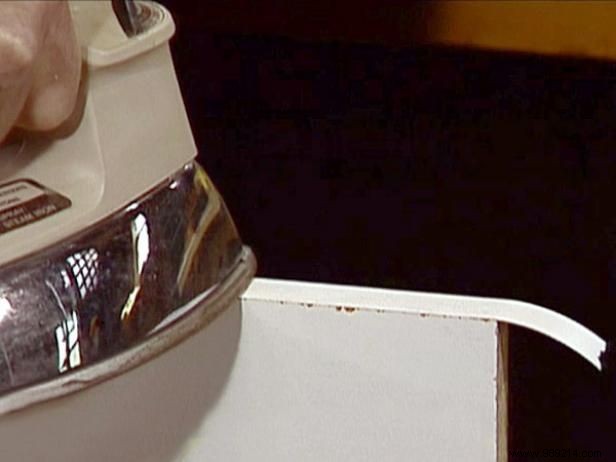
Grab matching laminate edge tape from the shelving section. Secure the board in a vise, align the tape along the edge, and trim it with extra length at ends. Heat your iron to the highest setting and glide it over the tape to activate the adhesive (Image 1). Keep moving to prevent burning, and use the iron's tip for precision—keep fingers clear.
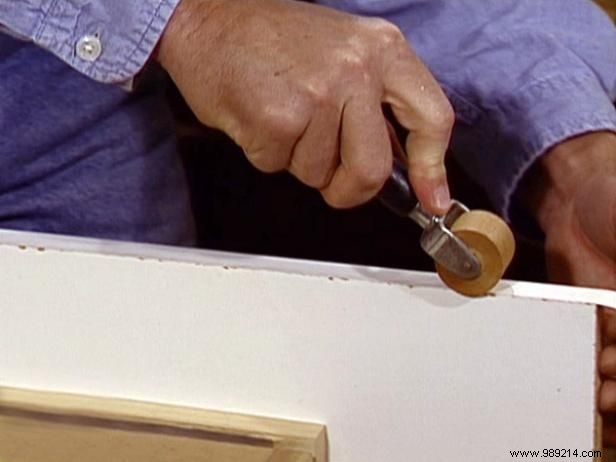
Once applied, roll firmly with a small roller (Image 2) to ensure strong adhesion as the glue sets.
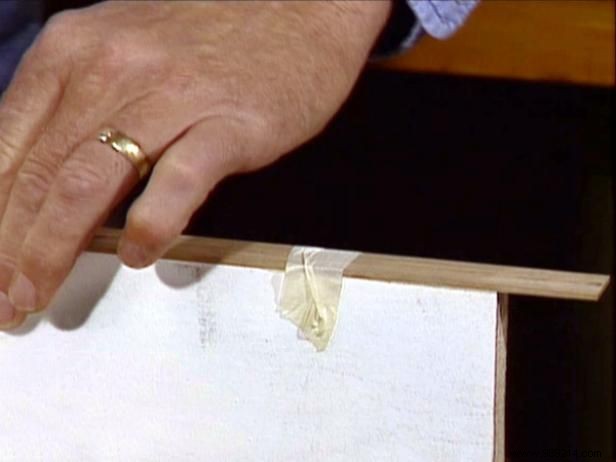
For a premium, custom finish, attach a wood strip instead. Cut to length on a table saw, apply glue along the laminate edge, and press firmly into place, aligning edges perfectly. Secure with tape until dry.
Note: You can also glue wood directly over applied laminate tape for added detail.
For shelves with a raised lip, use a slightly thicker strip—like 1" on 3/4" laminate—for enhanced functionality and style.